background image

17

Using Media Player

r

e

y

a

l

P


a

i

d

e

M


g

n

i

s

U


Media Player allows you to enjoy photo, music or video 

recorded on a USB Flash Memory.


The picture may not appear correctly on this TV 

depending on the digital cameras used.


Display may take some time when there are many files 

and folders in the USB Flash Memory.


Partly degraded files might be displayed at a reduced 

resolution.


The folder and file names may be different depending 

on the digital camera used.

Video

Document

Photo

Music

Disk

1. Select 

Document

2. Press Up, Down, Left or Right direction button to select your 

desired  file and press OK to Play.

3. Use OK key to see more option: ZOOM+, ZOOM-.
4. Press Return key of remote to Stop playing.

Document:

 icon.

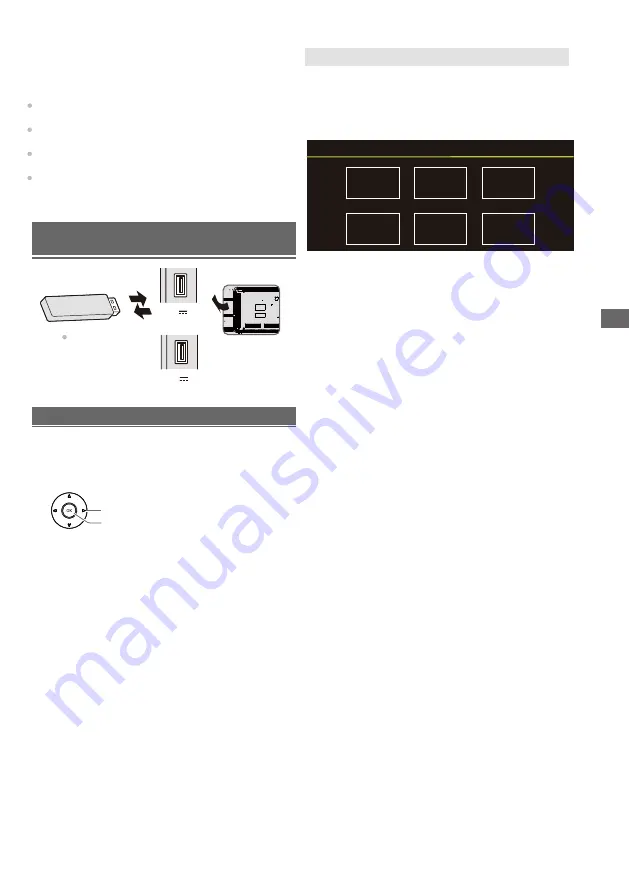
Insert the USB Flash Memory.

Select the mode.

[PHOTO]:

Displays the thumbnail of all photos in the 

USB Flash Memory.

[DOCUMENT]:

Displays the thumbnail of all 

documents in the USB Flash Memory.  

[MUSIC]:

Displays the thumbnail of music folders in 

the USB Flash Memory.

[VIDEO]:

Displays the thumbnail of video titles in the 

[DISK]:

Displays the thumbnail of all document in 

the USB Flash Memory.

USB Flash Memory.

Starting Media Player

Inserting / Removing the USB Flash 

Memory

TV


Insert or remove 

straight and 

completely.

500mA

MAX

5V

900mA

MAX

5V

Access

Select

Photo:

1. Select Picture icon, then press OK button to view the

picture.

2. Press Up, Down, Left or Right direction button to select 

your desired  picture file and press  OK to show.

3. While showing picture, press OK to display the play console. 

For Previous and Next use remote left and Right key. 

4. Use OK key to see more option: Left rotation, Right rotation,

ZOOM+, ZOOM-, Manual play/Auto play, Information, Play 

mode, Play interval,BGM:on or off.


Video:

1. Select Video icon, then press OK button to view movie file.

2. Press Up, Down, Left or Right direction button to select 

your desired file and press OK to Play.

3. While playing a Video, press OK Menu of remote to display  

the play console. For the Play console, Press Ok key of remote 

to Play and Pause the video file.Left key of remote to Fast

backward.Right key of remote to Fast forward.

4. Use OPTION key to see more option: Photo scale, Looping

mode, Subtitle, Subtitle code, Audio track, information and 

video list. 
5. Press Return key of remote to Stop playing and Press

Return to Exit.

1. Select 

Disk

 icon, then press OK button to choose folder.

2. Press Up, Down, Left or Right direction button to select your 

desired  file and press OK to Play.

3. Press Return key of remote to Stop playing.

Disk:

1. Select Music icon, then press OK button to listen to Music.

2. Press Up, Down, Left or Right direction button to select your 

desired  file and press  OK to Play.

3. The Play console includes Previous, Play/Pause,Fast

backward/Fast forward,Next.

Press OPTION key to see PlayList. 

4. Press Return key of remote to Stop playing.

Music:

When the cursor stays on the icon,it displays the 

information of the highlighted content.

[Contents Display]

Follow the operation guide to perform 

available operations.


Summary of Contents for TH-43LX650Z

Page 1: ...onceptual images and may be different from the actual products The illustrations for 50 inch model is used in this manual unless otherwise mentioned Transport only in upright position Model No TH 43LX...

Page 2: ...6 Initial Setup 8 Operating the TV 10 Watching External Inputs 13 Using Media Player 17 Using Homepage Apps 13 Using the Menu Functions 14 Additional Information 18 Troubleshooting 20 Maintenance 20 S...

Page 3: ...help avoid risk of electrical shock fire damage or injury please follow the warnings and cautions below Mains plug and lead Warning If you detect anything unusual immediately remove the mains plug Ma...

Page 4: ...and mobile phones When problems occur due to static electricity etc the TV might stop operating to protect itself In this case turn the TV off at the Mains power On Off switch then turn it back on Bl...

Page 5: ...recommended wall hanging bracket Wall mounting the TV optional a b Rear of the TV View from the side Depth of screw Screw for fixing the TV onto the wall hanging bracket not supplied Attaching the ped...

Page 6: ...s Always ensure that there are no electrical cables pipes etc in the wall before you begin the wall bracket installation To prevent fall and injury remove the TV from its fixed wall position when it i...

Page 7: ...which has eARC ARC Audio Return Channel function If connecting to an amplifier without eARC ARC function use DIGITAL AUDIO OUT DIGITAL AUDIO OUT HDMI 1 2 3 HDMI 1 2 3 Using AV terminals Equipment MiN...

Page 8: ...sign in to your Google account Note If you don t want to use your Android device to setup the TV you will skip to Step 3 If you want to use your Android device to setup the TV please turn on the Bluet...

Page 9: ...o back to former step and make any changes by using button Country Region NEWZEALAND Environment Home Step 1 Step 2 Step 3 Step 4 Step 5 Home Shop 1 2 3 4 5 Next Environment Please choose your environ...

Page 10: ...ettings menu MENU To enter the picture mode PICTURE To enter the sleep timer OFF TIMER To enter source selection interface INPUT Goes to the AUDIO LINK homepage Goes to the prime video homepage To sel...

Page 11: ...npair the Bluetooth remote As follow Step 1 Press button to enter the home page Step 2 Press to choose and then press OK to enter Step 3 Press to select Remotes Accessories and then to chooe the Bluet...

Page 12: ...43 50 55 65 inch model Indicators on the TV 2 3 1 2 Remote control signal receiver 3 Power LED Red Standby Green On 1 Power On Power Off Indicators on the TV 6 7 75 inch model 1 3 2 4 5 Power off Inp...

Page 13: ...E CABLE AV HDMI 1 HDMI 2 HDMI 3 Android TV Home Note This manual is for common use Figures and illustrations in this User Manual are provided for reference only and may differ from actual product appe...

Page 14: ...Temperature To select the Normal Warm Cool Dynamic Contrast To select ON or OFF Aspect Ratio Displays the Aspect Ratio screen Follow the operation guide to select the mode 16 9 4 3 Auto Original Back...

Page 15: ...to display some signal information on current digital channel such as signal strength Frequency etc Channel Diagnostic This option allows you to organize channels Channel Organizer Channels setup Ana...

Page 16: ...oves to Digital Satellite Tuning 3 Pushing OK in Freeview Setup then select Freeview 4 The Select Region is displayed 5 Move the focus to the region where you are resident and push OK 9 Pressing Blue...

Page 17: ...your desired picture file and press OK to show 3 While showing picture press OK to display the play console For Previous and Next use remote left and Right key 4 Use OK key to see more option Left ro...

Page 18: ...2ch Linear PCM sampling frequencies 48 kHz 44 1 kHz 32 kHz Input video signal Input signal that can be displayed p 18 Match the output setting of the digital equipment Signal name HDMI 525 480 60i 60...

Page 19: ...ot disconnect USB devices while they are transferring files Limitations on use of photo video and music files When connecting an external hard drive use the USB HDD port We recommend that you use an e...

Page 20: ...and 30 degree angle Situate the TV away from sunshine or block sources of bright light from shining on the remote control signal receiver of the TV Parts of the TV become hot Even if the temperature o...

Page 21: ...189 cm 43 inch model 3 840 W 2160 H 50 inch model 3 840 W 2160 H 55 inch model 3 840 W 2160 H 65 inch model 3 840 W 2160 H 75 inch model 3 840 W 2160 H 50 inch model 9 9 kg With Pedestal 9 6 kg TV on...

Page 22: ...change without notice Mass and Dimensions shown are approximate 9 Systems Systems Function 1 PAL B G 2 PAL I 3 PAL D K PAL Reception of broadcast 6 Playback from Special VCR s or DVD 4 SECAM B G 5 SEC...

Page 23: ...istributed in the hope that it will be useful but WITHOUT ANY WARRANTY without even the implied warranty of MERCHANTABILITY or FITNESS FOR A PARTICULAR PURPOSE Please refer to the detailed terms and c...

Page 24: ...theft or loss and for Warranty Service purposes Model Number Serial Number Information on Disposal in other Countries outside the European Union This symbol is only valid in the European Union If you...

Reviews: