background image

48

English

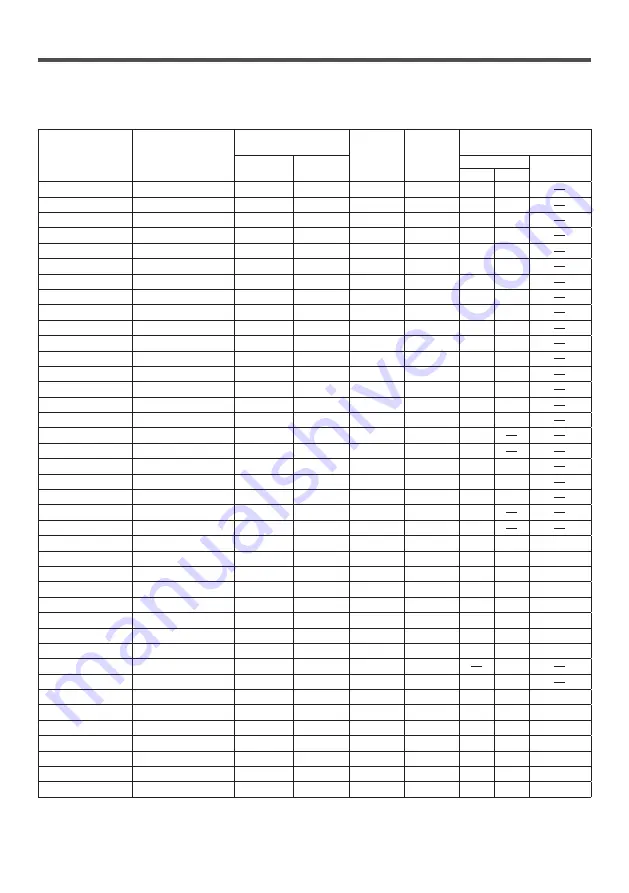
Preset Signals

This unit can display the video signals shown in the table below.

● 

The contents of HDMI signal in the Plug and Play-supported signal column are as follows.
1: 4K/60p, 2: 4K/30p

Corresponding 

signal

Resolution (Dot)

Scanning frequency Dot clock 

frequency 

(MHz)

Format

*

2

Plug and Play-supported 

signal

*

4

Horizontal 

(kHz)

Vertical 

(Hz)

HDMI

PC

1

2

480/60i

720 (1 440) x 480i

*

1

15.73 

59.94 

27.00 

H

576/50i

720 (1 440) x 576i

*

1

15.63 

50.00 

27.00 

H

480/60p

720 x 480

31.47 

59.94 

27.00 

H

576/50p

720 x 576

31.25 

50.00 

27.00 

H

720/60p

1 280 x 720

45.00 

60.00 

74.25 

H

720/50p

1 280 x 720

37.50 

50.00 

74.25 

H

1080/60i

1 920 x 1 080i

33.75 

60.00 

74.25 

H

1080/50i

1 920 x 1 080i

28.13 

50.00 

74.25 

H

1080/24p

1 920 x 1 080

27.00 

24.00 

74.25 

H

1080/25p

1 920 x 1 080

28.13 

25.00 

74.25 

H

1080/30p

1 920 x 1 080

33.75 

30.00 

74.25 

H

1080/60p

1 920 x 1 080

67.50 

60.00 

148.50 

H

1080/50p

1 920 x 1 080

56.25 

50.00 

148.50 

H

3840 x 2160/24p

3 840 x 2 160

54.00 

24.00 

297.00 

H

3840 x 2160/25p

3 840 x 2 160

56.25 

25.00 

297.00 

H

3840 x 2160/30p

3 840 x 2 160

67.50 

30.00 

297.00 

H

3840 x 2160/60p

3 840 x 2 160

135.00 

60.00 

594.00 

H

3840 x 2160/50p

3 840 x 2 160

112.50 

50.00 

594.00 

H

4096 x 2160/24p

4 096 x 2 160

54.00 

24.00 

297.00 

H

4096 x 2160/25p

4 096 x 2 160

56.25 

25.00 

297.00 

H

4096 x 2160/30p

4 096 x 2 160

67.50 

30.00 

297.00 

H

4096 x 2160/60p

4 096 x 2 160

135.00 

60.00 

594.00 

H

4096 x 2160/50p

4 096 x 2 160

112.50 

50.00 

594.00 

H

640 x 480/60

640 x 480

31.47 

59.94 

25.18 

R/H

800 x 600/60

800 x 600

37.88 

60.32 

40.00 

R/H

1024 x 768/60

1 024 x 768

48.36 

60.00 

65.00 

R/H

1280 x 720/60

1 280 x 720

45.00

60.00 

74.25

R/H

1280 x 800/60

1 280 x 800

49.70 

59.81 

83.50 

R/H

1280 x 960/60

1 280 x 960

60.00 

60.00 

108.00 

R/H

1280 x 1024/60

1 280 x 1 024

63.98 

60.02 

108.00 

R/H

1280 x 1024/75

1 280 x 1 024

79.98 

75.02 

135.00 

R/H

1360 x 768/60

1 360 x 768

 47.71 

60.02 

85.50 

H

1400 x 1050/60

1 400 x 1 050

65.32 

59.98 

121.75 

H

1440 x 900/60

1 440 x 900

55.94 

59.89 

106.50 

R/H

1600 x 900/60

1 600 x 900

*

3

60.00 

60.00 

108.00 

R/H

1600 x 1200/60

1 600 x 1 200

75.00 

60.00 

162.00 

R/H

1680 x 1050/60

1 680 x 1 050

65.29 

59.95 

146.25 

R/H

1920 x 1080/60

1 920 x 1 080

67.50 

60.00 

148.50 

R/H

1920 x 1200/60

1 920 x 1 200

*

3

74.04 

59.95 

154.00 

R/H

720 x 400/70

720 x 400

31.50 

70.00 

28.30 

R/H

Summary of Contents for TH-43CQ1

Page 1: ...inch model TH 50CQ1W 50 inch model TH 43CQ1W 43 inch model English Please read these instructions before operating your set and retain them for future reference DPQP1286ZC X1 This manual is common to all the models regardless of suffixes of the model number Manufactured under license from Dolby Laboratories Dolby Dolby Audio and the double D symbol are trademarks of Dolby Laboratories TP0819TS2070...

Page 2: ...nes Descriptive illustrations in this Operating Instructions are created mainly based on the 55 inch model Important Safety Notice 4 Safety Precautions 6 Precautions for use 9 Accessories 11 Accessories Supply 11 Remote Control Batteries 12 Kensington security 13 Connections 13 AC cord connection and fixing Cable fixing 13 Video equipment connection 16 Before connecting 17 HDMI 1 and HDMI 2 termin...

Page 3: ...ry environment for computers to be connected 40 Example of network connection 40 Settings to connect to a LAN 41 Command based control 41 Using USB media file playback function 42 Play file 43 Auto playback 43 Operations during play 44 Playing the pictures 45 Playing the music video 46 Using HDMI CEC function 47 Connection 47 Setting 47 Preset Signals 48 Troubleshooting 50 Specifications 52 ...

Page 4: ...ty Notice WARNING 1 To prevent damage which may result in fire or shock hazard do not expose this appliance to dripping or splashing Do not place containers with water flower vase cups cosmetics etc above the set including on shelves above etc No naked flame sources such as lighted candles should be placed on above the set 2 To prevent electric shock do not remove cover No user serviceable parts i...

Page 5: ...E READ THE FOLLOWING TEXT CAREFULLY This display is supplied with a moulded three pin mains plug for your safety and convenience A 10 amp fuse is fitted in this plug Shall the fuse need to be replaced please ensure that the replacement fuse has a rating of 10 amps and that it is approved by ASTA or BSI to BS1362 Check for the ASTA mark or the BSI mark on the body of the fuse If the plug contains a...

Page 6: ...wall hanging bracket even during the warranty period Small parts can present choking hazard if accidentally swallowed Keep small parts away from young children Discard unneeded small parts and other objects including packaging materials and plastic bags sheets to prevent them from being played with by young children creating the potential risk of suffocation Do not place the display on sloped or u...

Page 7: ... other than that provided with this unit Doing so may cause short circuit generates heat etc which could cause electric shock or fire Do not use the supplied power supply cord with any other devices Doing so may cause short circuit generates heat etc which could cause electric shock or fire Clean the power supply plug regularly to prevent it becoming dusty If there is a build up of dust on the plu...

Page 8: ...ectric shock could result Disconnect the power supply plug from the wall socket as a safety precaution before carrying out any cleaning Electric shocks can result if this is not done Do not step on or hang from the display or the Pedestal They might tip over or might be broken and it may result in injury Pay special attention to the children Do not reverse the polarity and of the battery when inse...

Page 9: ...e at the top left and right and 5 cm 1 31 32 or more at the rear and also keep the space between the bottom of the display and the table surface If using some other setting up method wall hanging etc follow the manual of it If there is no specific indication of installation dimension in the installation manual leave a space of 10 cm 3 15 16 or more at the top bottom left and right and 5 cm 1 31 32...

Page 10: ...e of the radio wave Or wrap the LAN cable connected to the LAN terminal by using a piece of metal foil or a metal pipe of which is grounded at both ends Request Regarding Security When using this unit take safety measures against the following incidents Personal information being leaked via this unit Unauthorized operation of this unit by a malicious third party Interfering or stopping of this uni...

Page 11: ...50CQ1W TH 43CQ1W Approx 1 8 m TZSH03039 TZSH03040 DPVF2792ZA X1 Clamper large 2 DPVF1654ZA Clamper small 1 DPVF1653ZA Attention Store small parts in an appropriate manner and keep them away from young children The part numbers of accessories are subject to change without notice The actual part number may differ from the ones shown above In case you lost accessories please purchase them from your d...

Page 12: ... Disposal of batteries should be done in an environment friendly manner Take the following precautions 1 Batteries shall always be replaced as a pair 2 Do not combine a used battery with a new one 3 Do not mix battery types example manganese dioxide battery and alkaline battery etc 4 Do not attempt to charge disassemble or burn used batteries 5 Do not burn or breakup batteries Moreover batteries m...

Page 13: ...odel Connections AC cord connection and fixing Cable fixing 86 inch model Back of the unit AC cord fixing AC cord supplied Plug the connector into the display unit Note When disconnecting the AC cord be absolutely sure to disconnect the AC cord plug at the socket outlet first The supplied AC cord is for this unit exclusive use Do not use this for other purposes ...

Page 14: ...nnecting the AC cord be absolutely sure to disconnect the AC cord plug at the socket outlet first The supplied AC cord is for this unit exclusive use Do not use this for other purposes Cable fixing Note 3 clampers are supplied with this unit Fix the cables at 3 locations using the holes for clampers as shown below If you need more clampers purchase them from your dealer Available from the customer...

Page 15: ...attachment surface by pushing it firmly Once the clamper is affixed it cannot be reused Be sure to confirm the attaching position before affixing it Remove the tape at the back and affix the clamper on the flat surface Attachment surface 2 Bundle the cables hooks knob To loosen Remove the band from the knob and pull out the band tip ...

Page 16: ...o PC see page 19 3 LAN LAN Terminal Control the display by connecting to Network see page 40 4 PC IN PC Input Terminal Connect to video terminal of PC see page 18 5 AUDIO IN Audio Input Terminal 6 HDMI 1 HDMI 2 HDMI Input Terminal Connect to video equipment such as VCR or DVD player etc Use a commercially available HDMI cable conforming to the HDMI standard that supports 4K 7 USB USB Terminal Conn...

Page 17: ... external device to the system that is neither supplied with the device nor available as an option If the outer shape of the plug of a connection cable is large it may come in contact with the periphery such as a back cover or the plug of an adjacent connection cable Use a connection cable with the suitable plug size for the terminal alignment When connecting the LAN cable with plug cover be aware...

Page 18: ... connected With regard to the typical PC input signals that are described in Preset Signals see page 48 adjustment values such as for the standard picture positions and sizes have already been stored in this unit Computer signals which can be input are those with a horizontal scanning frequency of 31 to 83 kHz and vertical scanning frequency of 56 to 76 Hz If signals outside the range of supported...

Page 19: ...nments and signal names for PC Input Terminal Mini D sub 15P 1 6 7 8 3 9 4 5 10 15 14 13 12 11 2 Pin No Signal Name Red video signal input Green video signal input Blue video signal input NC not connected GND GND for red video signal GND for green video signal GND for blue video signal 5 V DC GND Ground NC not connected DDC data Hsync Signal input Vsync Signal input DDC Clock RS232 terminal connec...

Page 20: ... Input select toggle HM1 HDMI 1 input HDMI1 HM2 HDMI 2 input HDMI2 PC1 PC IN input PC UD1 USB input USB DAM FULL Full NORM Normal NATV Native ZOOM Zoom Note If an incorrect command is sent this unit will reply an ER401 command to the computer If communication has not been established for reasons such as a bad connection between the computer and display nothing is returned not even ER401 ER401 may ...

Page 21: ...isplay when removing a USB memory device If the power is turned off or the USB memory device is removed while accessing data in the USB memory device the stored data may be destroyed The access indicator of the USB memory device blinks during data access Supported USB memory device File System FAT16 32 Capacity Up to 32 GB maximum file size 4 GB Note Do not use a USB memory device with a security ...

Page 22: ...remove the USB memory device while blinking Depending on the USB memory device the access indicator may remain blinking even when it is not being accessed or the device is not equipped with an access indicator function etc In this case remove the USB memory device after confirming the following or Switch the input to an input other than USB and confirm that the functions that access USB memory dev...

Page 23: ...h model 43 inch model 1 External input output terminal Connects to video equipment PC etc see page 16 2 Power button Unit Turns the power On Off 3 INPUT Unit Selects the connected device see page 26 Configures the item on menu screen 4 MENU Unit Displays the menu screen see page 29 5 Unit Unit Selects the setting item on menu screen see page 29 6 Unit Unit Adjusts the volume see page 27 On the mai...

Page 24: ...ENTER Cursor buttons Used to operate the menu screens see page 29 9 EXIT Turns off the menu screens see page 29 10 DISPLAY Displays information of displayed signal 11 USB Switches to USB device viewing 12 HDMI Selects to fit the input signal 13 MUTE Sound mute on off see page 27 14 INPUT Switches input to display on the screen see page 26 15 ASPECT Change aspect ratio see page 28 16 MENU Press to ...

Page 25: ...be shorter Do not subject the remote control sensor of the main unit to the direct sunlight or strong fluorescent light 1 Connect the AC cord plug to the display see page 13 2 Connect the plug to the socket outlet Note When disconnecting the AC cord be absolutely sure to disconnect the AC cord plug at the socket outlet first The settings may not be saved if the power plug is disconnected immediate...

Page 26: ...n then the power will be turned off Power Indicator Red standby Note After the power plug is disconnected the power indicator may remain lit for a while This is not a malfunction Press the Power button Unit on the unit to turn the unit off when the power of the unit is turned on or in standby mode Selecting the input signal Select the signals input to the unit Press INPUT or INPUT Unit Unit Input ...

Page 27: ... 60 seconds at the end Volume Adjustment Press VOL VOL or Unit Unit to adjust volume Unit 6 The current sound volume level is memorised even if the power is turned off Sound mute On Off It is useful when you want to mute the sound temporarily for example when answering the phone or door Press MUTE appears on the screen and the sound is muted Press again to reactivate the sound It is also reactivat...

Page 28: ...lay s screen size switching function to compress or expand the screen for commercial or public viewing in establishments like cafes or hotels may infringe on the rights of the creators as protected by Copyright Law so please be careful The appearance of the original video may change if you select a screen size with a different aspect ratio than the original image e g video input from external equi...

Page 29: ...rast Tint Sharpness Color Select Return Exit ENTER MENU EXIT Setup Audio To display the submenu press ENTER 3 Set Press to set Press to set 4 Exit from the menu Press to exit the menu Press MENU to return to the previous screen Alternatively press the button selected in step 1 to exit from the menu Press Note When changing the settings of the display picture or sound disturbance may occur temporar...

Page 30: ...it ENTER MENU EXIT Audio Picture Setup Balance Bass Treble Speaker Surround Audio output Setup menu see page 34 39 Picture Move Language Network settings HDMI CEC control Position No signal power off Button lock EDID select Select Return Exit ENTER MENU EXIT Setup Audio No activity power off RC control lock Picture Move Position No signal power off No activity power off Button lock RC control lock...

Page 31: ...nnot be selected for the PC input or RGB signal with HDMI input Advanced Selects advanced video settings Aspect ratio Changes the screen size see page 28 Overscan Sets the scan mode used for video input Dynamic backlight control Optimizes the backlight brightness to enhance contrast and reduce total power consumption Color temperature Adjusts colour tone 10700K 9300K 6500K and Native Note Emphasiz...

Page 32: ...ss More Brightness Adjusts the entire brightness of the video signals Less More Contrast Adjusts for easier viewing of dark pictures Less More Color Adjusts colour saturation Less More Tint Adjusts hue of skin colour Reddish Greenish Sharpness Adjusts picture sharpness Less More ...

Page 33: ...d through your Home Theatre systems Music Improves sound quality for watching music videos etc Sports Improves sound quality for watching sports program etc Custom Adjusts the sounds manually by using the equaliser to suit your favourite sound quality Balance Adjusts left and right volumes Bass Adjusts low pitch sounds Treble Adjusts high pitch sounds Speaker Internal speakers Enable Internal spea...

Page 34: ... Network settings Set the communication channel supported by the application software accordingly HDMI CEC control Sets for HDMI CEC function EDID select EDID select settings change how the content displayed is processed and decoded Position Adjusts the position for PC input No signal power off Sets whether or not the display power off when there is no input signal for more than 10 minutes No acti...

Page 35: ...0 000 Network information Picture Return Exit MENU EXIT Setup Audio DHCP IP address Subnet mask Gateway MAC address Use 000 000 000 000 000 000 000 000 000 000 000 000 DHCP IP address Subnet mask Gateway Press to set Use No Use of DHCP When No Use is selected IP address and other settings can be set manually DHCP Use Use Dynamic IP address No Use Use Static IP address Subnet mask and Gateway IP ad...

Page 36: ... the display will automatically switch to the appropriate HDMI input whenever an HDMI connected equipment is initially turned on and the Play mode is selected Off Disables HDMI CEC control Note The HDMI CEC feature of connected HDMI CEC compatible device must be turned on EDID select The menu is displayed in HDMI1 and HDMI2 inputs EDID data of each terminal is switched EDID select submenu screen P...

Page 37: ...happens adjust so that any such noise is minimized Clock phase Adjusts sampling clock for applicable video Useful when small characters appear with low contrast and or there are flickers at corners When using the adjustment pattern make adjustments so that no horizontal stripe noise appears in it It should be made only after Dot clock has been correctly set Reset Resets the values of Position item...

Page 38: ...ting the power cord while pressing the Power button Unit on the display RC control lock Disables the remote control buttons RC control lock submenu screen Picture Move Button lock Select Return Exit ENTER MENU EXIT Setup Audio RC control lock Unlocked Lock all Lock except volume Lock except power Language Network settings HDMI CEC control EDID select No signal power off No activity power off Posit...

Page 39: ...y mp4 file only Note Photos and video cannot be played automatically at the same time see page 43 Information Displays the display information Information submenu screen Picture Move EDID select Return Exit MENU EXIT Setup Audio Model TH 50CQ1W Position No signal power off No activity power off Button lock RC control lock Auto play Information Front indicator light Version V0 07 MAIN V0 03 LAN Ser...

Page 40: ...er driver beforehand For details on how to install the driver refer to the instructions accompanying the wired LAN adapter Example of network connection Note The unit cannot be turned on in standby state since the LAN control is disabled To use the network function set each item in Network settings and make sure to select LAN see page 35 You cannot use RS 232C and LAN control simultaneously LAN Te...

Page 41: ...ax 16 Parameters Range of parameters space 0 1 2 3 4 5 6 7 8 9 A B C D E F G H I J K L M N O P Q R S T U V W X Y Z _ a b c d e f g h i j k l m n o p q r s t u v w x y z SSU UPW LAN control password Max 16 Parameters Range of parameters space 0 1 2 3 4 5 6 7 8 9 A B C D E F G H I J K L M N O P Q R S T U V W X Y Z _ a b c d e f g h i j k l m n o p q r s t u v w x y z 1 Connect the computer to the di...

Page 42: ... HL 1920x1080 30 0 Bit rate Maximum 20Mbps H 264 Main Profile and High Profile Level4 0 mpg MPEG1 Main Profile 1920x1080 30 0 Bit rate Maximum 20Mbps MPEG2 Main Profile avi MPEG2 MP HL 1920x1080 30 0 Bit rate Maximum 20Mbps H 264 JPEG 640x480 30 0 Bit rate Maximum 10Mbps Music files Extension Audio codec mp3 MP3 MPEG 1 Layer2 MPEG 1 Layer3 MPEG 2 Layer3 Audio Codec Sampling rates Bit Rates MP3 MEP...

Page 43: ...you press PLAY without selecting a file all the files in the folder will be played Select Return folder to return to the root folder select Up folder folder to return to the next higher folder The volume can be adjusted with the VOL VOL and MUTE on the remote control For operations during play see page 44 To stop playing Press EXIT Auto playback Photos or video in a USB memory device can be played...

Page 44: ...r checked in the menu is repeatedly played Repeat all To play and repeat files in the playlist Set A Set B None Set the interval to play and repeat Set A Set the start point of the interval Set B Set the end point of the interval Audio and Video only Random On Random Off Random On To play and repeat all files in random Random Off To play and repeat all files in order Music On Music Off When select...

Page 45: ...aying image slideshow Repeat all Repeat none Repeat 1 Repeat all All the files in the same folder are repeatedly played Repeat none After starting playing the files selected in the menu each file in the same folder is played once in order until the last one Repeat 1 The one file selected or checked in the menu is repeatedly played Random On Random Off Select to play images in the folder randomly M...

Page 46: ...F2X FF4X FF8X FF16X Previous To go to previous the file When playing video press once to play from the beginning Next To go to next file STOP To stop the playing file Repeat all Repeat none Repeat 1 Repeat all All the files in the same folder are repeatedly played Repeat none After starting playing the files selected in the menu each file in the same folder is played once in order until the last o...

Page 47: ...ompatible device alone to turn on off this unit and switch input Connection Connect the HDMI CEC compatible device to HDMI 1 or HDMI 2 terminal HDMI HDMI cable commercially available DVD Recorder DVD Player Blu ray Recorder Blu ray Player Setting Make the setting on the connected device HDMI CEC compatible device so this function can operate Set HDMI CEC control to On see page 36 Turn on all the d...

Page 48: ... 840 x 2 160 67 50 30 00 297 00 H 3840 x 2160 60p 3 840 x 2 160 135 00 60 00 594 00 H 3840 x 2160 50p 3 840 x 2 160 112 50 50 00 594 00 H 4096 x 2160 24p 4 096 x 2 160 54 00 24 00 297 00 H 4096 x 2160 25p 4 096 x 2 160 56 25 25 00 297 00 H 4096 x 2160 30p 4 096 x 2 160 67 50 30 00 297 00 H 4096 x 2160 60p 4 096 x 2 160 135 00 60 00 594 00 H 4096 x 2160 50p 4 096 x 2 160 112 50 50 00 594 00 H 640 x...

Page 49: ... and Play supported signal column are the ones written in EDID Extended Display Identification Data of this unit For signals without in the Plug and Play supported signal column resolutions may not be selected on the PC side even if this unit supports those signals Note An auto detected signal format may be differently displayed from the actual input signal i shown after the number of dots of reso...

Page 50: ...nable see page 37 No remote control operations can be performed Are the batteries inserted with polarity aligned see page 12 Are the batteries exhausted Point the remote control unit toward the display s remote control sensor see page 23 Check whether the option other than Unlocked is selected in RC control lock see page 38 Unstable video The signal may be incompatible Try the automatic screen adj...

Page 51: ...oduce esthetically pleasing images As such it sometimes takes a few moments for the picture to appear when the power has been turned on when the input has been switched The edges of the images flicker Due to the characteristics of the system used to drive the liquid crystal panel the edges may appear to flicker in the fast moving parts of the images This is normal and not indicative of malfunction...

Page 52: ...28 4 mm W 803 5 mm H 1 638 9 mm diagonal 56 23 W 31 63 H 64 52 diagonal 55 inch model 1 209 6 mm W 680 4 mm H 1 387 8 mm diagonal 47 62 W 26 78 H 54 63 diagonal 50 inch model 1 095 8 mm W 616 4 mm H 1 257 3 mm diagonal 43 14 W 24 26 H 49 50 diagonal 43 inch model 941 1 mm W 529 4 mm H 1 079 8 mm diagonal 37 05 W 20 84 H 42 51 diagonal No of pixels 8 294 400 3 840 Horizontal 2 160 Vertical Dimensio...

Page 53: ...le with DDC2B 1 AUDIO OUT RCA jack 0 5 Vrms Output Variable 0 dB 1 kHz 0 dB input 10 kΩ load SERIAL IN External Control Terminal D sub 9 Pin 1 RS 232C compatible LAN Communication method RJ45 10BASE T 100BASE TX USB USB connector 1 TYPE A DC 5 V 0 5 A Sound Speakers 132 mm 25 mm 1 φ 70 mm 1 2 pieces Audio Output 20 W 10 W 10 W 10 THD Remote Control Transmitter Power source DC 3 V battery R03 LR03 ...

Page 54: ...es must not be mixed with general household waste For proper treatment recovery and recycling of old products and used batteries please take them to applicable collection points in accordance with your national legislation By disposing of them correctly you will help to save valuable resources and prevent any potential negative effects on human health and the environment For more information about...

Reviews: