25
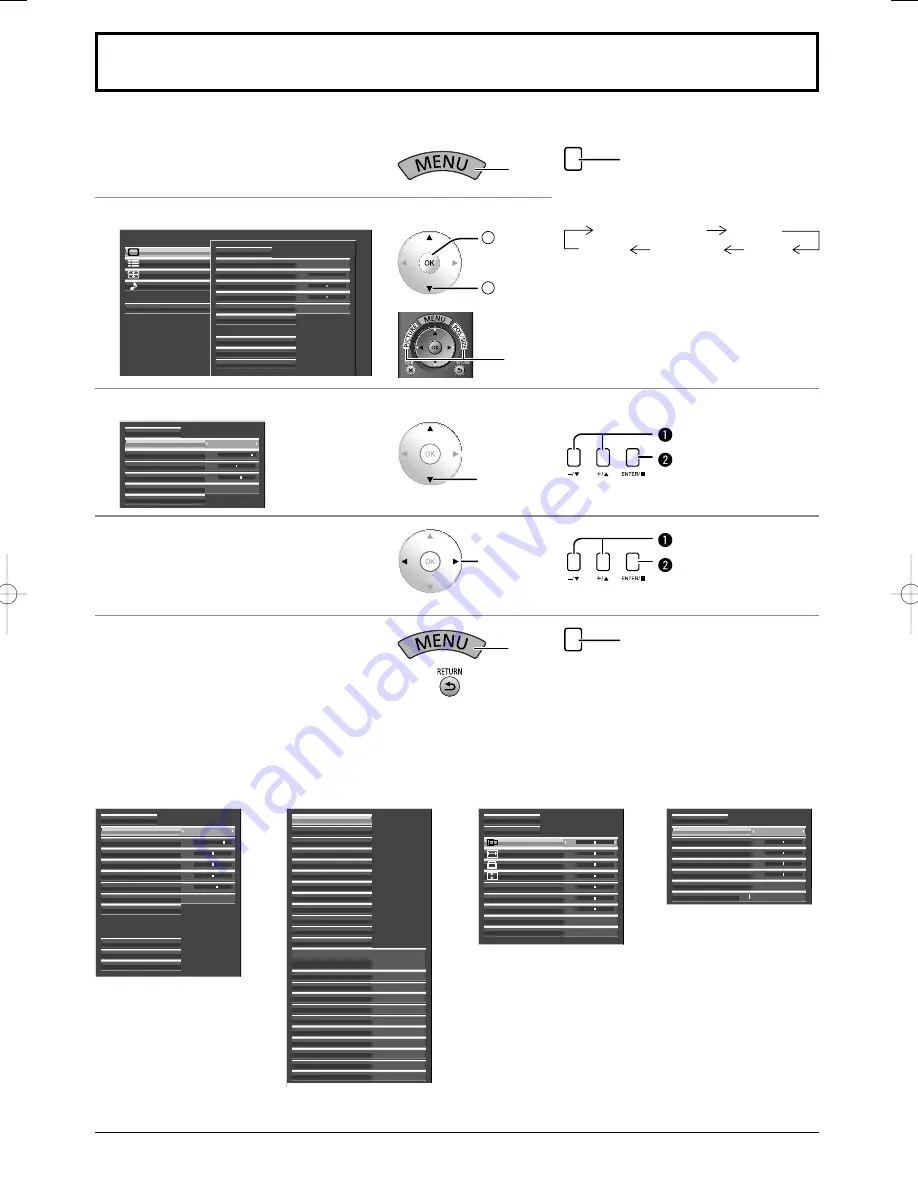
On-Screen Menu Displays
Remote Control
Unit
1
Display the menu screen.
Press
MENU
Press several times.
Each time the MENU button is pressed,
the menu screen will switch.
Normal Viewing
Picture
Sound
Pos. /Size
Setup
2
Select the menu.
Setup
Pos./Size
Sound
Options
Picture
Monitor
Memory save
Memory load
Memory edit
Picture Mode
Contrast
Normalise
0
Brightness
Advanced settings
0
Warm
Sharpness
White balance
2
Access
1
Select
3
Select the item.
Select
Select.
Press.
Picture Mode
25
0
Contrast
Normalise
Brightness
Advanced settings
5
Sharpness
White balance
Monitor
Warm
4
Set.
Adjust
Adjust.
Press.
5
Exit the menu.
Press
Press
to return to the previous menu.
MENU
Press several times.
( Example: Picture menu)
The menu can be displayed directly by pressing
these buttons. (see page 26, 29)
Memory save
Memory load
Memory edit
Cinema
Advanced settings
Picture Mode
20
0
5
Normal
Contrast
Normalise
Brightness
0
Colour
0
Hue
Sharpness
White balance
Network Setup
External scaler mode
Power save
Standby save
PC Power management
Off
DVI-D Power management
Off
On
Off
Off
No signal power off
Disable
No activity power off
Disable
Component/RGB
-
in select
RGB
OSD design
OSD position
OSD Language
English (UK)
Upper left
Type1
Marker settings
Waveform Monitor
Network Setup
RGB/MONO settings
Screensaver
Extended life settings
Function Button Settings
On/Off Timer Setup
Day/Time Setup
Signal
3D Settings
Input label
1:1 Pixel Mode
H-Pos
0
0
0
H-Size
Auto Setup
Normalise
V-Pos
0
V-Size
0
Dot Clock
0
0
Clock Phase
Clamp Position
Off
HV Delay
Off
Picture menu
Menu display list
Note:
Menu that cannot be adjusted is grayout. Adjustable menu changes depending on signal, input and menu setting.
see page 29-38
see page 40-58
see page 26-28
see page 39
Setup menu
Pos. /Size menu
Sound menu
Sound Mode
Normal
1
Normalise
Volume
0
Bass
0
Mid
0
Treble
0
Balance
Surround
Off


