


6
Connecting the TV
●
Please ensure the TV is disconnected from the
mains socket/ power point before attaching or
disconnecting any RF/ AV leads.
●
External equipment and cables are for illustrative
purposes only and not supplied with this TV.
●
Check the type of terminals and cable plugs are
correct when connecting.
●
When using an HDMI cable, use the fully wired one.
●
Keep the TV away from electronic equipment (video
equipment, etc.) or equipment with an infrared
sensor. Otherwise, distortion of image/ sound may
occur or operation of other equipment may be
interfered.
●
Also read the manual of the equipment being
connected.
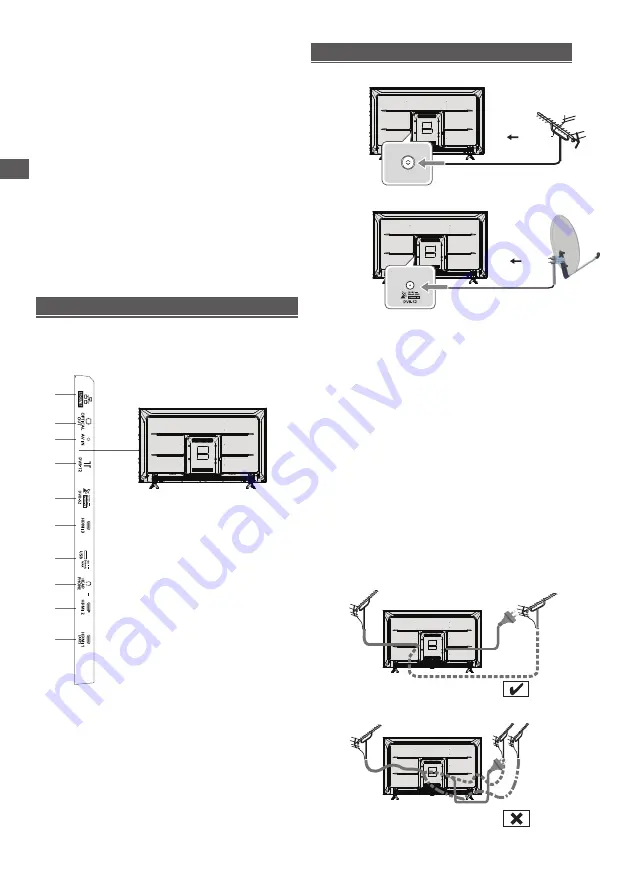
Connecting the TV
Terminals
Rear of the TV
Connections
Aerial
RF cable
Aerial
ANT
●
Keep RF (aerial) cable away from the mains lead to
avoid and minimise mains interference pickup.
●
Do not place the RF cable under the TV.
●
An aerial, correct cable (75
Ω
coaxial) and correct
terminating plug are required to obtain optimum quality
picture and sound.
●
If a communal aerial system is used, you may require
the correct connection cable and plug between the wall
aerial socket and the TV.
●
Your local Television Service Centre or dealer may be
able to assist you in obtaining the correct aerial system
for your particular area and the accessories required.
●
Any matters regarding aerial installation, upgrading
of existing systems or accessories required, and
the costs incurred, are the responsibility of you, the
customer.
●
If the aerial is placed in the wrong location, interference
might happen.
1
2
3
USB
4
6
DVB-S2
5
OPTICAL out
HDMI 3
7
HDMI 2
8
HDMI 1(ARC)
9
10
HEADPHONE
AV in
LAN(10/100)
1
2
3
4
7
8
9
10
6
5
DVB-T2
This TV has a satellite tuner, for receiving free satellite
channels without the need for an external satellite set-top
box or a dedicated remote control for watching by satellite.
SATELLITE cable


