


23
MULTI
PIP
1
2
3
4
6
7
8
9
0
TV
OK
5
AV1
CHANGE
PAP
PIP
2
sub
window
main
window
A
B
CHANGE
POP
PAP
2
2
AV1
AV1
CHANGE
POP
PAP
AV1
CHANGE
PIP
POP
2
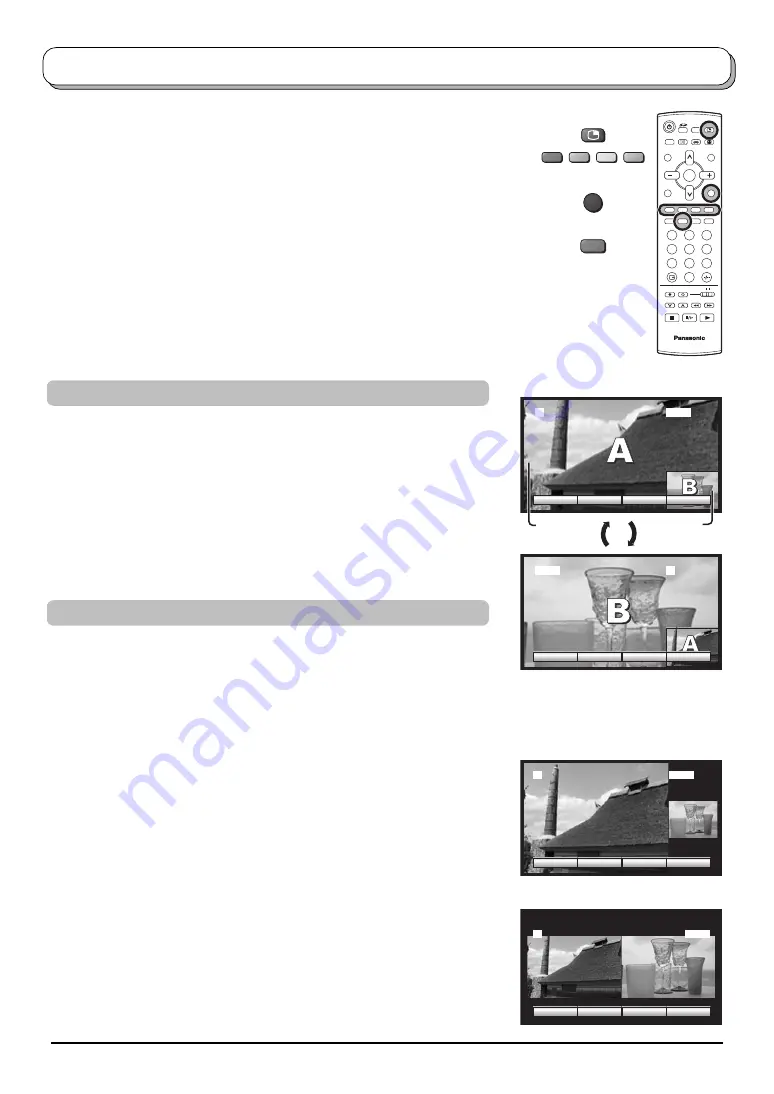
Multi window
Press the
MULTI PIP
button. Whilst the on screen selector keys are displayed, use
the
Red
or
Green
buttons to move between the
PIP
(picture in picture) feature,
POP
(picture out of picture) and
PAP
(picture and picture) feature.
Press the
Blue
or
CHANGE
button to swap the contents of the two windows.
The on screen selector keys that appear for the features clear after a few seconds.
If you want to select an operation when the keys are not shown, press the
MULTI
PIP
button again and the keys will reappear.
Press the
MULTI PIP
button (whilst the selector keys are displayed) to return to
normal viewing.
Notes:
• This TV has one tuner. When the main and sub windows are both TV mode,
these are the same TV channel.
• This operation cannot be made during progressive signal or 1080i signal input (Y,
P
B
, P
R
).
Picture out of picture
mode
The two pictures have been
swapped, the picture in the smaller
window has become the main
window picture.
Picture in picture
mode
Picture and picture
mode
TV/AV
CHANGE
Changing the channels
• Main window
Press the Programme Number button on the remote control.
• Sub window
Press the
MULTI PIP
button. Whilst the on screen selector keys are
displayed, press the Programme Number button on the remote control.
Changing the mode
• Main window
Press the
TV/AV
button to switch between the TV and AV mode.
During the AV mode, press any coloured button. Whilst the on screen
selector keys are displayed, press coloured button to select the AV
source.
•
Sub window
Press the
MULTI PIP
button. Whilst the on screen selector keys are
displayed, press the
TV/AV
button to switch between the TV channel
and all AV sources in turn.


