background image

RQTX1061

ENGLISH

7

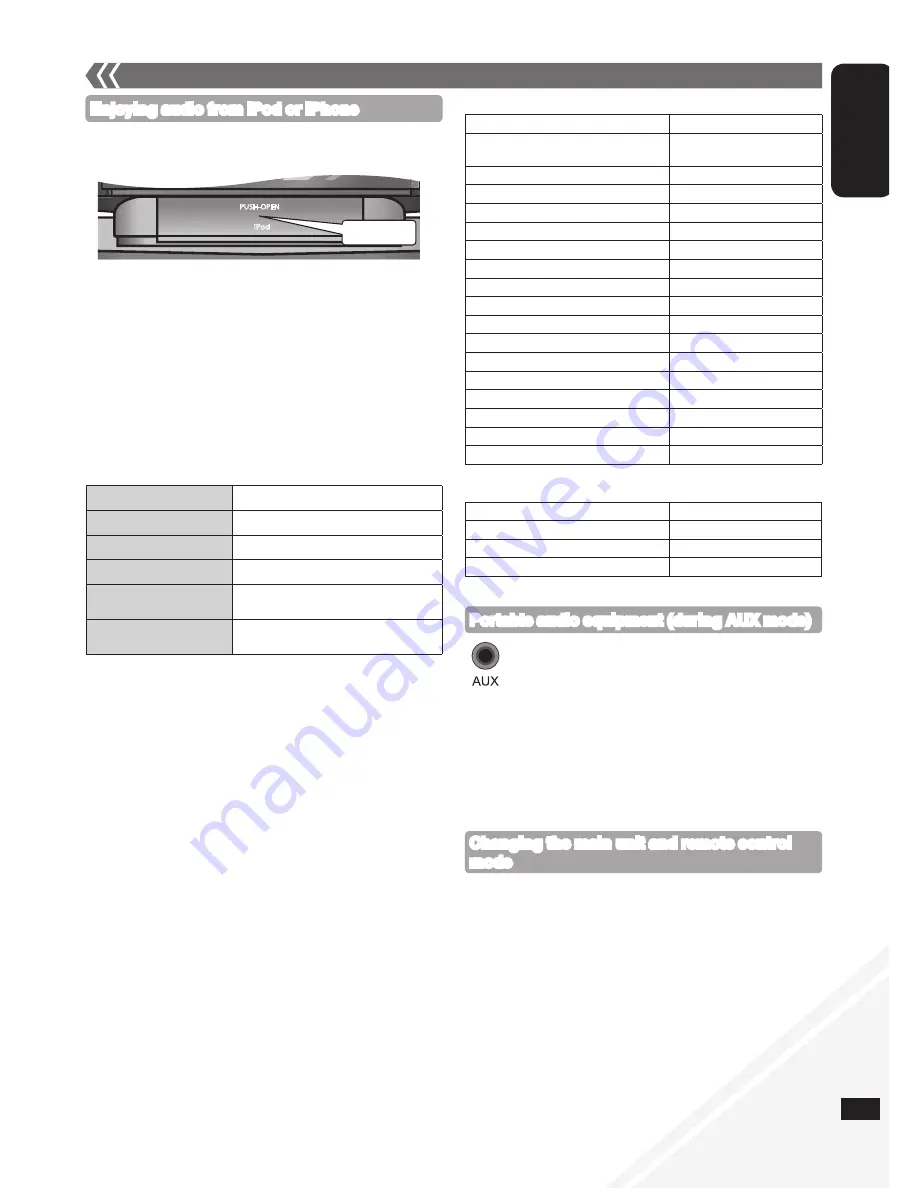
 Push to open the dock.

7

External unit

Enjoying audio from iPod or iPhone

g

 Inserting or removing an iPod/iPhone

■ 

Charging the iPod/iPhone

When iPod/iPhone is being charged in standby mode, 
“IPOD CHARGING” is shown on the main unit’s display.
Check iPod/iPhone to see if the battery is fully charged. If you are 
not using iPod/iPhone for an extended period of time after recharging 
has completed, disconnect it from the main unit as the battery will be 
depleted naturally. (Once fully recharged, additional recharging will 
not occur.)

Notes on iPhone:

All phone features can only be controlled by the iPhone’s touch 
screen.
The unit does not display incoming calls or the phone status.
The ringtone of incoming call can be heard from the iPhone’s speaker. 
When the unit is in iPod/iPhone mode, the ringtone can also be heard 
from the unit’s speakers.
The voice of caller cannot be heard on the unit’s speakers. The user 
can use the iPhone internal microphone though.
Connecting or disconnecting the iPhone from the unit will not cancel 
a call.
There is no Apple Inc. specification that will guarantee the iPhone 
responses above. iPhone responses may vary on new iPhone models 
or iPhone new software updates.


Play

Press 

[iPod


q

/

h

]

.

Pause

Press 

[iPod


q

/

h

]

 or 

[

g

]

.

Skip track

Press 

[

u

/

t

]

 or 

[

y

/

i

]

.

Search the current track

Press and hold 

[

u

/

t

]

 or 

[

y

/

i

]

.

Display iPod/iPhone menu/ 
return to previous menu

Press 

[iPod MENU] 

in the play mode. 

(Remote control only)

Select contents from 
iPod/iPhone menu

Press 

[

e

,

r

]

 and then 

[OK]

.

(Remote control only)

The remote control and main unit are factory-set to “REMOTE 1” mode.
If you find the remote control unintentionally also controls other 
equipment, you can switch to operate in “REMOTE 2” mode.

To switch to “REMOTE 2” mode (by main unit only)

 Press [FM/AM/AUX] to select ‘‘AUX’’.

 Press and hold [FM/AM/AUX] and then press [2] until 

“REMOTE 2” is displayed.

 Press and hold [OK] and [2] for at least 2 seconds.

To return to “REMOTE 1” mode

Repeat the steps above but replace 

[2]

 with 

[1]

.

(“REMOTE 1” will be displayed.)

Changing the main unit and remote control 
mode

 Plug the audio cord into the AUX jack.


Plug type: 3.5 mm stereo

 Press [AUX] and start playback from the portable audio 

source.

You can select the sound input level of the portable audio equipment.

Press [INPUT LEVEL] repeatedly to select “HIGH” or “NORMAL”.

Switch the equalizer off or turn the volume of the portable equipment 
down to reduce the input signal. High level of input signal will distort 
the sound.
For details, refer to the instruction manual of the other equipment.
Cords and equipment are not included.


Portable audio equipment (during AUX mode)

■ 

Compatible iPod

Name

Memory size

iPod nano 5th generation
(video camera)

8 GB, 16 GB

iPod touch 2nd generation

8 GB, 16 GB, 32 GB, 64 GB

iPod classic

120 GB, 160 GB (2009)

iPod nano 4th generation (video)

8 GB, 16 GB

iPod classic

160 GB (2007)

iPod touch 1st generation

8 GB, 16 GB, 32 GB

iPod nano 3rd generation (video)

4 GB, 8 GB

iPod classic

80 GB

iPod nano 2nd generation (aluminum)

2 GB, 4 GB, 8 GB

iPod 5th generation (video)

60 GB, 80 GB

iPod 5th generation (video)

30 GB

iPod nano 1st generation

1 GB, 2 GB, 4 GB

iPod 4th generation (colour display)

40 GB, 60 GB

iPod 4th generation (colour display)

20 GB, 30 GB

iPod 4th generation

40 GB

iPod 4th generation

20 GB

iPod mini

4 GB, 6 GB

■ 

Compatible iPhone

Name

Memory size

iPhone 3GS

16 GB, 32 GB

iPhone 3G

8 GB, 16 GB

iPhone

4 GB, 8 GB, 16 GB

Compatibility depends on the software version of the iPod/iPhone.

PUSH-OPEN

iPod

Push!

 Insert the suitable dock adapter (not included) for the 

iPod/iPhone.

Insert the side of the iPod/iPhone dock adapter with the clips facing 
towards you first and then push the opposite side until it clicks into 
place.

 Connect the iPod/iPhone (not included) firmly.

Be sure to remove the iPod/iPhone from its case.

To remove, simply pull the iPod/iPhone straight out to disconnect it.

When inserting an iPod/iPhone into the unit, be sure to use the dock 
adapter either supplied with the iPod/iPhone or commercially available 
from Apple Inc.
When not using the dock, push it back until it locks.
Reduce the volume of the main unit to minimum before connecting or 
disconnecting the iPod/iPhone.


Summary of Contents for SCHC20 - COMPACT STEREO SYSTEM

Page 1: ...oduct please read the instructions completely Please keep this manual for future reference Operations in these instructions are described using remote control but you can do the operations with the main unit if the controls are the same Your unit may not look exactly as illustrated 亲爱的用户 感谢您购买本产品 在对本机进行连接 操作或调节之前 请仔细阅读本使用说明书 请妥善 保管本手册 以备日后参考 本手冊所描述的操作主要是使用遥控器 但是如果控制是相同的 您也可 以在主机操作 您的机器可能与插图有所不同 SC...

Page 2: ... safety please read the following text carefully This appliance is supplied with a moulded three pin mains plug for your safety and convenience A 5 ampere fuse is fitted in this plug Should the fuse need to be replaced please ensure that the replacement fuse has a rating of 5 ampere and that it is approved by ASTA or BSI to BS1362 Check for the ASTA mark or the BSI mark on the body of the fuse If t...

Page 3: ...ords Click Avoid listening for prolonged periods of time to prevent hearing damage Excessive sound pressure from earphones and headphones can cause hearing loss Listening at full volume for long periods may damage the user s ears Be sure to use the supplied or recommended headphones or earphones Reduce the volume level and connect the headphones Plug type 3 5 mm stereo 4 Headphones not included Ta...

Page 4: ...PUSH OPEN iPod Display 32 Approx 30 Approx 30 Transmission window 31 7 Standby on switch 8 5 6 9 Press to switch the unit from on to standby mode or vice versa In standby mode the unit is still consuming a small amount of power DIMMER Dims the display panel Press again to cancel Numeric buttons 1 9 0 10 5 6 7 To select a 2 digit number e g 16 10 1 6 To select a 3 digit number e g 226 10 10 2 2 6 D...

Page 5: ... cleared when you open the sliding door To repeat program play or selected play mode press REPEAT Press again to cancel Play Mode function Disc operations Press to turn the unit on Press CD OPEN CLOSE on the main unit to open the sliding door Tilt the disc into the disc tray under the sliding door and then set the CD in place Press CD OPEN CLOSE to close the sliding door Keep fingers away from the...

Page 6: ... press e r to set the time Press and hold to change the time faster Press OK To display the clock press CLOCK TIMER Reset the clock regularly to maintain accuracy Setting the clock Play timer Change the settings Repeat step to above Change the source or volume Press z PLAY twice to clear zPLAY indicator from the display Make changes to the source or volume Perform step and above Check the settings...

Page 7: ...ce 2 with 1 REMOTE 1 will be displayed Changing the main unit and remote control mode Plug the audio cord into the AUX jack Plug type 3 5 mm stereo Press AUX and start playback from the portable audio source You can select the sound input level of the portable audio equipment Press INPUT LEVEL repeatedly to select HIGH or NORMAL Switch the equalizer off or turn the volume of the portable equipment...

Page 8: ...uttons are pressed Check that the batteries are inserted correctly page 4 g Display You plugged the AC mains lead in for the first time or there was a power failure recently Set the time page 6 ADJUST CLOCK Clock is not set Adjust the clock accordingly ADJUST TIMER Play timer is not set Adjust the play timer accordingly PGM FULL The number of programmed tracks is limited to 24 No further tracks ca...

Page 9: ...tems on the lead Grasp the plug firmly when unplugging the lead Pulling the AC mains lead can cause electric shock Do not handle the plug with wet hands This can cause electric shock Do not let metal objects fall inside the unit This can cause electric shock or malfunction Do not let liquids get into the unit This can cause electric shock or malfunction If this occurs immediately disconnect the un...

Page 10: ...RQT4389ZAA 产品内部 2 中东和香港区域 交流电源线的注意事项 为了您的安全着想 请详细阅读以下文字 为了您的安全与便利 此家电随附一个模压三管脚电源插头 此插头已内置一个 5 安培的保险丝 若需要更换保险丝 请确保欲安装的保险丝评级为 5 安培 并经 ASTA 或 BSI 至 BS1362 所批准 检查保险丝上标记的 ASTA 标志或 BSI 标志 若插头上附有可拆除的保险丝外罩 请确保在更换保险丝后将之重新置 入 若您丢失该保险丝外罩 请勿使用该插头直至更换新的保险丝外罩 可向当地经销商购买新的保险丝外罩 注意 若此模压插头不适用于您家的插座 务必取出保险丝并拆除插头然后在 安全的情况下丢弃 若将已拆除的插头插入任何一个 13 安培的插座 这将造成严重触电的 危险 欲安装新的插头 请留意以下的接线代码 若有任何疑问 请洽询符合资格的经销商 重要 此电源线的接线是按照以下代码而...

Page 11: ...Apple Inc 的商标 or 连接 连接 AM 环状天线 2 将松散的天线电缆远离其它电线和电缆 1 2 将天线竖立在其基座上 AM 环状天线 咔嗒 避免长时间收听 以免听力受损 自耳机或头戴耳机传出的过大声压会导致听觉受损 长时间以全音量收听将导致用户耳朵受损 确保使用随机提供或建议使用的头戴耳机或耳机 4 头戴耳机 非附件 降低音量 并连接耳机 插头类型 3 5 毫米立体声 在干扰最少的位置 用胶带将天线粘到墙 壁或支柱上 FM 室内天线 胶带 连接 FM 室内天线 1 扬声器的注释 这些扬声器无磁屏蔽 切勿将其放置于电视机 个人电脑或其它 易受磁性影响的设备附近 别把扬声器的网罩取下 本机的放置 保持本机前至少有 50 毫米的空间 以防止 iPod iPhone 或 本机掉落 5 4 1 3 2 AUX 第 7 页 通风孔 后视图 请核对并识别随机附件 提供附件 3 3 完成所有...

Page 12: ...消耗少量 的电力 DIMMER 使显示屏变暗 再次按下以 取消 数字键 1 9 0 10 5 6 7 选择一个 2 位数的数字 例如 16 10 1 6 选择一个 3 位数的数字 例如 226 10 10 2 2 6 DEL 5 PROGRAM 5 6 REPEAT 5 PLAY MODE 5 6 RADIO 6 CD q h 5 iPod q h 7 u t y i 5 6 7 g 5 7 RE MASTER 6 PRESET EQ 6 e r w q 5 6 7 OK 5 6 7 DISPLAY 5 AUTO PRESET 6 TUNE MODE 6 z PLAY 6 CLOCK TIMER 6 AUTO OFF 此功能允许本机在无操作状态 下约 30 分钟后 收音机模式除 外 自动关闭 按两次以开启 之 SLEEP 6 VOL VOLUME MUTE 静音 再次按下以取消 当 调节音...

Page 13: ...播放光盘 1ALBUM RND 1 ALBUM RANDOM MP3 在所选唱片集上随机播放所有曲目 按 e r 以选择唱片集 在随机播放期间 您无法跳越至前一曲目 在您打开滑动门时 当前的播放模式将会被清除 欲重复编排播放或已选择播放模式 按 REPEAT 再次按下以取消 播放模式功能 光盘操作 按 以开启本机 按主机上的 CD OPEN CLOSE 以打开滑动门 将光盘倾斜并置入滑动门内的光盘托盘 按 CD OPEN CLOSE 以关闭滑动门 关闭时 手指远离滑动门 以免受到微小的伤害 按 CD q h 以开始播放 如果用力使滑动门关闭 可能发生损坏 移除 CD 时 小心碰击滑动门 基本播放 此功能可让您编排 24 个曲目 按 CD q h 然后按 g 按 PROGRAM CD 按数字键以选择曲目 持续按数字键以编排更多曲目 按 OK 或 CD q h 以开始播放 MP3 按 e r ...

Page 14: ... 以关闭本机 此为 24 小时制式时钟 按 CLOCK TIMER 以选择 CLOCK 在 5 秒钟内按 e r 以设置时间 按住以快速更改时间 按 OK 欲显示时钟 按 CLOCK TIMER 定期重设时钟以保持其准确性 设置时钟 播放定时器 更改设置 重复步骤 至 上文 更改音源或音量 按 z PLAY 两次以从显示屏清除 zPLAY 指 示灯 更改音源或音量 执行步骤 和 上文 检查设置 在本机 开启或处于待机模 式时 重复按 CLOCK TIMER 以选择 zPLAY 1 zPLAY 2 或 zPLAY 3 取消 按 z PLAY 两次以从显示屏清除定时器指示灯 定时器将在预设时间启动 其声量将逐渐增加至预设水平 睡眠定时器能让本机在设置时间后关闭 按 SLEEP 以开启或关闭睡眠功能 预设 EQ 重复按 PRESET EQ 以选择 HEAVY SOFT CLEAR VOCAL 或...

Page 15: ...孔 插头类型 3 5 毫米立体声 按 AUX 以从便携式音源开始重放 您可以选择便携式音频设备的声音输入水平 重复按 INPUT LEVEL 以选择 HIGH 或 NORMAL 关闭均衡器或降低便携式设备音量以降低输入信号的电平 高电平的输 入信号将导致声音失真 详情请参阅其它设备的说明书 不含电线和设备 便携式音频设备 在 AUX 模式时 兼容的 iPod 名称 储存容量 第五代 iPod nano 视讯相机 8 GB 16 GB 第二代 iPod touch 8 GB 16 GB 32 GB 64 GB iPod classic 120 GB 160 GB 2009 第四代 iPod nano 视讯 8 GB 16 GB iPod classic 160 GB 2007 第一代 iPod touch 8 GB 16 GB 32 GB 第三代 iPod nano 视讯 4 GB 8 GB...

Page 16: ...时间 第 6 页 ADJUST CLOCK 没有设置时钟 相应调整时钟 ADJUST TIMER 没有设置播放定时器 相应调整播放定时器 PGM FULL 编排的曲目数量仅限于 24 首 不能编排更多的曲目 NO PLAY 置入的 CD ROM 光盘并非 CD DA 或 MP3 格式 不能播放 ERROR 执行错误的操作 阅读说明书并重试 F61 或 F76 有电源问题 请咨询经销商 AUTO OFF 本机已有大约 29 分钟不被使用 并且将在一分钟内关闭 按下任何按 钮以取消 ILLEGAL OPEN 滑动门没有处于正确的位置 关闭本机 然后再次开启 NODEVICE iPod iPhone 装置没有正确插入 阅读说明书并重试 第 7 页 REMOTE 1 本机处于 REMOTE 1 模式 将遥控器切换至 REMOTE 1 模式 第 7 页 REMOTE 2 本机处于 REMOTE 2 ...

Page 17: ... 至 80 相对湿度 无凝结 进行保养前 请断开本机电源线插头与插座的连接并用干软布擦拭 当本机过于肮脏时 请拧干湿布才擦拭 然后再用干布擦拭之 请勿使用挥发剂 稀释剂 酒精和洗涤剂等溶剂 这将导致本机外壳 涂层变形 使用化学处理的布之前 请依照注意事项 保养 CD 罩 定期清洁玻璃罩 防止发生故障 如果外部很脏 使用鼓风机和棉拭 去除灰尘 请勿使用 CD 型的玻璃罩清洁剂 规格如有变更 恕不另行通知 全谐波失真使用数码光谱分析仪测量 设置 电压 交流电源线的防护 维修 异物 安全注意事项 待机模式下的耗电量 0 3 瓦 大约 将本机置于平稳的平面上 远离直射阳光 高温 过度潮湿和过度振动 之处 这些条件会损坏机壳和其它组件 因此会缩短本机的使用寿命 请勿在本机上放置重物 切勿使用高压电源 这会使本机过载 诱发火灾 切勿使用直流电源 在使用直流电源的船舶或其它地方设置本机时 请 仔细确认其...

Page 18: ...Panasonic Corporation Web Site http panasonic net Panasonic Corporation 2010 RQTX1061 简体中文 18 10 ...

Page 19: ...Panasonic Corporation Web Site http panasonic net Panasonic Corporation 2010 RQTX1061 ﻋﺮﺑﻲ 19 10 ...

Page 20: ...لصدمة التعرض أو حريق نشوب في المقابس تلف أو الردئ التوصيل يتسبب المقابس على ثقيلة أشياء تضع أو تثني تسحب ال كهربية سحب يتسبب فقد التيار منفذ من فصلة عند جيدا المقبس امسك كهربية بصدمة اإلصابة في المتردد التيار مقبس كهربية بصدمة تصاب فقد مبللة بأيدي المقبس تمسك ال بصدمة تصاب فقد الوحدة داخل المعدنية األشياء بسقوط تسمح ال بالوحدة عطل يحدث قد أو كهربية قد أو كهربية بصدمة تصاب فقد الوحدة داخل سوائل بدخ...

Page 21: ...ح بالشكل البطاريات تثبيت من تحقق العرض شاشة g في عطل هناك كان أو مرة ألول المتردد التيار بمنفذ القابس بتوصيل قمت هل 6 صفحة الوقت ضبط مؤخرا الطاقة ADJUST CLOCK لذلك وفقا الساعة اضبط مضبوطة غير الساعة ADJUST TIMER لذلك وفقا التشغيل مؤقت اضبط مضبوط غير التشغيل مؤقت PGM FULL مسارات برمجة يمكن وال مسار 24 إلى محدود المبرمجة المسارات عدد يكون أكثر NO PLAY يمكن ال MP3 أو CD DA بصيغة ليس األقراص مشغل في ق...

Page 22: ...ن من REMOTE 1 وضع على الرئيسية والوحدة بعد عن التحكم وحدة ضبط يتم المصنع قبل يمكنك قصد دون أخرى أجهزة في تتحكم بعد عن التحكم وحدة أن وجدت إذا REMOTE 2 وضع على ضبطها فقط الرئيسية الوحدة خالل من REMOTE 2 وضع إلى للتحويل AUX لتحديد FM AM AUX زر على اضغط 2 زر على اضغط ثم FM AM AUX زر على الضغط في واستمر اضغط REMOTE 2 عرض يتم حتى األقل على ثانيتين لمدة 2 وزر OK زر على الضغط في واستمر اضغط REMOTE 1 وضع ...

Page 23: ...غضون في e r زر على اضغط أسرع بشكل الوقت لتغيير الضغط في OK زر على اضغط CLOCK TIMER زر على اضغط الساعة لعرض الدقة على للحفاظ دوري بشكل الساعة ضبط أعد الساعة ضبط التشغيل وقت اإلعدادات تغيير أعاله إلى من الخطوات كرر أو المصدر غير الصوت مستوى zPLAY لمسح z PLAY زر على اضغط الشاشة على من التشغيل الصوت مستوى أو المصدر على التغييرات بعمل قم أعاله و الخطوات نفذ اإلعدادات من تحقق الوحدة تكون عندما االستعداد...

Page 24: ...وضع الزر على اضغط المختار التشغيل وضع أو البرنامج تشغيل إلعادة لإللغاء أخرى مرة عليه اضغط REPEAT التشغيل وضع وظائف الوحدة لتشغيل على اضغط لفتح الرئيسية الوحدة من CD OPEN CLOSE الزر على اضغط المنزلق الباب ثم المنزلق الباب تحت القرص علبة داخل الموجود القرص بتسمية قم بتشغيله تقوم الذي القرص بإعداد قم المنزلق الباب إلغالق CD OPEN CLOSE الزر على اضغط الثانوية اإلصابات حدوث لتجنب اإلغالق عند المنزلق الب...

Page 25: ...ت استخدام R6 LR6 AA اآلخر الجانب قبل الجانب هذا ثبت بعد عن التحكم وحدة إعداد للتشغيل االستعداد مفتاح 9 6 5 I التشغيل وضع من الوحدة لتحويل اضغط أو االستعداد وضع إلي التشغيل العكس الوحدة تستمر االستعداد وضع في الطاقة من ضئيل قدر استهالك في DIMMER اضغط العرض لوحة ضوء يقلل لإللغاء أخرى مرة عليه 10 0 1 9 الرقمية األزرار 7 6 5 رقمين من يتكون عدد لتحديد 6 f 1 f 10 16 مثل أرقام ثالثة من يتكون عدد لتحديد 2...

Page 26: ...لفترات االستماع تجنب وسماعات األذن سماعات عن الناتج المرتفع الصوت ضغط يؤدي قد السمع حاسة فقدان إلي الرأس السمع فقدان إلى يؤدي قد طويلة لمدة عال لصوت االستماع بها الموصى أو المرفقة األذن أو الرأس سماعات استخدام من تأكد الرأس سماعات ووصل الصوت مستوى اخفض ستريو مم 3 5 القابس نوع 4 مضمنه غير الرأس سماعات بالحائط الهوائي ثبت من قدر أقل مع عمود أو التداخل داخلي FM هوائي الداخلي FM هوائي وصل الصق شريط با...

Page 27: ...صيل يجب األحمر المصهر غطاء املصهر أمبير 5 املصهر أمبير 5 مفك باستخدام المصهر غطاء افتح 1 A الشكل A الشكل B الشكل B الشكل مكانه في ثبته أو الغطاء اغلق ثم المصهر استبدل 2 املتردد للتيار الرئيسي املأخذ بكبل خاص تنبيه تنبيه في أو املبيتة الكابينات أو الكتب خزانات في اجلهاز هذا تضع وال تنصب ال عدم من تأكد جيدة تهوية ظروف لضمان وذلك املشابهة املغلقة احليوز مخاطر ولتجنب التهوية لظروف أخري مواد أي أو الست...

Page 28: ...ل بالكامل التعليمات مستقبال إليه للرجوع الدليل بهذا االحتفاظ الرجاء عن التحكم جهاز باستخدام التعليمات هذه في الواردة العمليات شرح تم توافرت ما إذا الرئيسية بالوحدة العمليات بهذه القيام يمكنك أنه غير بعد التحكم أدوات نفس التوضيحية الرسوم مع تماما متماثلة الوحدة تبدو ال قد ﺍﻟﺘﺸﻐﻴﻞ ﺇﺭﺷﺎﺩﺍﺕ مضغوط ستيريو نظام SC HC20 الموديل رقم ...

Reviews: