background image

2

RQT7991

S

a

fe

ty

 pr

e

c

a

u

tions

Dear customer

Thank you for purchasing this product. For optimum performance 
and safety, please read these instructions carefully.

Set the unit up on an even surface away from direct sunlight, high 

temperatures, high humidity, and excessive vibration. These 
conditions can damage the cabinet and other components, thereby 
shortening the unit’s service life. 

Do not place heavy items on the unit.

Do not use high voltage power sources. This can overload the unit 

and cause a fire. 

Do not use a DC power source. Check the source carefully when 

setting the unit up on a ship or other places where DC is used.

Ensure the AC mains lead is connected correctly and not 

damaged. Poor connection and lead damage can cause fire or 
electric shock. Do not pull, bend, or place heavy items on the lead.

Grasp the plug firmly when unplugging the lead. Pulling the AC 

mains lead can cause electric shock. 

Do not handle the plug with wet hands. This can cause electric 

shock.

Do not let metal objects fall inside the unit. This can cause electric 

shock or malfunction.

Do not let liquids get into the unit. This can cause electric shock or 

malfunction. If this occurs, immediately disconnect the unit from the 
power supply and contact your dealer.

Do not spray insecticides onto or into the unit. They contain 

flammable gases which can ignite if sprayed into the unit.

Do not attempt to repair this unit by yourself. If sound is 

interrupted, indicators fail to light, smoke appears, or any other 
problem that is not covered in these instructions occurs, disconnect 
the AC mains lead and contact your dealer or an authorized service 
center. Electric shock or damage to the unit can occur if the unit is 
repaired, disassembled or reconstructed by unqualified persons.

Extend operating life by disconnecting the unit from the power 

source if it is not to be used for a long time.

These operating instructions are applicable to models for 

a variety of regions.

Unless otherwise indicated, illustrations in these 

operating


instructions are of the model for Australia and 

N.Z.

Operations in these instructions are described mainly 

with the remote control, but you can perform the 
operations on the main unit if the controls are the same.
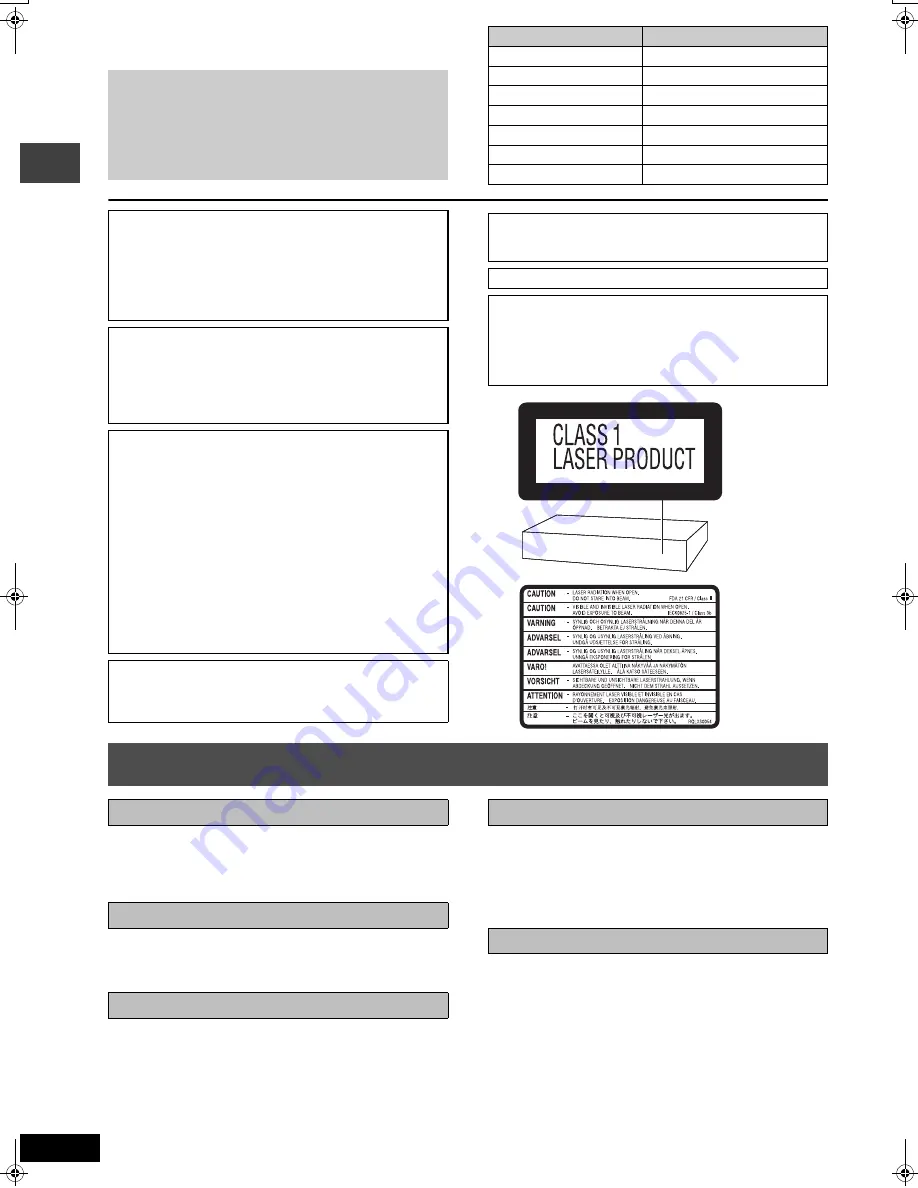
System

SC-HT880W

Main unit

SA-HT880W

Front speakers

SB-FS930

Center speaker

SB-PC930

Surround speakers

SB-FS880

Active subwoofer

SB-WA880

Digital transmitter

SH-FX50T

Digital receiver

SE-FX50

CAUTION!

THIS PRODUCT UTILIZES A LASER.
USE OF CONTROLS OR ADJUSTMENTS OR PERFORMANCE 
OF PROCEDURES OTHER THAN THOSE SPECIFIED HEREIN 
MAY RESULT IN HAZARDOUS RADIATION EXPOSURE.
DO NOT OPEN COVERS AND DO NOT REPAIR YOURSELF. 
REFER SERVICING TO QUALIFIED PERSONNEL.

WARNING:

TO REDUCE THE RISK OF FIRE, ELECTRIC SHOCK OR 
PRODUCT DAMAGE, DO NOT EXPOSE THIS APPARATUS 
TO RAIN, MOISTURE, DRIPPING OR SPLASHING AND THAT 
NO OBJECTS FILLED WITH LIQUIDS, SUCH AS VASES, 
SHALL BE PLACED ON THE APPARATUS. 

CAUTION!

DO NOT INSTALL OR PLACE THIS UNIT IN A BOOKCASE, 

BUILT-IN CABINET OR IN ANOTHER CONFINED SPACE. 
ENSURE THE UNIT IS WELL VENTILATED. TO PREVENT 
RISK OF ELECTRIC SHOCK OR FIRE HAZARD DUE TO 
OVERHEATING, ENSURE THAT CURTAINS AND ANY 
OTHER MATERIALS DO NOT OBSTRUCT THE 
VENTILATION VENTS.

DO NOT OBSTRUCT THE UNIT’S VENTILATION OPENINGS 

WITH NEWSPAPERS, TABLECLOTHS, CURTAINS, AND 
SIMILAR ITEMS.

DO NOT PLACE SOURCES OF NAKED FLAMES, SUCH AS 

LIGHTED CANDLES, ON THE UNIT.

DISPOSE OF BATTERIES IN AN ENVIRONMENTALLY 

FRIENDLY MANNER.

This product may receive radio interference caused by mobile 
telephones during use. If such interference is apparent, please 
increase separation between the product and the mobile 
telephone. 

The socket outlet shall be installed near the equipment and 
easily accessible or the mains plug or an appliance coupler shall 
remain readily operable.

THIS UNIT IS INTENDED FOR USE IN MODERATE CLIMATES.

For the digital receiver only

Although the AC power switch is in the “OFF” position, the unit is 
not completely disconnected from the mains. Remove the plug 
from the main electrical outlet if you will not be using the unit for 
an extended period of time. Place the unit so the plug can be 
easily removed.

(Back of product)

(Inside of product)

Safety precautions

Placement

Voltage

AC mains lead protection

Foreign matter

Service

HT880W_En.book  Page 2  Thursday, February 17, 2005  11:55 AM

Summary of Contents for SC-HT880W

Page 1: ...s manual for future reference Region Number The United Kingdom 2 Australia and N Z 4 4 ALL 4 5 2 Note EB on the packaging indicates the United Kingdom Advanced progressive scan Provides a smoother and sharper image 7 page Digital Transmitter and Receiver Set your surround sound free 9 page Compatible with a variety of media formats DVD RAM DVD Audio DVD Video and more 11 page High performance soun...

Page 2: ... are of the model for Australia and N Z Operations in these instructions are described mainly with the remote control but you can perform the operations on the main unit if the controls are the same System SC HT880W Main unit SA HT880W Front speakers SB FS930 Center speaker SB PC930 Surround speakers SB FS880 Active subwoofer SB WA880 Digital transmitter SH FX50T Digital receiver SE FX50 CAUTION T...

Page 3: ...fuse cover Safety precautions 2 Caution for AC Mains Lead 3 Control reference guide 10 Discs that can be played 11 Disc handling 11 Convenient functions 14 Displaying current playback condition QUICK OSD Reviewing titles to play ADVANCED DISC REVIEW Quick replay Skipping 30 seconds forward Changing the zoom ratio Changing soundtracks Changing subtitles Angle selection and Still picture rotation ad...

Page 4: ... appropriate screw eyes to match the walls or pillars to which they are going to be fastened Consult a qualified housing contractor concerning the appropriate procedure when attaching to a concrete wall or a surface that may not have strong enough support Improper attachment may result in damage to the wall or speakers 1Thread the string not included through the slot on the rear of the speaker to ...

Page 5: ...L R CENTER ACTIVE SUBWOOFER Do not use a front speaker as a surround speaker or vice versa Verify the type of speaker with the label on the rear of the front speaker Speaker labels DIGITAL RECEIVER How you set up your speakers can affect the bass and the sound field Note the following points Place speakers on flat secure bases Placing speakers too close to floors walls and corners can result in ex...

Page 6: ...kers with the subwoofer and the digital receiver Click Sheet of speaker cable stickers Speaker cable sticker 2 FRONT R 1 FRONT L 5 CENTER ACTIVE SUBWOOFER Insert the wire fully Click Speaker cable For center speaker Copper Silver AC mains lead The United Kingdom Australia and N Z Front and center speaker connection Connect the surround speaker cables here only if you do not intend to use the digit...

Page 7: ...ect Video YPbPr or S Video YPbPr from QUICK SETUP page 9 If RGB No Output is selected the RGB signal is output from the SCART AV terminal but no signal is output from the component video output terminals STEP4 Video connections COMPONENTVIDEOOUT COMPONENTVIDEOOUT PB PR Y S VIDEO S VIDEO OUT OUT VIDEO VIDEO OUT OUT VIDEO IN NTSC 480p 480i PAL 576p 576i NTSC 480p 480i PAL 576p 576i Back of the main ...

Page 8: ...ins lead after all other connections are complete Optional antenna connections page 23 AM loop antenna Stand the antenna up on its base Place the antenna where reception is best Keep loose antenna cable away from other wires and cables Catch up Click System cable AM loop antenna FM indoor antenna AC mains lead FM indoor antenna Affix this end of the antenna where reception is best The United Kingd...

Page 9: ... SKIP SUBTITLE AUDIO PLAY SPEED QUICK REPLAY SLEEP QUICK OSD ADVANCED DISC REVIEW FL DISPLAY REPEAT SHIFT ANGLE PAGE GROUP AV SYSTEM DVD CD PLAY LIST TV VOL TV VOL ENTER 1 2 6 9 4 5 7 8 CANCEL 0 S10 3 AUX SETUP RETURN SHIFT DVD CD 3 4 2 1 ENTER 1 Turn on the main unit 2 Select DVD CD 3 Show the QUICK SETUP screen 4 Follow the messages and make the settings 5 Press to finish QUICK SETUP 6 Press to ...

Page 10: ... tray 12 PHONES Connect headphones 28 VOLUME Turn up down the volume 12 PROGRESSIVE Enjoy progressive video 12 RDS The United Kingdom only Display RDS text data 23 H BASS Turn the bass sound enhancement on off 25 H BASS indicator 4 5 X TUNING W Skipping or slow search play 12 Select the radio stations 22 Standby on switch Í I Press to switch the unit from on to standby mode or vice versa In standb...

Page 11: ...tc Discs that are badly warped or cracked Irregularly shaped discs such as heart shapes Disc Logo Indication in these operating instructions Remarks DVD RAM RAM Recorded with devices using Version 1 1 of the Video Recording Format a unified video recording standard such as DVD video recorders DVD video cameras personal computers etc JPEG Recorded using the DCF Design rule for Camera File system st...

Page 12: ...SE OPEN CLOSE VOLUME DOWN UP INPUT SELECTOR Press to skip Press and hold to search during play slow motion during pause Motion picture part Press 1 play to start normal play 6 Adjust the volume 5 Start play The tray is automatically closed 3 Open the disc tray Stop 2 Select DVD CD 1 Turn the main unit on 4 Load the disc Load double sided discs so the label for the side you want to play is facing u...

Page 13: ... MENU TOP MENU RETURN SUBTITLE AUDIO FL DISPLAY ANGLE PAGE GROUP 1 2 6 5 CANCEL 3 4 2 1 ENTER SHIFT Numbered buttons SKIP ENTER SLOW SEARCH ENTER ENTER Select Register Enter number RAM DVD A DVD V VCD CD e g To select 12 S10 1 2 VCD with playback control Press to cancel the PBC function and then press the numbered buttons WMA MP3 JPEG e g To select 123 1 2 3 ENTER Press CANCEL to cancel the number...

Page 14: ... use this button to select L R or LR DVD V Karaoke discs Press 2 1 to select On or Off for vocals Read the disc s instructions for details Signal type data LPCM PPCM ÎDigital DTS MPEG Signal type kHz Sampling frequency bit ch Number of channels Displaying current playback condition QUICK OSD Reviewing titles to play ADVANCED DISC REVIEW Quick replay VOLUME CH SKIP SLOW SEARCH MENU DIRECT NAVIGATOR...

Page 15: ...elect Play as Data Disc in Other Menu page 19 DVD A Some discs contain bonus groups If a password screen appears after selecting a group enter the password with the numbered buttons to play the bonus group Refer also to the disc s jacket DVD A Press 1 play 1 Press the numbered buttons to select the items WMA MP3 JPEG then press ENTER Repeat this step to program other items To select a 2 digit numb...

Page 16: ...NS to show the playback condition and current position To exit the screen Press TOP MENU or MENU Playing data discs Playing items in order Playback Menu Playing from the selected item Navigation Menu VOLUME CH SKIP SLOW SEARCH MENU DIRECT NAVIGATOR TOP MENU RETURN FUNCTIONS SUBWOOFER LEVEL SUPER SRND H BASS C FOCUS SFC PLAY MODE TEST CH SELECT SETUP MUTING MIX 2CH PL ZOOM MANUAL SKIP SUBTITLE AUDI...

Page 17: ...rotected This unit does not support Multiple Bit Rate MBR MP3 This unit does not support ID3 tags Compatible sampling rates 8 11 02 12 16 22 05 24 32 44 1 and 48 kHz JPEG To view JPEG files on this unit Take them on a digital camera that meets the DCF Standard Design rule for Camera File system Version 1 0 Some digital cameras have functions that are not supported by the DCF Standard Version 1 0 l...

Page 18: ...IONS Items shown differ depending on the type of disc Main menu Program Group Title Chapter Track Playlist Content To start from a specific item Time Except iR iRW To skip incrementally or decrementally Time Slip for play only 1 Press ENTER twice to show the Time Slip indicator 2 Press 3 4 to select the time and press ENTER Press and hold 3 4 to alter faster To start from a specific time Time Sear...

Page 19: ...video content is distorted When you play NTSC discs Auto1 normal Detects 24 frame per second film content and appropriately converts it Auto2 Compatible with 30 frame per second film content in addition to 24 frame per second film content Video Select when using Auto1 or Auto2 and the video content is distorted Dolby Pro Logic II page 24 Dolby Pro Logic II Dialogue Enhancer To make the dialogue in...

Page 20: ... Select the tab 3 Select the item 4 Make the settings 5 Press to exit SHIFT SETUP MUTING ENTER Select Go right ENTER Select Register ENTER 1 2 6 9 4 5 7 8 0 S10 3 Select Register SHIFT SETUP MUTING QUICK SETUP enables successive settings of the items in the shaded area Audio Choose the audio language English Language options 1 Original 2 Other 3 Subtitle Choose the subtitle language Automatic 4 En...

Page 21: ...lurred NTSC Disc Output Choose PAL 60 or NTSC output when playing NTSC discs page 11 Video systems PAL60 When connected to a PAL television NTSC When connected to an NTSC television Dynamic Range Compression Off On Adjusts for clarity even when the volume is low by compressing the range of the lowest sound level and the highest sound level Convenient for late night viewing Only works with Dolby Di...

Page 22: ...o the radio broadcast Press ENTER 2 While the frequency and PGM are flashing on the display Press the numbered buttons to select a channel Alternatively press W CH X then press ENTER To select a 2 digit number e g 12 S10 1 2 The station occupying a channel is erased if another station is preset to that channel Automatic presetting VOLUME CH SKIP SLOW SEARCH MENU DIRECT NAVIGATOR TOP MENU RETURN FU...

Page 23: ...UNTRY AFFAIRS POP M CHILDREN NATIONAL INFO ROCK M SOCIAL A OLDIES SPORT M O R M RELIGION FOLK M EDUCATE LIGHT M PHONE IN DOCUMENT DRAMA CLASSICS TRAVEL TEST CULTURE OTHER M LEISURE ALARM SCIENCE WEATHER JAZZ Optional antenna connections TV TV AUDIO AUDIO IN IN VCR VCR AUDIO AUDIO IN IN FM ANT FM ANT AM ANT AM ANT 75 75 LOOP LOOP EXT EXT COMPONENTVIDEOOUT COMPONENTVIDEOOUT PROGRESSIV PROGRESSIVE IN...

Page 24: ...n Super Surround is turned on This also works when Dolby Pro Logic II is turned on Dolby Pro Logic II is an advanced decoder that derives 5 channel surround Left and Right Front Center Left and Right Surround from any stereo program material whether or not it has been specifically Dolby Surround encoded Press ÎPLII Each time you press the button MOVIE Movie software recorded in Dolby Surround MUSI...

Page 25: ...ess VOLUME r or s to set the volume level normally used for listening 3 Press 3 increase or 4 decrease to adjust the speaker level for each speaker C RS LS 6 dB to i6 dB L R Only the balance is adjustable To adjust the balance of the front speakers While outputting the test signal press 2 1 Adjust the speaker level to the same level as the front speakers To stop the test signal Press SHIFT i TEST ...

Page 26: ...ENTVIDEOOUT COMPONENTVIDEOOUT NTSC 480p 480i PAL 576p 576i NTSC 480p 480i PAL 576p 576i PB Y PR S VIDEO S VIDEO OUT OUT VIDEO VIDEO OUT OUT A AV REC REC OUT OUT AUDIO OUT R L VIDEO IN 2 1 PLAY OUT REC IN R L R L VIDEO OUT AUDIO OUT R L DIGITAL TRANSMITTER Television not included Video cassette recorder not included To show video from the video cassette recorder Select VIDEO 2 input on your televis...

Page 27: ...ND to select FM or AM 2 Start recording and play Press AUX to select AUX as the source Operating the television and the video cassette recorder Television Video cassette recorder Changing the remote control code Operating the tape deck Recording to the tape deck Listening to the tape deck PANASONIC 01 29 30 31 AKAI 07 11 28 36 37 ALBA 05 11 12 BAUR 32 BLAUPUNKT 28 36 BRANDT 26 41 BUSH 02 05 10 11 ...

Page 28: ...matically switched to stereo 2 channel Note Avoid listening for prolonged periods of time to prevent hearing damage Sleep timer VOLUME CH SKIP SLOW SEARCH MENU DIRECT NAVIGATOR TOP MENU RETURN FUNCTIONS VCR AUX TV TUNER BAND TV AV SUBWOOFER LEVEL SUPER SRND H BASS C FOCUS SFC PLAY MODE TEST CH SELECT SETUP MUTING MIX 2CH PL ZOOM MANUAL SKIP SUBTITLE AUDIO PLAY SPEED QUICK REPLAY ADVANCED DISC REVI...

Page 29: ...ecommended for wall mounted front or surround speakers You can also remove the speaker cables from the pipes supplied with this system Fitting speaker stands not included Center speaker only Ensure the stands meet these conditions before purchasing them Note the diameter and length of the screws and the distance between screws as shown in the diagram The stands must be able to support over 10 kg T...

Page 30: ...ty is lower I P B MPEG 2 the video compression standard adopted for use with DVD Video codes frames using these 3 picture types I Intra coded picture This picture has the best quality and is the best to use when adjusting the picture P Predictive coded picture This picture is calculated based on past I or P pictures B Bidirectionally predictive coded picture This picture is calculated by comparing...

Page 31: ...75 Urdu 8582 Uzbek 8590 Vietnamese 8673 Volapük 8679 Welsh 6789 Wolof 8779 Xhosa 8872 Yiddish 7473 Yoruba 8979 Zulu 9085 Windows Media and the Windows logo are trademarks or registered trademarks of Microsoft Corporation in the United States and or other countries WMA is a compression format developed by Microsoft Corporation It achieves the same sound quality as MP3 with a file size that is small...

Page 32: ...0 Hz 20 kHz 2 S N ratio CD Audio 95 dB 3 Dynamic range DVD linear audio 95 dB CD Audio 93 dB 4 Total harmonic distortion CD Audio 0 005 VIDEO SECTION Video system Signal system PAL625 50 PAL525 60 NTSC Composite video output Output level 1 Vp p 75 Terminal Pin jack 1 system The United Kingdom Scart jack 1 system S video output Y output level 1 Vp p 75 C output level PAL 0 3 Vp p 75 NTSC 0 286 Vp p...

Page 33: ... supply AC 230j240 V 50 Hz Power consumption Digital transmitter 0 3 W Digital receiver 35 W Dimensions WtHtD Digital transmitter 97 mmk47 5 mmk8 5 mm Digital receiver 103 mmk215 mmk178 mm Mass Digital transmitter 0 03 kg Digital receiver 2 3 kg Wireless module Frequency range 2 402j2 480 GHz No of channels 79 Bandwidth Channel 1 MHz RF Output Power 13 dBm Max RF Output Impedance 50 Type of Emissi...

Page 34: ...displayed correctly WMA MP3 JPEG Folders deeper than the eighth layer are displayed as the eighth layer A menu screen appears during skip or search VCD This is normal for Video CD s Playback control menu doesn t appear VCD with playback control Press twice and then press 1 play The program and random play functions do not work DVD V These functions do not work with some DVD Videos Programmed items...

Page 35: ...storted Adjust the position of the FM or AM antenna Use an outdoor antenna 23 A beat sound is heard Turn the television off or move it away from the unit A low hum is heard during AM broadcasts Separate the antenna from other cables Cannot operate the TV Press TV first to operate the television Check the remote control code for the TV manufacturer 27 Wireless link indicator does not light Check th...

Page 36: ...ase check and identify the supplied accessories Use numbers indicated in parentheses when asking for replacement parts Product numbers correct as of February 2005 These may be subject to change Declaration of Conformity DoC Hereby Panasonic AVC Networks Singapore Pte Ltd PAVCSG declares that this product is in compliance with the essential requirements and other relevant provisions of Directive 19...

Reviews: