background image

31

RQT6945

Other functions

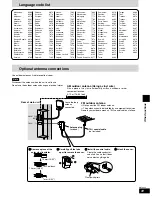
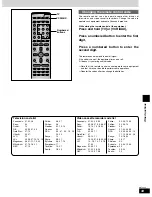
Language code list

Abkhazian:

6566

Afar:

6565

Afrikaans:

6570

Albanian:

8381

Ameharic:

6577

Arabic:

6582

Armenian:

7289

Assamese:

6583

Aymara:

6588

Azerbaijani:

6590

Bashkir:

6665

Basque:

6985

Bengali; Bangla: 6678
Bhutani:

6890

Bihari:

6672

Breton:

6682

Bulgarian:

6671

Burmese:

7789

Byelorussian:

6669

Cambodian:

7577

Catalan:

6765

Chinese:

9072

Corsican:

6779

Croatian:

7282

Czech:

6783

Danish:

6865

Dutch:

7876

English:

6978

Esperanto:

6979

Estonian:

6984

Faroese:

7079

Fiji:

7074

Finnish:

7073

French:

7082

Frisian:

7089

Galician:

7176

Georgian:

7565

German:

6869

Greek:

6976

Greenlandic:

7576

Guarani:

7178

Gujarati:

7185

Hausa:

7265

Hebrew:

7387

Hindi:

7273

Hungarian:

7285

Icelandic:

7383

Indonesian:

7378

Interlingua:

7365

Irish:

7165

Italian:

7384

Japanese:

7465

Javanese:

7487

Kannada:

7578

Kashmiri:

7583

Kazakh:

7575

Kirghiz:

7589

Korean:

7579

Kurdish:

7585

Laotian:

7679

Latin:

7665

Latvian, Lettish:

7686

Lingala:

7678

Lithuanian:

7684

Macedonian:

7775

Malagasy:

7771

Malay:

7783

Malayalam:

7776

Maltese:

7784

Maori:

7773

Marathi:

7782

Moldavian:

7779

Mongolian:

7778

Nauru:

7865

Nepali:

7869

Norwegian:

7879

Oriya:

7982

Pashto, Pushto:

8083

Persian:

7065

Polish:

8076

Portuguese:

8084

Punjabi:

8065

Quechua:

8185

Phaeto-Romance: 8277

Romanian:

8279

Russian:

8285

Samoan:

8377

Sanskrit:

8365

Scots Gaelic:

7168

Serbian:

8382

Serbo-Croatian:

8372

Shona:

8378

Sindhi:

8368

Singhalese:

8373

Slovak:

8375

Slovenian:

8376

Somali:

8379

Spanish:

6983

Sundanese:

8385

Swahili:

8387

Swedish:

8386

Tagalog:

8476

Tajik:

8471

Tamil:

8465

Tatar:

8484

Telugu:

8469

Thai:

8472

Tibetan:

6679

Tigrinya:

8473

Tonga:

8479

Turkish:

8482

Turkmen:

8475

Twi:

8487

Ukrainian:

8575

Urdu:

8582

Uzbek:

8590

Vietnamese:

8673

Volapük:

8679

Welsh:

6789

Wolof:

8779

Xhosa:

8872

Yiddish:

7473

Yoruba:

8979

Zulu:

9085

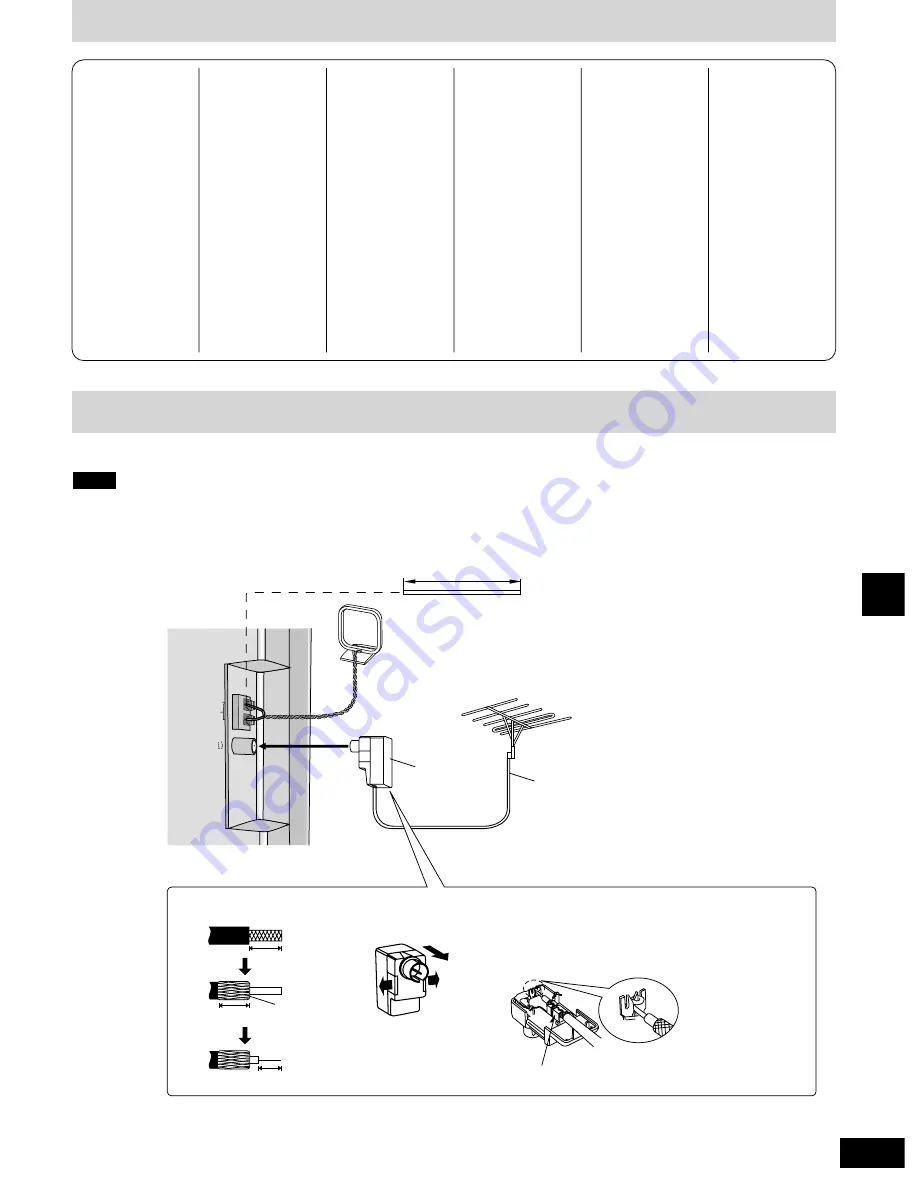
Optional antenna connections

AM ANT

FM ANT

EXT

LOOP

75

Rear of main unit

Use outdoor antennas if radio reception is poor.

Disconnect the antenna when the unit is not in use.
Do not use the outdoor antenna during an electrical storm.

Note

AM outdoor antenna (Using a vinyl wire)

Run a piece of vinyl wire horizontally across a window or other
convenient location.

FM outdoor antenna 

¡

Disconnect the FM indoor antenna.

¡

The antenna should be installed by a competent technician.

Rework your outdoor antenna’s 75 

coaxial cable as follows.

5–12 m (16–39 feet)

75 

coaxial cable

(not included)

Antenna plug
(included)

Clamp with pliers

Leave the loop
antenna
connected.

1

1

Remove a piece of the
outer vinyl insulator.

2

2

Carefully pull the tabs
apart to remove the cover.

3

3

Install the coaxial cable.

Clamp the cable conductor,
and wind it on so that it does
not contact anything else.

4

4

Attach the cover.

10 mm (13/32'')

10 mm (13/32'')

7 mm (9/32'')

Peel back

q

q

w

Summary of Contents for SAST1 - SINGLE DVD MINI SYST

Page 1: ... NAVIGATOR PLAY LIST MENU SLOW SEARCH 1 2 3 4 5 6 7 8 0 9 TUNER BAND DVD CD TV VCR AUX ENTER CH SELECT TEST TV VIDEO 10 ENTER POSITION MEMORY S SRND C S M AC IN Region number supported by this player Region numbers are allocated to DVD players and software according to where they are sold The region number of this player is 1 The player will play DVD Video marked with labels containing 1 or ALL Ex...

Page 2: ... SHOCK DO NOT REMOVE SCREWS NO USER SERVICEABLE PARTS INSIDE REFER SERVICING TO QUALIFIED SERVICE PERSONNEL CAUTION RISK OF ELECTRIC SHOCK DO NOT OPEN THE FOLLOWING APPLIES ONLY IN THE U S A THE FOLLOWING APPLIES ONLY IN THE U S A CAUTION This equipment has been tested and found to comply with the limits for a Class B digital device pursuant to Part 15 of the FCC Rules These limits are designed to...

Page 3: ...eep timer Using headphones 28 Changing settings 29 Language code list 31 Optional antenna connections 31 Operating a television or video cassette recorder 32 Reference Glossary 34 Specifications 35 Troubleshooting guide 36 Product Service 38 Maintenance 38 Limited Warranty U S A 40 Customer Services Directory U S A 40 Radio operations The radio 24 Manual tuning Preset tuning 24 Accessories Please ...

Page 4: ...cord from being walked on or pinched particularly at plugs convenience receptacles and the point where they exit from the apparatus Read these operating instructions carefully before using the unit Follow the safety instructions on the unit and the applicable safety instructions listed below Keep these operating instructions handy for future reference 11 Only use attachments accessories specified ...

Page 5: ...as described in these operating instructions for example if the play time is not displayed or if a Video CD has menus Read the disc s instructions carefully Type Non cartridge discs Discs that can be removed from their cartridges TYPE 2 and 4 12 cm 5 9 4 GB double sided and 4 7 GB single sided 8 cm 3 2 8 GB double sided Discs recorded with DVD video recorders DVD video cameras personal computers e...

Page 6: ...utton AUDIO 17 6 Group button GROUP 15 Buttons i o 3 and 5 function the same as the controls on the remote control 7 Standby on switch POWER 8 13 Press to switch the unit from on to standby mode or vice versa In standby mode the unit is still consuming a small amount of power 8 Open close button OPEN CLOSE 13 9 Progressive out button PROGRESSIVE OUT 13 0 Source select button SELECTOR 13 1 Standby ...

Page 7: ... securely fastened Place into groove Connect the speaker cables Fit into groove Connect the speaker cables above 1 Short cable for CENTER Connecting the cables The speaker units stands and bases for the front and surround speakers are the same Only the lengths of the cables are different Black Red Copper Silver 1 Sheet of speaker feet 4 feet per sheet You can put front and surround speakers on the...

Page 8: ...bass Cover walls and windows with thick curtain Keep your speakers at least 10 mm 13 32 away from the system for proper ventilation Center speaker Vibration caused by the center speaker can disrupt the picture if it is placed directly on the television Put the center speaker on a rack or shelf Subwoofer Place to the right of the television on the floor or a sturdy shelf so that it won t cause vibr...

Page 9: ...ted with some televisions and set up combinations If this occurs turn the television off for about 30 minutes The television s demagnetizing function should correct the problem If it persists move the speakers further away from the television Caution Use the speakers only with the recommended system Failure to do so may lead to damage to the amplifier and or the speakers and may result in the risk...

Page 10: ... disconnect Press the catch and pull out To disconnect Press the catch and pull out Remove the cover Fit the cover You can also pass other cables through the removable cavity Subwoofer Never short circuit positive and negative speaker wires Be sure to connect only positive copper wires to positive terminals and negative silver wires to negative terminals Incorrect connection can damage the speaker...

Page 11: ... page 29 Video Black Level Control To enjoy progressive video Connect to the component video 480P input terminals on a television compatible with this unit s copy guard system Video will not be displayed correctly if connected to an incompatible television Press PROGRESSIVE OUT on the main unit so PROGRESSIVE appears on the display page 13 All televisions manufactured by Panasonic and that have 48...

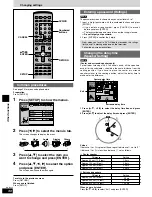
Page 12: ...vision to suit the connections for the unit 1 Press to turn on the unit 2 Press DVD CD to select DVD CD as the source 3 Press SETUP to show the QUICK SETUP screen 4 Press e r to select the menu language and press ENTER 5 Press e r to select Yes to continue and press ENTER 6 Press e r to select the item and press ENTER Audio Language page 29 TV Type below Subtitle Language page 29 TV Aspect below 7...

Page 13: ... open the loading tray and place the disc in the tray Press OPEN CLOSE to close the loading tray The disc loading tray opens automatically if the disc is not loaded properly and a CLOSE ERR message will display on the unit Try setting the disc into place again 3 Press q play CD text only Group and track names are displayed on the television To turn the display on or off page 22 Disc information 5 ...

Page 14: ...layed Press q play while the message is displayed and the beginning portions of each chapter up to the current one are played Full play resumes from the point where you pressed g or POSITION MEMORY This feature works only within a title If you do not press q play the message disappears and play starts from where you pressed g or POSITION MEMORY DVD V Chapter Preview Press the numbered buttons to s...

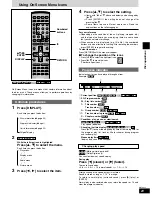
Page 15: ... a menu screen Starting play from a selected item Press the numbered buttons to select the item Play starts from the selected item To select a 2 digit number Example To select track 23 press 10 2 3 2 3 ENTER This works only when stopped with some discs Note MP3 WMA MP3 WMA CD VCD DVD V DVD A RAM Repeat play During play Press REPEAT Each time you press the button Program All Entire disc Off During ...

Page 16: ...le Title No Chapter No Program No To select a 2 digit number Example To select item 25 press 10 2 5 2 5 ENTER Repeat this step to program other items To select an item using the cursor buttons Press ENTER and e r to select an item then press ENTER again to register the number All the items in the selected disc title or group are selected when you select ALL 2 Press q play To add or change the prog...

Page 17: ... Number of channels Example 3 2 1 ch DVD A 1 LFE Low Frequency Effects Not displayed if there is no LFE signal 0 No surround 1 Mono surround 2 Stereo surround left right 1 Center 2 Front left Front right 3 Front left Front right Center Subtitles Motion picture parts only Discs with multiple subtitle languages You can change the subtitle language and turn the subtitles on and off You can turn the s...

Page 18: ... e r to select 11 20 You can select the next group when the current group is full Markers added with this unit clear when you switch the unit to standby change the source or open the loading tray Note 12345678910 RAM Variable zoom function Motion picture parts only Change the zoom ratio so the pictures expands to the optimum size to fill the screen Preparation Change the setting TV Aspect to suit ...

Page 19: ...ith the numbered buttons 3 Press q to select Find and press ENTER The search results screen appears 4 Press e r to select the track and press ENTER To return to the navigation menu Press RETURN Track title search Another Pineapple Board The Golden Ship Fall In The Frozen Season Violet Sky Pink Island Next Find Prev 6 7 8 9 10 SELECT ENTER RETURN SELECT NUMBER Find A 1 Press q while a track is high...

Page 20: ...umber Example 23 10 2 3 3 Press ENTER The program being played in the background continues To clear the program list Press DIRECT NAVIGATOR Titles appear only if you have entered them You cannot change program and disc titles Note DIRECT NAVIGATOR Date On 12 23 SAT 12 26 TUE 1 12 FRI 1 24 WED 2 20 TUE 1 2 3 4 5 21 02 14 35 20 00 19 30 19 05 SELECT ENTER RETURN No Saturday feature Auto action Sunda...

Page 21: ...re you are playing there are some items that you cannot select or change When numbers are displayed e g title No the numbered buttons are also effective for setting After entering the numbers press ENTER to register the setting To clear the menus Press RETURN until the menus disappear To change the position of the icons 1 Press w q to select the rightmost icon 2 Press e r to move the icons There a...

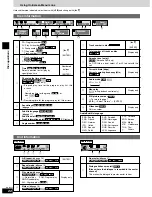
Page 22: ...NTER Display only Display only Display only Display only 8 Total number of tracks on disc MP3 WMA 9 0 2 Karaoke vocal on off Karaoke DVD only If a DVD title is a duet select V1 or V2 to duet with the unit DVD V Current bitrate kbps Current sampling frequency kHz MP3 WMA 1 Audio mode LR L R VCD RAM Menu play with playback control only VCD 3 Still picture number To return to page 1 w q Select Return...

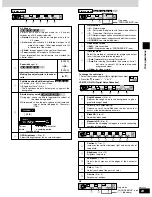
Page 23: ...Normal mode S Soft mode Soft picture with fewer video artifacts F Fine mode Details are sharper C1 Mellows images and enhances detail in dark scenes C2 Sharpens images and enhances detail in dark scenes U1 U2 U3 User mode below w Video output mode 480I Interlace video 480P Progressive video PROGRESSIVE is on e Transfer mode Select the method of conversion for progressive output to suit the type of...

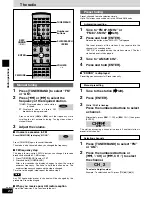
Page 24: ...anges to show the current minimum frequency Continue to hold the button down The minimum frequency changes and the step is changed To return to the original step repeat the above steps Any FM frequencies preset in channels will be changed by this procedure Preset them again When you receive poor AM radio reception Turn off the television if it is too close to the unit Note TUNED ST MONO Preset tun...

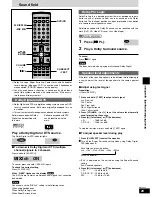
Page 25: ...olby Pro Logic is on When Super Surround is on Note DVD A MIX2ch ON Software encoded with Dolby Digital can be identified with this mark Software encoded with DTS can be identified with this mark DIGITAL DTS Dolby Pro Logic Dolby Pro Logic is a decoding system that was developed to get a better sense of presence from sources encoded with Dolby Surround The feeling of position has been improved by ...

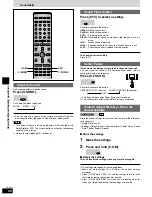
Page 26: ...akes vocals more alive HALL Expands sound to make you feel like you were in a hall FLAT Canceled no effect is added factory preset To check the current setting Press SFC SFC Center Focus Discs where the dialogue is recorded in the center channel You can make the sound of the center speaker seem like it is coming from within the television Press C FOCUS Each time you press the button CENTER FOCUS 1...

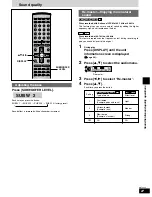
Page 27: ...er increment SUB W 2 Re master Enjoying more natural sound Discs recorded with 2 channel LPCM at 44 1 kHz or 48 kHz This feature gives you a more natural sound by adding the higher frequency signals not recorded on the disc Discs recorded at 44 1 kHz or 48 kHz This feature reproduces the frequencies lost during recording to give you a sound closer to the original 1 During play Press DISPLAY until ...

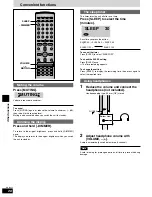
Page 28: ...MER To return to the original brightness press and hold DIMMER again The display also returns to the original brightness when you switch the unit to standby The sleep timer This timer turns the unit off after a set time Press SLEEP to select the time minutes Each time you press the button SLEEP 30 SLEEP 60 SLEEP 90 SLEEP OFF SLEEP 120 To cancel the timer Press SLEEP to select SLEEP OFF To check th...

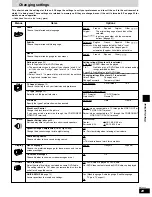
Page 29: ...prevent play of discs that do not have ratings levels recorded on them TV Aspect page 12 Choose the setting to suit your television and preference Standard Direct View TV CRT Projector LCD TV Projector Projection TV Plasma TV TV Type page 12 Select to suit the type of television Automatic Field Frame Still Mode Specify the type of picture shown when paused Menus Display Lighter when connected to a...

Page 30: ...er press CANCEL to erase it before you press ENTER The lock symbol appears closed to show the rating is locked Do not forget your password 2 Press ENTER to confirm the 4 digits DVD V Changing the delay time Speaker Setting Center and surround speakers only For optimum listening with 5 1 channel sound all the speakers except for the subwoofer should be the same distance from the seating position If...

Page 31: ...Samoan 8377 Sanskrit 8365 Scots Gaelic 7168 Serbian 8382 Serbo Croatian 8372 Shona 8378 Sindhi 8368 Singhalese 8373 Slovak 8375 Slovenian 8376 Somali 8379 Spanish 6983 Sundanese 8385 Swahili 8387 Swedish 8386 Tagalog 8476 Tajik 8471 Tamil 8465 Tatar 8484 Telugu 8469 Thai 8472 Tibetan 6679 Tigrinya 8473 Tonga 8479 Turkish 8482 Turkmen 8475 Twi 8487 Ukrainian 8575 Urdu 8582 Uzbek 8590 Vietnamese 867...

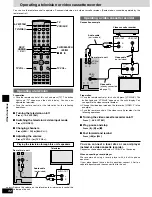
Page 32: ...VOL Playing the television through this unit s speakers TVIN R L AUDIO OUT L R Rear of main unit Television Audio cable not included Reduce the volume on the television to minimum and control the volume on this unit Operating a video cassette recorder Connection example VIDEO IN 2 1 AUDIO OUT VIDEO OUT R L VIDEO OUT VCRIN AUX R L Video cassette recorder Audio cable not included Video cable already...

Page 33: ... correct the equipment turns on or off If it doesn t try entering another code Note that this remote control cannot operate some equipment and that it may not be able to perform some operations Reenter the codes after you change the batteries Television code list Panasonic 01 02 26 Sony 04 Fisher 14 G E 02 03 07 09 Gold Star 07 15 Hitachi 05 07 JVC 12 LXI 03 06 07 10 14 15 Magnavox 06 07 11 15 22 ...

Page 34: ...standard adopted for use with DVD Video codes frames using these 3 picture types I Intra coded picture This picture has the best quality and is the best to use when adjusting the picture P Predictive coded picture This picture is calculated based on past I or P pictures B Bidirectionally predictive coded picture This picture is calculated by comparing past and future I and P pictures so it has the...

Page 35: ... W H D 250 1 063 250 mm 9 27 32 41 7 8 9 27 32 including protrusions Mass 7 8 kg 17 2 lb SA ST1 SPEAKER SECTION Type 2 way 2 speaker Bass ref Speakers Full range 6 5 cm 2 1 2 cone type Super tweeter Piezo type Impedance 6 Ω Input power 60 W Music Output sound pressure level 79 dB W 1 0 m Crossover frequency 10 kHz Frequency range 85 Hz 25 kHz 16 dB 90 Hz 22 kHz 10 dB Dimensions W H D 250 1 062 250...

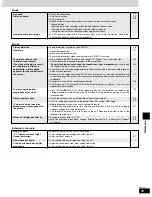
Page 36: ...th the remote control Press TV first to operate the television Cannot select alternative languages This function is dependent on software availability Try selecting from the disc s menu if one is available No subtitles This function is dependent on software availability Subtitles are cleared from the television Display the subtitles Soundtrack and or subtitle language is not the one selected with ...

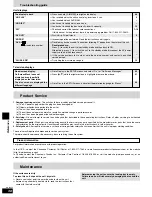
Page 37: ... 3 Aspect with the on screen menu icons Ensure that the unit is connected directly to the television and is not connected through a video cassette recorder Connect to the component video 480P input terminals on a television compatible with this unit s copy guard system You cannot view progressive video if your television is not compatible Change the size with the variable zoom function The images ...

Page 38: ...ly or exhibits a marked change in performance or e The unit has been dropped or the cabinet damaged 2 Servicing Do not attempt to service the unit beyond that described in these operating instructions Refer all other servicing to authorized servicing personnel 3 Replacement parts When parts need replacing ensure the servicer uses parts specified by the manufacturer or parts that have the same char...

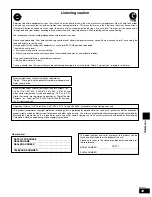
Page 39: ...ring Guard against this by setting your equipment at a safe level BEFORE your hearing adapts To establish a safe level Start your volume control at a low setting Slowly increase the sound until you can hear it comfortably and clearly and without distortion Once you have established a comfortable sound level Set the dial and leave it there Taking a minute to do this now will help to prevent hearing...

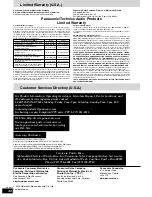
Page 40: ...hotel office restaurant or other business rental use of the product service by anyone other than a Factory Servicenter or other Authorized Servicer or damage that is attributable to acts of God THERE ARE NO EXPRESS WARRANTIES EXCEPT AS LISTED UNDER LIMITED WARRANTY COVERAGE THE WARRANTOR IS NOT LIABLE FOR INCIDENTAL OR CONSEQUENTIAL DAMAGES RESULTING FROM THE USE OF THIS PRODUCT OR ARISING OUT OF ...

Reviews: