9
Initial Setup
(Connection)
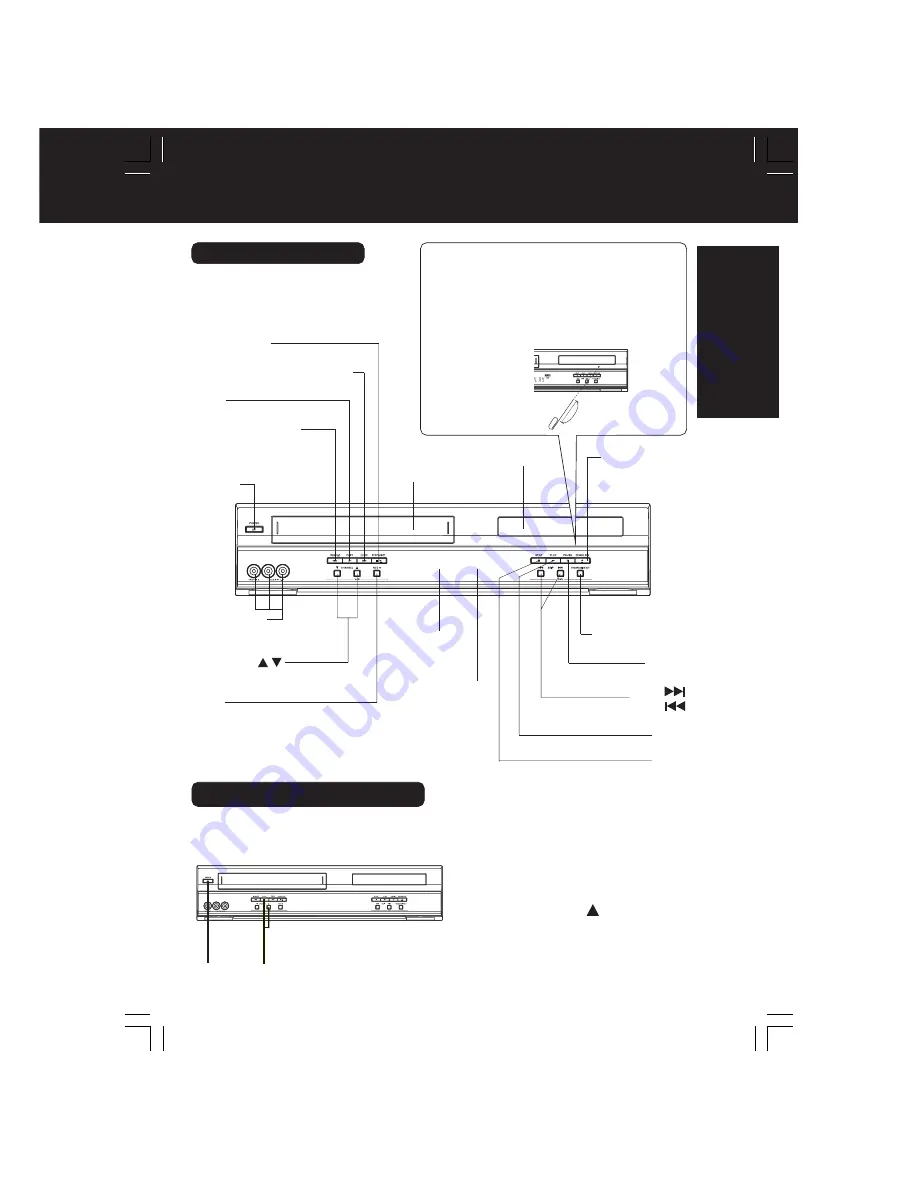
Front View of DECK
Audio/Video
Input Connector 2
(LINE 2)
p. 35
CHANNEL /
TRACKING/V-LOCK
pp. 4, 21
POWER
PAUSE
p.
23
OPEN/CLOSE
p.
22
STOP/EJECT
p. 20
Multi Function
Display
p.
11
REC
p. 21
Disc Tray
Cassette
Compartment
PLAY
p. 20
Remote
Sensor
FAST FORWARD/SEARCH
p. 20
REWIND/SEARCH
p. 20
Front View of DECK
SKIP
SKIP
p.
23
STOP
p.
22
Bold
:
VCR Function
Italic:
DVD Function
Bold Italic
:
VCR and DVD Functions
Normal:
Others
PROGRESSIVE
p.
10
PLAY
p.
22
If the disc cannot be removed...
First, unplug DECK. Then, prepare a rigid
wire (e.g. an extended paper clip) and,
applying moderate force, insert it straight
into the hole at the base of the tray.
The tray will eject a little. Now, pull the tray
all the way out and remove the disc.
Over 2 inches
Use when moving DECK to new location, or if a mistake was made in the Initial
Setup section (return to Factory Setting).
• Make sure a tape is not inserted in the DECK.
Reset All Memory Functions
Press and hold both
VCR PLAY
and
CHANNEL
on the DECK for
more than 5 seconds.
• The power shuts off.
Turn DECK Power on.
3
Do “Initial Setup (Ready to Play)”
on page 16.
2
1
2
1
PV-D4733S-K(E) P1-25 (030314).p65
2003/04/09, 13:52
9


