Chapter 2
Getting Started — Attaching/removing the projection lens (optional)
48 - ENGLISH
Attaching/removing the projection lens (optional)
Move the lens position to the home position before replacing or removing the projection lens. (
x
page 69)
Attention
f
Replace the projection lens after turning off the power of the projector.
f
Do not touch the electric contacts of the projection lens. Dust or dirt may cause poor contact.
f
Do not touch the surface of the projection lens with your bare hands.
f
Before attaching the projection lens, remove the lens cover attached to the projection lens.
Note
f
The precautions for handling the lens are different for the Fixed-focus Lens (Model No.: ET-D75LE90). For details, refer to the Operating
Instructions of ET-D75LE90.
Attaching the projection lens
Attach the projection lens using the following procedure.
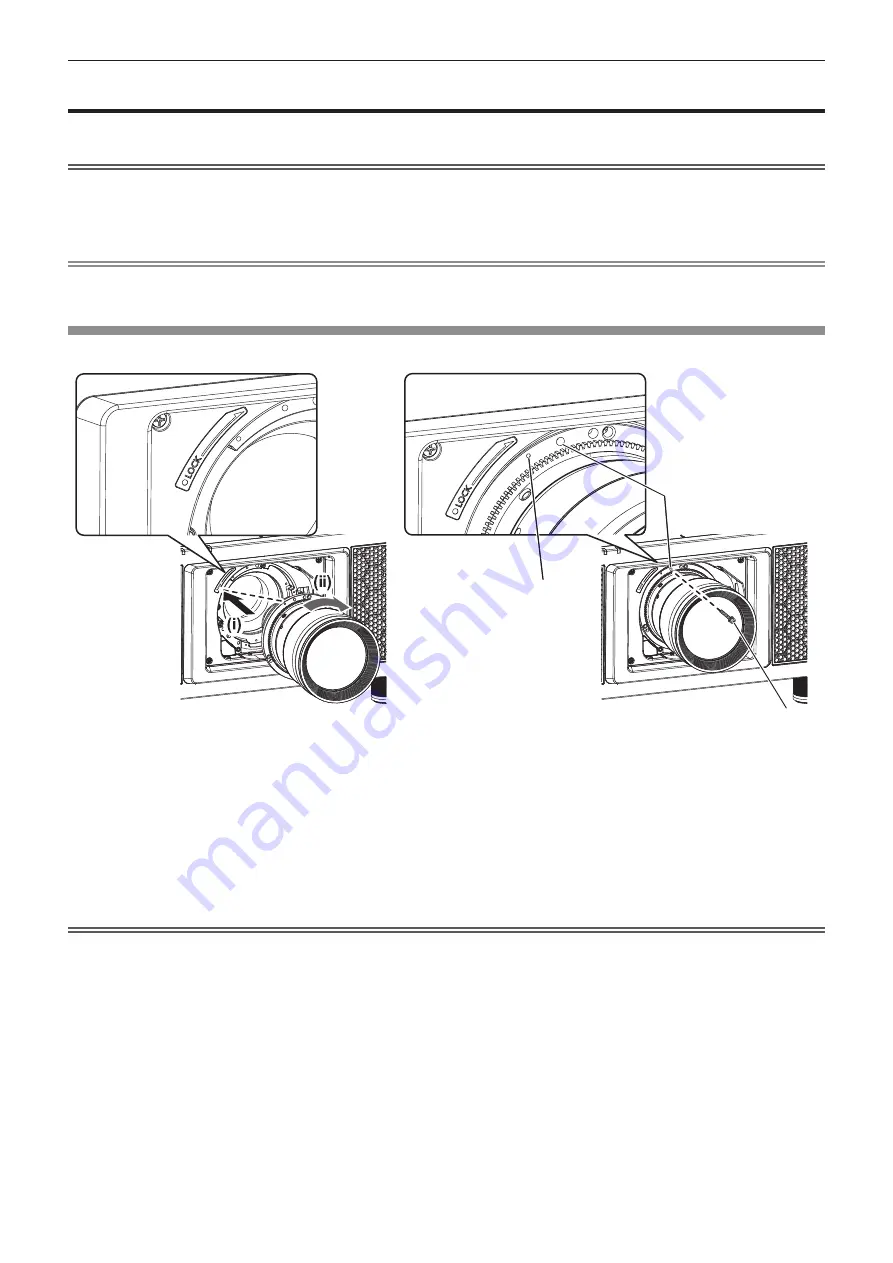
Mark (orange)
Fig. 1
Fig. 2
Screw hole A
Lens fixing screw
1) Insert the projection lens by aligning the mark on the projection lens (orange) with the mark on the
projector (
E
to the left of LOCK) and turn clockwise until it clicks. (Fig. 1)
2) Secure the projection lens with the supplied lens fixing screw. (Fig. 2)
f
Use a Phillips screwdriver to secure it in screw hole A located to the right of mark on the projection lens
(orange).
f
Some lenses may not have a screw hole A for securing the projection lens.
Attention
f
Turn the projection lens counterclockwise to confirm that it does not come out.


