32
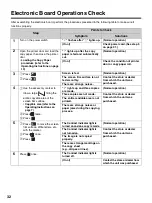
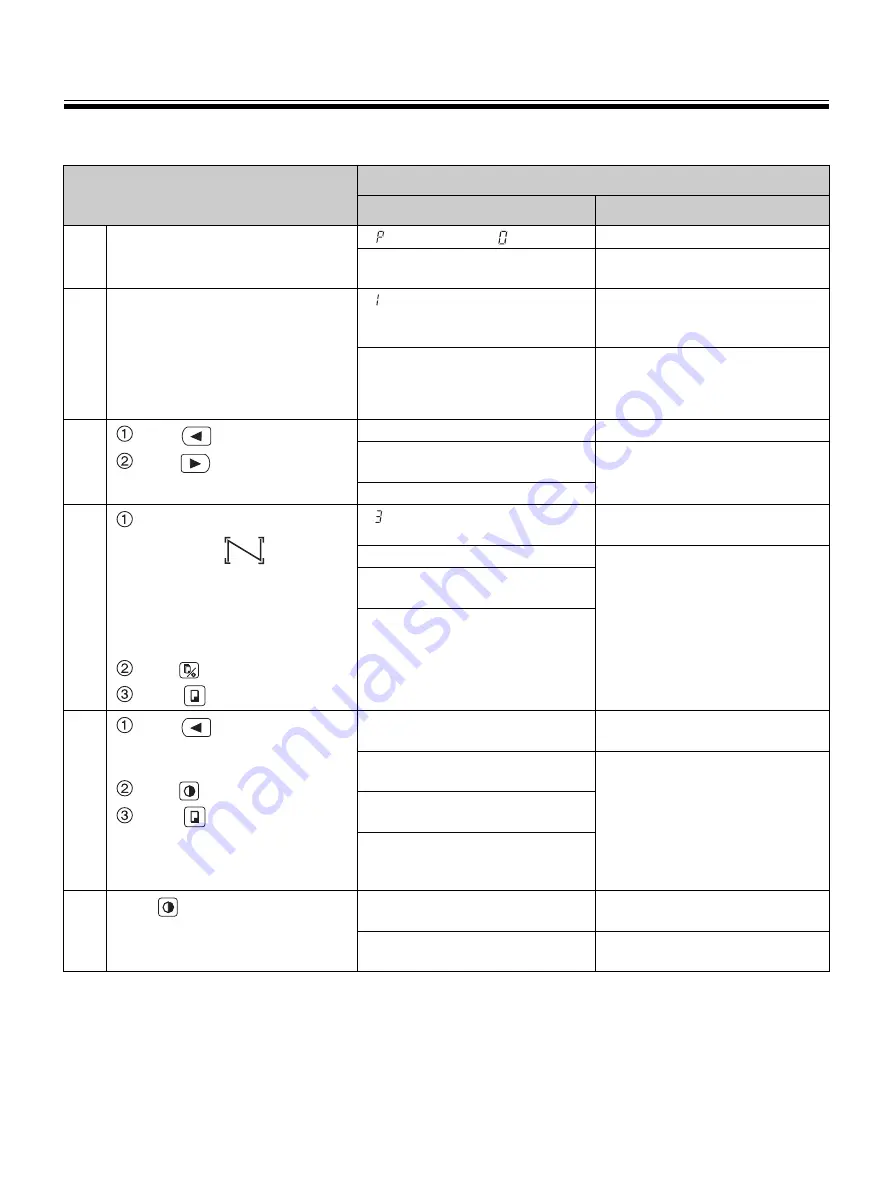
Electronic Board Operations Check
After assembling the electronic board, perform the procedures presented in the following table to make sure it
functions properly.
Step
Points to Check
Symptom
Solutions
1
Turn on the power switch.
“ ” flashes after “ ” lights up.
(Normal operation)
(If not)
Check power cord. (See step 5
on page 31.)
2
Open the printer door and load the
copy paper, then close the printer
door.
• Loading the Copy Paper
procedure (refer to the
Operating Instructions on page
10)
“ ” lights up after the copy
paper is fed and automatically
cut.
(Normal operation)
(If not)
Check the condition of printer
door or copy paper roll.
3
Press .
Press .
Screen is fed.
(Normal operation)
The screen film surface is not
fed smoothly.
Contact the store or dealer
from which the unit was
purchased.
There are strange noises.
4
Use the accessory marker to
draw a large
filling the
entire copyable area of the
screen film surface.
• Copyable area (refer to the
Operating Instructions on
page 7)
Press
twice.
Press .
“ ” lights up and three copies
are made.
(Normal operation)
Three copies are not made.
Contact the store or dealer
from which the unit was
purchased.
The entire readable area is not
printed.
There are strange noises or
paper jams during the copying
process.
5
Press
to move the screen
film surface. Write letters, etc.
with the marker.
Press
once.
Press .
The Contrast indicator light is
turned on and one copy is made.
(Normal operation)
The Contrast indicator light is
not turned on.
Contact the store or dealer
from which the unit was
purchased.
The image is not copied
properly.
There are strange markings on
the copy sheet
(e.g., stripes or lines).
6
Press
once.
The Contrast indicator light is
turned off.
(Normal operation)
(If not)
Contact the store or dealer from
which the unit was purchased.

