13
RF IN
RF OUT
AV 1
(TV)
AV 2
(DECODER/
EXT)
AUDIO
R
L
VIDEO
AUDIO
R
L
VIDEO
VCR/DVD OUT
DVD OUT
DIGITAL AUDIO
(PCM/BITSTREAM)
OPTICAL
OPTICAL
Connectors
AUDIO IN
R
L
VIDEO
IN
LP
Before connecting
!
Verify that all devices to be connected
up are unplugged from the AC mains.
39
TIMER REC
REC
CH
JET REW
QUICK
ERASE
AV3 IN
VIDEO
L/MONO
AUDIO
R
NV-VP31
Video Audio
R
L
41
39
INPUT
REPEAT
!
!
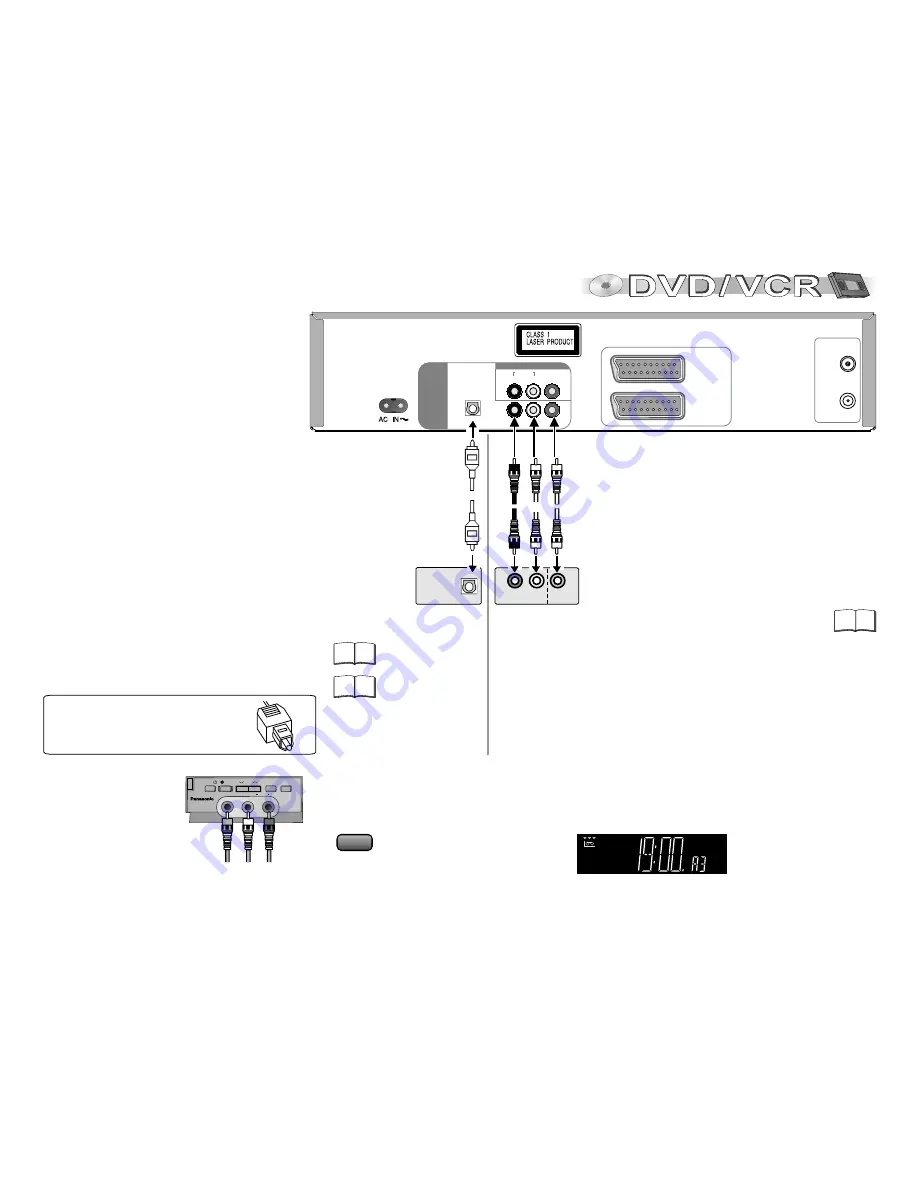
Connect your external unit (e.g. a video camcorder) with the front panel input.
Just seize the L/Mono port for mono recording of the audio signal.
Use
INPUT
to select A3.
Connection to AV3 (front panel)
Push the jack all the way into the
socket with this side facing up.
Optical digital
audio cable
Amplifier (example)
Red
Amplifier or
TV set (example)
Yellow
White
To be able to hear sound in stereo or Dolby Pro Logic
quality, attach an amplifier or an analogue audio
component supporting these features.
To avoid sound quality problems
deactivate function Advanced Surround
when you attach an amplifier with Dolby
Pro Logic functionality.
Digital connectors (OPTICAL)
To play programmes with a 5.1-channel surround sound, connect
the digital audio output ( OPTICAL ) with an external Multi-
channel Dolby Digital Decoder, for example.
Prerequisites for making recordings with an external digital
recorder
-
The original disc must not be copy-protected.
-
The recorder must be able to process signals with a scanning
frequency of 48 kHz/16 bit.
-
You cannot make MP3/WMA recordings.
D
Adapt the Audio SETUP menu settings to the following:
PCM Digital Output: [Up to 48 kHz]
Dolby Digital / DTS Digital Surround / MPEG: [PCM]
D
Deactivate function Advanced Surround.
Connection to a TV set without a scart socket or
to an amplifier component (home cinema):
DVD connectors


