background image

13

To Make an S-VHS Recording on a Cassette

For recordings that you intend to play back on this VCR or
another S-VHS VCR, we recommend that you record in the
S-VHS format to take advantage of this system’s superior
picture quality. Be sure to use a cassette bearing the
S-VHS logo.

Insert an S-VHS cassette so that the S-VHS indicator is
lit. Recording is performed in the S-VHS format.
– When a cassette that was recorded in the S-VHS

format is played back on a VHS VCR without S-VHS
quasi playback function, noisy playback picture will
appear.

If you want to make a recording in the VHS format in
order to play it back on a VHS VCR, press the [S-VHS/
S-VHS ET] button, so that the S-VHS indicator goes
out.
– Once a setting is selected, it remains in effect until the

AC mains lead is disconnected.

Note:

– When receiving SECAM signals or when you set [Video

system] on the Manual tuning menu or [TV system] on the
Other settings menu to [MESECAM] (see pages 23 and
26), recording is automatically made in the VHS format
even if the S-VHS indicator is lit.

To Record a VHS Cassette with S-VHS
Quality
(S-VHS Expansion Technology)

S-VHS ET stands for Super-VHS Expansion Technology.
This function allows recording and playback in S-VHS picture
quality on a normal VHS cassette.

Recording in this format is only possible in the
SP mode.
If LP or EP mode is selected while setting up a
timer recording, the S-VHS ET indicator turns off
and S-VHS ET is cancelled.

Insert a VHS cassette and press the [S-VHS/S-VHS ET]
button, so that the S-VHS ET indicator is lit.
Recording is performed in the S-VHS picture quality.
– When a cassette that was recorded using S-VHS ET

function is played back on a VHS VCR without S-VHS
quasi playback function, noisy playback picture will
appear.

Notes:

– We recommend that you use cassettes other than type

E300.

– When receiving SECAM signals or when you set [Video

system] on the Manual tuning menu or [TV system] on the
Other settings menu to [MESECAM] (see pages 23 and
26), recording is automatically made in the VHS format
even if the S-VHS ET indicator is lit.

– If you want to record and playback with highest possible

picture quality or store the cassettes for a long time, we
recommend that you use S-VHS cassettes and record in
the S-VHS format.

– If you record in the S-VHS ET format, the picture quality

may not be very good with certain types of cassettes.
To avoid negative surprises, we recommend that you make
a trial recording and confirm that the quality of the recorded
picture is satisfactory.
To ensure optimum picture quality, we recommend the use
of high-quality type cassettes.

– We recommend entering [S-VHS ET] into the label on any

cassette that you have recorded using the S-VHS ET
function so that you will be able to distinguish such
cassettes from VHS cassettes.

The following table lists the playback formats that are
compatible with this VCR’s recording standard.

Cassette

VHS

S-VHS

Recording

format

VHS

(SP/LP/EP)

S-VHS ET

(SP)

VHS

(SP/LP/EP)

S-VHS

(SP/LP/EP)

Compatible Playback

Equipment

VHS, S-VHS,

VHS with SQPB

°

1

S-VHS

°

2

,

VHS with SQPB

VHS, S-VHS,

VHS with SQPB

S-VHS,

VHS with SQPB

S-VHS/S-VHS ET

S-VHS/S-VHS ET

°

1

SQPB stands for S-VHS quasi playback.

°

2

Some models are not compatible.

Summary of Contents for NV-HS825EE

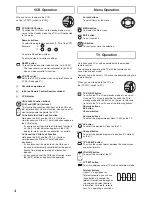
Page 1: ...g 11 Satellite or Digital Receiver 14 Timer Recording 15 Tape Library System 17 Search Functions 20 Editing 21 Connecting a Decoder 22 Connecting a Stereo Amplifier 22 Manual Tuning 23 Setting the VCR s Clock 25 Various Settings 26 Other Function 28 Before Requesting Service 29 Index 31 Specifications 32 Please read through all these operating instructions especially the safety information before ...

Page 2: ...oing so may cause noise to adversely affect the picture and sound Do Wipe the VCR with a clean and dry cloth Install the VCR in a horizontal position Keep the VCR TV and other equipment switched off until you have finished all connections Condensation may form in the following cases The VCR is brought from cold surroundings into a well heated room The VCR is suddenly brought from cool surroundings...

Page 3: ...M REPLAY REC VCR DATE CANCEL RESET AUDIO OSD DISPLAY AV LINK SP LP EP r s r s r s ON OFF TV SV V AV MENU EXIT OK PROG CHECK TIMER Á LIBRARY SEARCH INDEX 1 2 3 7 8 0 9 4 5 6 INPUT SELECT VCR 1 2 Í DIRECTTV REC TV ASPECT TV TEXT TRACKING V LOCK VOLUME STILL ALBUM REPLAY REC VCR DATE CANCEL RESET AUDIO OSD DISPLAY AV LINK SP LP EP r s r s r s ON OFF TV SV V AV MENU EXIT OK PROG CHECK TIMER Á LIBRARY ...

Page 4: ...s If you disconnect the mains lead the Child Lock function is automatically cancelled after the power backup time of approximately 60 minutes has elapsed If you cannot cancel the Child Lock function press the EXIT button and perform the operation Menu Operation Cursor buttons To select items on the menu MENU button To display the Main menu EXIT button To exit the menu OK button To comfirm or store...

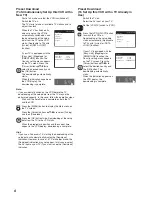
Page 5: ... connected to the matching pin of the plug on the other end of the cable If the TV set is equipped with a 21 pin Scart socket that features Y C signal separation set the Normal S Video Output switch on the rear panel to S VIDEO OUT so that you can play back with high picture quality and use a fully wired 21 pin Scart cable not supplied to connect the VCR to the TV 1 2 3 4 5 6 7 8 9 10 11 Connectin...

Page 6: ...as finished its own auto setup the VCR is automatically switched on and the downloading of the setup data from the TV to the VCR starts Applicable to TVs with Q Link or DATA LOGIC function If your TV is equipped with the Easy Link Megalogic or SMARTLINK function the Country setting menu appears on the TV screen Press the Cursor buttons 3421 to select the desired country and the OK button The downl...

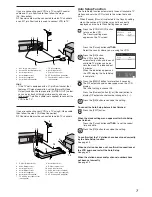
Page 7: ... 24 When the station names and or channel numbers have not been set correctly See page 23 Country Deutschland Česká Rep Magyarország Polska Россия others Panasonic VCR EXIT MENU OK 1 2 3 4 5 6 7 8 9 10 11 Í 1 AV1 21 pin Scart socket 2 Normal S Video Output switch 3 Aerial Input socket 4 Aerial Output socket 5 Aerial not supplied 6 Aerial lead not supplied 07 TV not supplied 08 Aerial Input socket ...

Page 8: ...tion appears on the VCR display the Auto Setup is complete If after setup the picture on the video playback channel is distorted change the RF output channel on the VCR to another number Press the MENU button for more than 5 seconds The RF output channel number appears on the VCR display The initial setting is channel 38 Press the Numeric buttons or Channel button Change the RF output channel Ente...

Page 9: ...r appears on the VCR display When loading cassette No 5 The cassette number and tape contents are not displayed for the following types of cassettes a New never used cassettes b Cassettes recorded on another VCR c Cassettes whose cassette number was deleted from the Library data d Certain other kinds of cassettes In the above cases the following indications appear This indication appears for sever...

Page 10: ...hen you play back a tape recorded in the EP mode the picture and the sound may be distorted However these are not malfunctions REPLAY To Change the Playback Speed Press the Pause Still button on the VCR Rotate the Shuttle Ring clockwise or counterclockwise To Locate Precisely the Desired Moment in a Scene Press the Pause Still button on the VCR Turn the Jog Dial clockwise or counterclockwise If yo...

Page 11: ...R without EP mode function On the other VCR even with EP mode function when you play back the tape recorded in the EP mode the picture may be distorted However this is not a malfunction To Display the Approximate Remaining Tape Time See page 26 to set the tape length Press the OSD DISPLAY button repeatedly until the remaining tape time appears on the VCR display Pressing the OSD DISPLAY button onc...

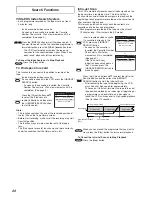
Page 12: ... you want to record copy onto this VCR When that point is reached press the Pause Slow button again to start recording the new picture and sound from the playback unit To record copy additional scenes press the Pause Slow button to put this VCR in the recording pause mode and then perform above step again At the point where you want to stop recording press the Stop button to finish recording Hint ...

Page 13: ...n so that the S VHS ET indicator is lit Recording is performed in the S VHS picture quality When a cassette that was recorded using S VHS ET function is played back on a VHS VCR without S VHS quasi playback function noisy playback picture will appear Notes We recommend that you use cassettes other than type E300 When receiving SECAM signals or when you set Video system on the Manual tuning menu or...

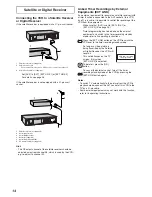
Page 14: ...ple a satellite receiver with a timer function is connected to the AV2 socket of this VCR by a 21 pin cable it is possible to control the recording of the VCR from this equipment Make sure that AV2 is set to EXT LINK 1 or EXT LINK 2 See page 26 Timer programming has to be done on the external equipment and switch to the timer recording standby mode refer to its operating instructions Press the EXT...

Page 15: ...Pos Start Stop VPS Name DATE ON OFF 1 PDC Timer recording Panasonic VCR 1 2 ShowView 7 2 1 1 1 4 Panasonic VCR PROG CHECK r s ON DATE r s r s OFF SP LP EP OK TIMER Á SV V OK OK TIMER Á SP LP EP To Programme with the ShowView Function The ShowView numbers make it extremely easy to set the VCR for timer recording The duration of a timer recording programmed with ShowView number may be slightly longe...

Page 16: ...ronises the recording start and stop with the actual broadcasting start and stop of the TV programme Press the Cursor buttons 3421 to make the ON indication appear ON must be displayed under VPS PDC on the TV screen The TV station must broadcast VPS PDC signals The programme starting time must be set correctly to the starting time listed in the newspaper magazine To Check Change or Cancel Timer Re...

Page 17: ...ta in the memory in case of a power failure and stores it for up to 5 years when the VCR is not connected to an AC mains socket When the recording is completed and you eject the cassette the cassette number remains displayed on the VCR display for approximately 30 seconds Be sure to write this number on the cassette label When the VCR s entire memory area has been used up by the Tape Library data ...

Page 18: ...g Press the LIBRARY SEARCH button The Cassette Number Check starts automatically Wait a few moments until the check is completed When it is completed the cassette number and its contents recorded programmes appear on the On Screen Display and the cassette number appears on the VCR display To Check on Which Cassette a Desired Programme Is Recorded Press the MENU button and then press the Cursor but...

Page 19: ...the Cursor buttons 34 to select the desired programme Press the Red button If you are sure to delete the programme press the OK button If you want to delete all the programmes repeat above procedures When no programme is left and the message appears press the OK button The cassette s Tape Library data are now deleted from the VCR s Tape Library If you want to keep the cassette number press the EXI...

Page 20: ... signals to play back the beginning of each programme recorded on the cassette one after another at high speed This lets you quickly and easily check the contents of a cassette and find a desired programme Each programme recorded on the tape must be at least 15 minutes long 25 minutes in the EP mode Insert a recorded video cassette If a cassette is already in the VCR press the LIBRARY SEARCH butto...

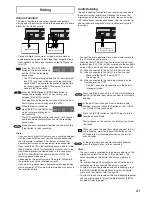
Page 21: ...sette Digital still camera Video movie camera Audio Dubbing The audio dubbing function lets you record new sound onto the normal mono audio track Although this erases the original sound on the normal audio track the sound on the Hi Fi audio tracks remains unchanged Use this function to add narration or background music to a previously made recordings Connect the audio equipment or a video movie ca...

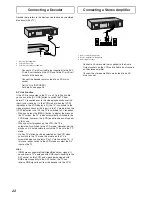
Page 22: ...screen the TV is also automatically switched to the VCR mode however the VCR indication does not appear in this case When you start playback on the VCR the TV is automatically switched to the VCR mode However during playback it is not possible to switch the TV back to the TV mode If a Pay TV station has been selected on the VCR when you switch to the TV mode the picture on the TV is scrambled when...

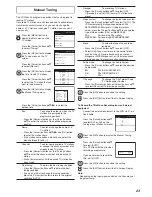
Page 23: ...receive TV stations If available TV stations are not received due to extraordinary transmission circumstances or if you want to change the name of a TV station or change a TV station you can set it up manually Press the MENU button to display the Main menu on the TV screen Press the Cursor buttons 34 to select Tuning Press the OK button to display the Tuning menu on the TV screen Press the Cursor ...

Page 24: ...OK OK MENU OK OK To Delete Add or Move a Programme Position Press the MENU button to display the Main menu on the TV screen Press the Cursor buttons 34 to select Tuning Press the OK button to display the Tuning menu on the TV screen Press the Cursor buttons 34 to select Manual Press the OK button to display the list of tuned TV stations Press the Cursor buttons 34 to select the desired TV station ...

Page 25: ...c time correction function may not work In this case the indication for Clock setting is automatically reset to MAN If the reception conditions improve later on it may be possible to activate this function Press the EXIT button to exit the On Screen Display Hints If Clock setting is set to AUTO when you open the Clock screen do not set it to MAN otherwise the automatic time correcting function is ...

Page 26: ...e timer recording standby mode After all programmed timer recordings have been made and after all programmed data have been erased the VCR switches over to the Power save mode When the VCR is off Pay TV programmes cannot be watched on the TV because the signal from the connected decoder is not looped through To watch them turn on the VCR VCR display For automatic change of the brightness of the VC...

Page 27: ...s that can receive NTSC 4 43 signal Audio playback To set the audio mode to be used during playback Select the type of Audio mode as follows NORMAL Normally set to this position MIX Use this setting when playing back a cassette tape on which audio dubbing has been performed The Hi Fi sound track and the normal sound track mono are played back together Remote To set the remote control mode Select t...

Page 28: ...n receiving a TV programme with the Stereo Bilingual or NICAM sound system the type of sound system in which it is broadcast is automatically indicated STEREO When receiving a Stereo NICAM stereo broadcast M1 M2 When receiving a Bilingual NICAM dual sound broadcast M1 When receiving a NICAM monaural broadcast 3 Sound mode during playback L R At each press of the AUDIO button the selected playback ...

Page 29: ... audio tracks set Mono to ON for the programme position on which the desired programme is broadcast as described on page 23 Before Requesting Service On Screen Display Messages The error messages are given in brackets Please insert video tape You pressed the REC button REC OTR button the DIRECT TV REC button the Play button the Fast Forward button or the Rewind button when no cassette was inserted...

Page 30: ...ing wrong with the installation of the aerial No programme was recorded because the VCR is not tuned correctly Tune it correctly No programme was recorded because the AV input was selected on the VCR Select the programme position of the desired TV programme Timer recording does not work correctly Time and date are not set or they are set incorrectly Set the time and date correctly The starting tim...

Page 31: ...Menu 4 MESECAM 23 26 Mono 23 NICAM 29 NTSC playback 28 NTSC recording 28 OSD 26 28 OTR 11 PAL 23 26 Playback 10 Playback off timer 10 Pos 16 23 Power save 26 Page Q Link 5 Recording 11 Remaining tape time 11 Repeat 10 Replay 10 Reset 4 Review 10 Rewind 10 RF 5 7 8 RFC system 26 Satellite receiver 14 Scart cable 5 7 Shipping condition 24 ShowView 15 Slow playback 10 SP 11 15 16 Stereo 28 Still albu...

Page 32: ... FM azimuth recording Colour signal converted subcarrier phase shift recording Input Level 1 0 Vp p 75 ohm terminated Output Level 1 0 Vp p 75 ohm terminated RF Modulated UHF channel 21 69 75 ohm AUDIO Input Level j6 dBV more than 10 kohm Output Level j6 dBV less than 1 kohm Video Horizontal Resolution Colour more than 240 lines VHS SP Colour more than 400 lines S VHS S VHS ET S Video socket SP Si...

Reviews: