90
Web screen configurations
(continued)
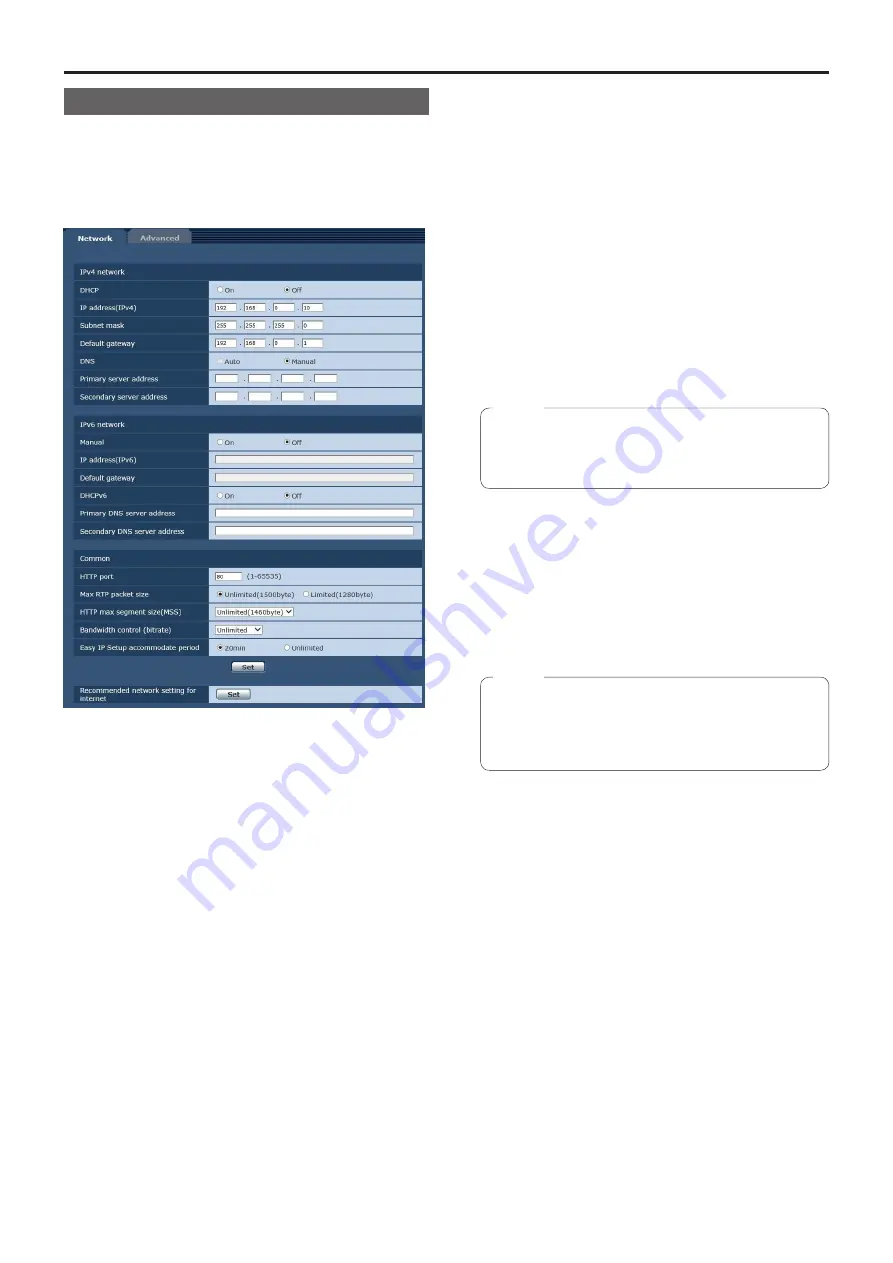
Network setup screen [Network]
Configure network settings in the Network setup screen.
The Network setup screen consists of the two tabs of
[Network] and [Advanced].
Network setup screen [Network]
Click the [Network] tab of the Network setup screen.
The following information is required to configure network
settings. Consult your network administrator or Internet
service provider.
●
IP address
●
Subnet mask
●
Default gateway (when using a gateway server or router)
●
HTTP port
●
DNS primary and secondary server addresses (when
using DNS)
z
IPv4 network
DHCP
Whether the DHCP function is to be used is set by
selecting “On” or “Off” here. Set the DHCP server in
such a way that the same IP address cannot be used by
personal computers without the DHCP function or by other
network cameras.
For details on the server settings, consult your network
administrator.
Factory settings:
Off
IP address(IPv4)
Input the unit’s IP address here when the DHCP function
is not going to be used. Input an address that will not
duplicate an existing IP address which has been set for a
personal computer or another network camera.
Factory settings:
192.168.0.10
●
Multiple IP addresses cannot be used even when
the DHCP function is used. For details on the DHCP
server settings, consult your network administrator.
Note
Subnet mask
Input the unit’s subnet mask here if the DHCP function is
not going to be used.
Factory settings:
255.255.255.0
Default gateway
Input the unit’s default gateway if the DHCP function is not
going to be used.
Factory settings:
192.168.0.1
●
Multiple IP addresses cannot be used for the default
gateway even when the DHCP function is used.
For details on the DHCP server settings, consult
your network administrator.
Note
Summary of Contents for Micro SD AW-HN40HWPC
Page 139: ...139 Memo ...
Page 140: ...Web Site http www panasonic com Panasonic Corporation 2017 ...


