29
Recording
(ENG) DVQX1022
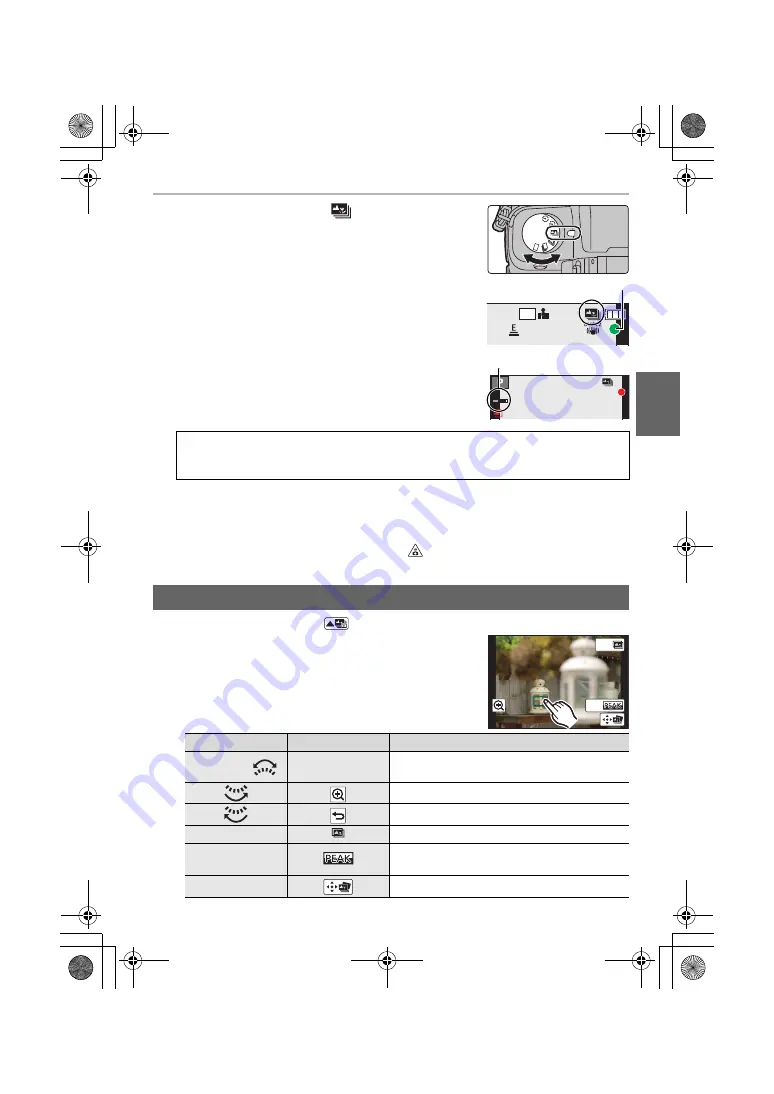
1
Set the drive mode dial to [
].
2
Decide on the composition, and press the shutter
button halfway.
• Auto Focus will detect focus areas on the screen.
(Excluding the edges of the screen)
• If no areas on the screen can be brought into focus, the
focus display (
A
) will flash. Recording is not possible in
this case.
3
Press the shutter button fully to start recording.
• The focus point changes automatically while recording.
When the icon (
B
) disappears, recording automatically ends.
• A motion picture in MP4 format will be recorded. (Audio will not be recorded.)
• When [Auto Review] is enabled, a screen that lets you select the desired focus area will
be displayed. (P29)
• If the surrounding temperature is high, recording is performed continuously with the Post Focus
function, or the temperature of the camera rises, [
] may be displayed and recording may
stop halfway through to protect the camera. Wait until the camera cools down.
1
Select an image with the [
] icon on the playback screen, and press
3
.
2
Touch the desired focus area.
• If a picture that is in focus is not available for the selected
area, a red frame will be displayed. You cannot save a
picture in this case.
• You cannot select the edges of the screen.
From the time you press the shutter button halfway until the end of recording:
• Maintain the same distance to the subject and the same composition.
• Do not operate the zoom.
Selecting the desired focus area and saving a picture
Button operation
Touch operation
Description of operation
3
/
4
/
2
/
1
/
Touching
Selects a focus area.
• It cannot be selected during enlarged display.
Enlarges the display.
Reduces the display (during enlarged display).
[Fn1]
Switches to the Focus Stacking function. (P30)
[Fn2]
In-focus portions are highlighted with colour.
([Peaking])
[MENU/SET]
Saves the picture.
5
m
04
s
4K
4:3
残
5
m
04
s
A
B
Fn2
Fn1
DMC-G85KMBody_GN-DVQX1022_eng.book 29 ページ 2016年8月30日 火曜日 午後1時27分


