


12.
Using the Wi-Fi function
292
When the Wi-Fi function is used, a record is saved in the history. You can register records
as favorites.
Connecting from the history or favorites allows you to easily connect with the same
settings as the previous ones.
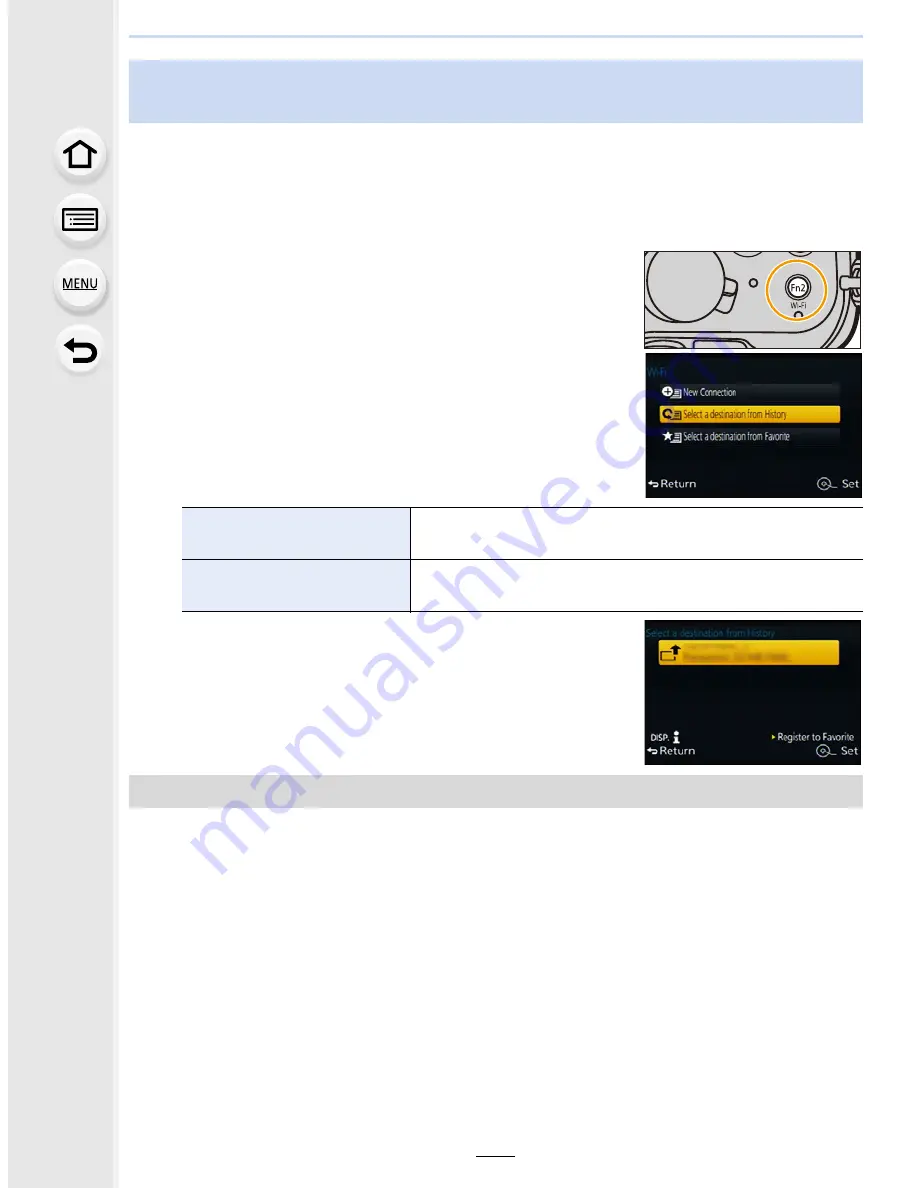
1
Press [Wi-Fi].
2
Select [Select a destination from History] or
[Select a destination from Favorite].
3
Select item.
1
Press [Wi-Fi].
2
Select [Select a destination from History].
3
Select the item you want to register to favorites, and then press
1
.
4
Enter a registration name.
•
For details on how to enter characters, refer to
“
Entering Text
”
section on
P55
.
•
A maximum of 30 characters can be entered. A two-byte character is treated as two
characters.
Connecting quickly with the same settings as the previous ones
([Select a destination from History]/[Select a destination from Favorite])
[Select a destination from
History]
Connects with the same settings as the previous ones.
[Select a destination from
Favorite]
Connects with settings registered as favorites.
Registering records as favorites


