background image

12

VQT2B46 (ENG)

Setting Date/Time 

(Clock Set)

• The clock is not set when the camera is shipped.

A

B

ON

OFF

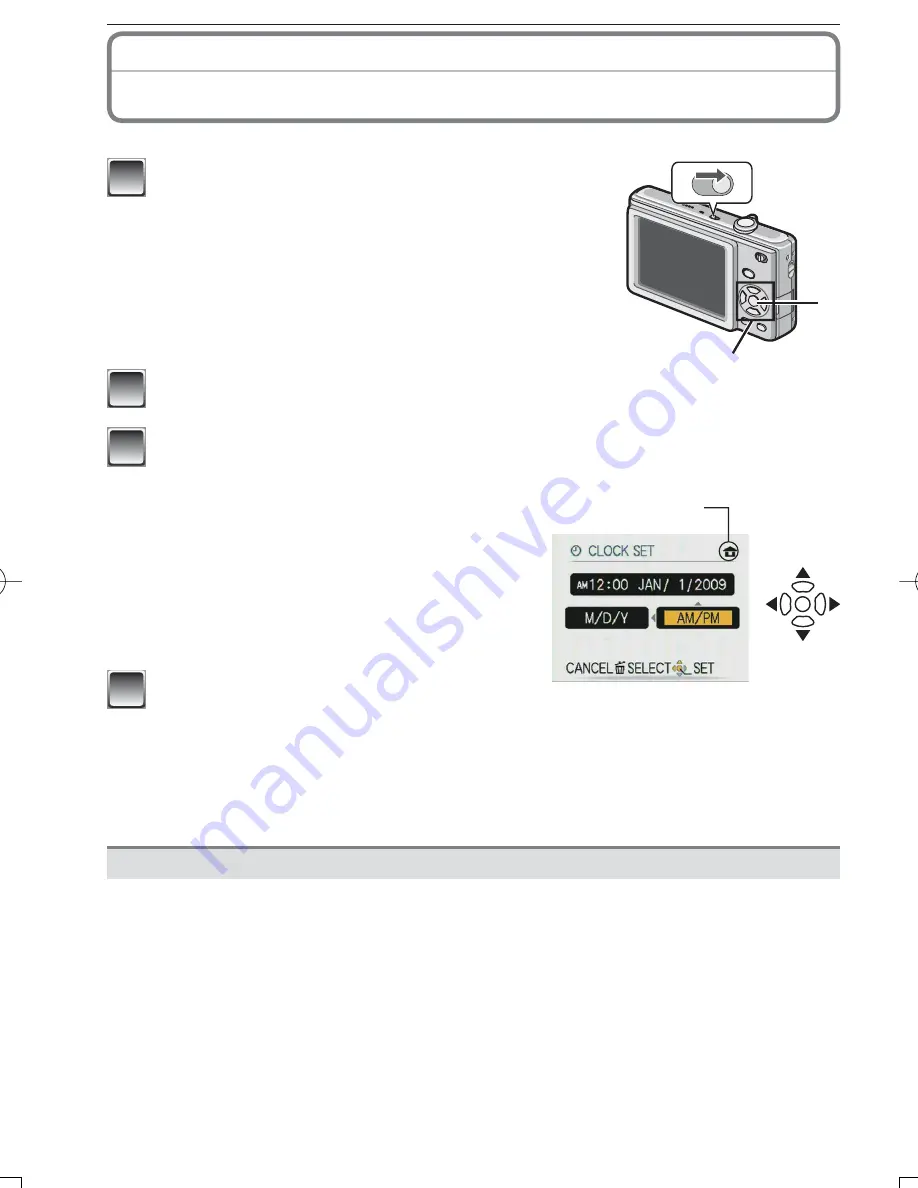
1

  Turn the camera on.

• When you turn the camera on, [PLEASE SET THE 

CLOCK] message appears. (It does not appear in 

Playback Mode.)

A

 [MENU/SET] button

B

 Cursor buttons

2

 Press [MENU/SET].

C

q

D

w

3

 Press 

w

/

q

 to select the items (year, month, day, hour, minute, display 

sequence or time display format), and press 

e

/

r

 to set.

C

  Time at the home area

D

  Time at the travel destination

4

:  Cancel without setting the clock.

• Select either [24HRS] or [AM/PM] for the 

time display format.

• AM/PM is displayed when [AM/PM] is 

selected.

4

 Press [MENU/SET].

• After completing the clock settings, turn the camera off. Then turn the camera 

back on, switch to Recording Mode, and check that the display re

fl

 ects the 

settings that were performed.

• When [MENU/SET] has been pressed to complete the settings without the clock 

having been set, set the clock correctly by following the “Changing the clock 

setting” procedure.

Changing the clock setting

1

  Press [MENU/SET] in Normal Picture Mode.

2

 Press 

e

/

r

 to select [CLOCK SET].

3

 Press 

q

 and perform steps 

3

 and 

4

 for setting.

4

  Press [MENU/SET] to close the menu.

• You can also set the clock in the [SETUP] menu.

• The clock setting is maintained for 3 months using the built-in clock battery even without 

the battery. (Leave the charged battery in the unit for 24 hours to charge the built-in 

battery.)

VQT2B46̲DMC-FS4̲PC̲EN.indd   12

VQT2B46̲DMC-FS4̲PC̲EN.indd   12

2009/02/17   12:51:01

2009/02/17   12:51:01

Summary of Contents for LUMIX DMC-FS4

Page 1: ...d the instructions completely Please also refer to Operating Instructions PDF format recorded on the CD ROM containing the Operating Instructions supplied You can learn about advanced operation methods and check the Troubleshooting For Canadian assistance please call 1 800 99 LUMIX 1 800 995 8649 or send e mail to lumixconcierge ca panasonic com ...

Page 2: ...etc of your Digital Camera may look somewhat different from those shown in the illustrations in these Operating Instructions SDHC Logo is a trademark THE SOCKET OUTLET SHALL BE INSTALLED NEAR THE EQUIPMENT AND SHALL BE EASILY ACCESSIBLE Product Identification Marking is located on the bottom of units Dear Customer Thank you for choosing Panasonic You have purchased one of the most sophisticated an...

Page 3: ...o flame Do not leave the battery ies in an automobile exposed to direct sunlight for a long period of time with doors and windows closed Warning Risk of fire explosion and burns Do not disassemble heat above 60 ºC 140 ºF or incinerate About the battery charger CAUTION DO NOT INSTALL OR PLACE THIS UNIT IN A BOOKCASE BUILT IN CABINET OR IN ANOTHER CONFINED SPACE ENSURE THE UNIT IS WELL VENTILATED TO...

Page 4: ... camera is adversely affected by electromagnetic equipment and stops functioning properly turn the camera off and remove the battery or disconnect AC adaptor DMW AC5PP optional Then reinsert the battery or reconnect AC adaptor and turn the camera on Do not use the camera near radio transmitters or high voltage lines If you record near radio transmitters or high voltage lines the recorded pictures ...

Page 5: ...emory Card an SDHC Memory Card and a MultiMediaCard When the term card is used in these operating instructions this refers to the following types of Memory Cards SD Memory Card 8 MB to 2 GB SDHC Memory Card 4 GB to 32 GB MultiMediaCard Still pictures only More specific information about memory cards that can be used with this unit When you use a card of 4 GB or more capacity you can use only the S...

Page 6: ...ng 13 About the menu operation 14 Taking Pictures Using the Automatic Function Auto Scene Mode 16 Scene detection 17 Taking Pictures with Your Favorite Settings Normal Picture Mode 18 Focusing 18 Playing Back Pictures Normal Playback Mode 19 Deleting Pictures 20 To delete a single picture 20 To delete multiple pictures up to 50 or all the pictures 20 Reading the Operating Instructions PDF format 2...

Page 7: ...to your PC 5 CD ROM Operating Instructions 6 Hand Strap 7 Battery Case SD Memory Card SDHC Memory Card and MultiMediaCard are indicated as card in the text Card is optional You can record or play back pictures on the built in memory when you are not using a card For information about optional accessories please refer to Digital Camera Accessory System If any of the accessories are lost customers i...

Page 8: ...ions using the cursor buttons are described as follows e g When you press the r p button or Press r 13 MODE button 14 MENU SET button 15 DISPLAY button 16 Q MENU Delete button 19 20 21 22 17 Hand strap eyelet Attach the strap when using the camera to prevent it from dropping 18 AV OUT DIGITAL socket 19 Tripod receptacle When you use a tripod make sure the tripod is stable with the camera attached ...

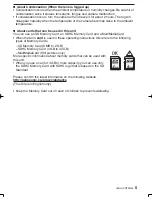
Page 9: ...tery pack is used Use the dedicated charger and battery The battery is not charged when the camera is shipped Charge the battery before use Charge the battery with the charger indoors Charge the battery in a temperature between 10 C to 35 C 50 F to 95 F The battery temperature should also be the same 1 Attach the battery paying attention to the direction of the battery 90 2 Connect the charger to ...

Page 10: ...ting recording 30 seconds after the camera is turned on Recording once every 30 seconds with full flash every second recording Rotating the zoom lever from Tele to Wide or vice versa in every recording Turning the camera off every 10 recordings Leaving the camera until the battery cools down CIPA is an abbreviation of Camera Imaging Products Association The number of recordable pictures varies dep...

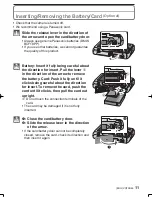
Page 11: ...ng careful about the direction for insert Pull the lever A in the direction of the arrow to remove the battery Card Push it fully until it clicks being careful about the direction for insert To remove the card push the card until it clicks then pull the card out upright B Do not touch the connection terminals of the card The card may be damaged if it is not fully inserted 3 1 Close the card batter...

Page 12: ... selected 4 Press MENU SET After completing the clock settings turn the camera off Then turn the camera back on switch to Recording Mode and check that the display reflects the settings that were performed When MENU SET has been pressed to complete the settings without the clock having been set set the clock correctly by following the Changing the clock setting procedure Changing the clock setting...

Page 13: ... List of Recording Modes Auto Scene Mode Taking pictures easily 1 Normal Picture Mode Taking pictures in the desired setting 5 Scene Mode Taking pictures according to the scene 6 Motion Picture Mode This mode allows you to record motion pictures with audio List of Playback Modes 9 Normal Play Mode Playing back the pictures normally 8 Slide Show Mode Playing back the pictures continuously z Favorit...

Page 14: ...corded pictures e SETUP menu This menu lets you perform the clock settings select the operating beep tone settings and set other settings which make it easier for you to operate the camera Available in Recording or Playback Mode How to use the menu 1 Press MENU SET to display the menu You can switch menu screens by the page from any menu item by rotating the zoom lever Example Selecting the Normal...

Page 15: ...UP menu When the camera shows the menu screen after step 1 on How to use the menu 1 Press w to move the menu icon 2 Press r to select the SETUP menu icon e 3 Press q to move to the menu item list Proceed to step 2 on How to use the menu ...

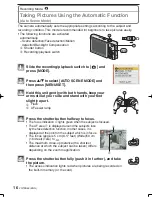
Page 16: ...it gently with both hands keep your arms still at your side and stand with your feet slightly apart C Flash D AF assist lamp 4 Press the shutter button halfway to focus The focus indication E lights green when the subject is focused F E The AF area F is displayed around the subject s face by the face detection function In other cases it is displayed at the point on the subject which is in focus Th...

Page 17: ...e Note Due to conditions such as the ones below a different scene may be identified for the same subject Subject conditions When the face is bright or dark The size of the subject The distance to the subject The contrast of the subject When the subject is moving When zoom is used Recording conditions Sunset Sunrise Under low brightness conditions When the camera is shaken To take pictures in an in...

Page 18: ...alfway to focus The focus indication green lights when the subject is focused The focus range is 50 cm 1 64 feet to 7 5 Press the shutter button fully push it in further and take the picture The access indication lights red when a picture is being recorded on the built in memory or the card Focusing Aim the AF area at the subject and then press the shutter button halfway Focus When the subject is ...

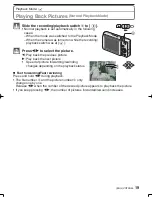
Page 19: ...k switch was at 5 2 Press w q to select the picture B C w Play back the previous picture q Play back the next picture Speed of picture forwarding rewinding changes depending on the playback status Fast forwarding Fast rewinding Press and hold w q during playback The file number B and the picture number C only change one by one Release w q when the number of the desired picture appears to play back...

Page 20: ...ss 4 2 Press w to select YES and then press MENU SET To delete multiple pictures up to 50 or all the pictures 1 Press 4 2 Press e r to select DELETE MULTI or DELETE ALL and then press MENU SET DELETE ALL step 5 DISPLAY 3 Press e r w q to select the picture and then press DISPLAY to set Repeat this step The selected pictures appear with b When DISPLAY is pressed again the setting is canceled 4 Pres...

Page 21: ...Operating Instructions PDF format Follow the instructions below for your OS to install it If using Windows 2000 SP4 Windows XP SP2 or SP3 Windows Vista and SP1 Insert the CD ROM containing the Operating Instructions supplied click Adobe R Reader R and then follow the messages on the screen to install If using Windows 98 98SE Me Download and install a version of Adobe Reader that you can use with y...

Page 22: ...Macro Auto scene 5 cm 0 17 feet Wide 50 cm 1 64 feet Tele to 7 Scene mode settings may be different to those shown above Shutter system Electronic shutter Mechanical shutter Motion picture recording WVGA 848 480 pixels 30 frames second When a card is used VGA 640 480 pixels 30 frames second When a card is used QVGA 320 240 pixels 30 frames second With audio Burst recording Burst speed Approx 3 pic...

Page 23: ...et to 6 3 m 20 7 feet Wide i AUTO AUTO AUTO Red eye reduction Forced ON Forced ON Red eye reduction Slow sync Red eye reduction Forced OFF Microphone Monaural Speaker Monaural Recording media Built in Memory Approx 50 MB SD Memory Card SDHC Memory Card MultiMediaCard Still pictures only Picture size Still picture 8M 3264 2448 pixels 5M 2560 1920 pixels 3M 2048 1536 pixels 7M 3264 2176 pixels 2 5M ...

Page 24: ...rd and battery Approx 134 g 0 30 lb with Memory Card and battery Operating Temperature 0 C to 40 C 32 F to 104 F Operating Humidity 10 to 80 Battery Charger Panasonic DE A59B Information for your safety Input 110 V to 240 V 50 60 Hz 0 2 A Output CHARGE 4 2 V 0 65 A Equipment mobility Movable Battery Pack lithium ion Panasonic DMW BCF10PP Information for your safety Voltage capacity Minimum 3 6 V 9...

Page 25: ...y Card RP SDV16GU1K 12 GB SDHC Memory Card RP SDM12GU1K 8 GB SDHC Memory Card RP SDV08GU1K 6 GB SDHC Memory Card RP SDM06GU1K 4 GB SDHC Memory Card RP SDM04GU1K 4 GB SDHC Memory Card RP SDV04GU1K 2 GB SD Memory Card RP SDM02GU1A 2 GB SD Memory Card RP SDV02GU1A 1 GB SD Memory Card RP SDR01GU1A Refer to P10 for information about the battery charging time and the number of recordable pictures NOTE A...

Page 26: ...ickTime logo are trademarks or registered trademarks of Apple Inc used under license therefrom Panasonic Canada Inc 5770 Ambler Drive Mississauga Ontario L4W 2T3 www panasonic ca Panasonic Corporation 2009 Printed in China ...

Reviews: