background image

20

7.4.

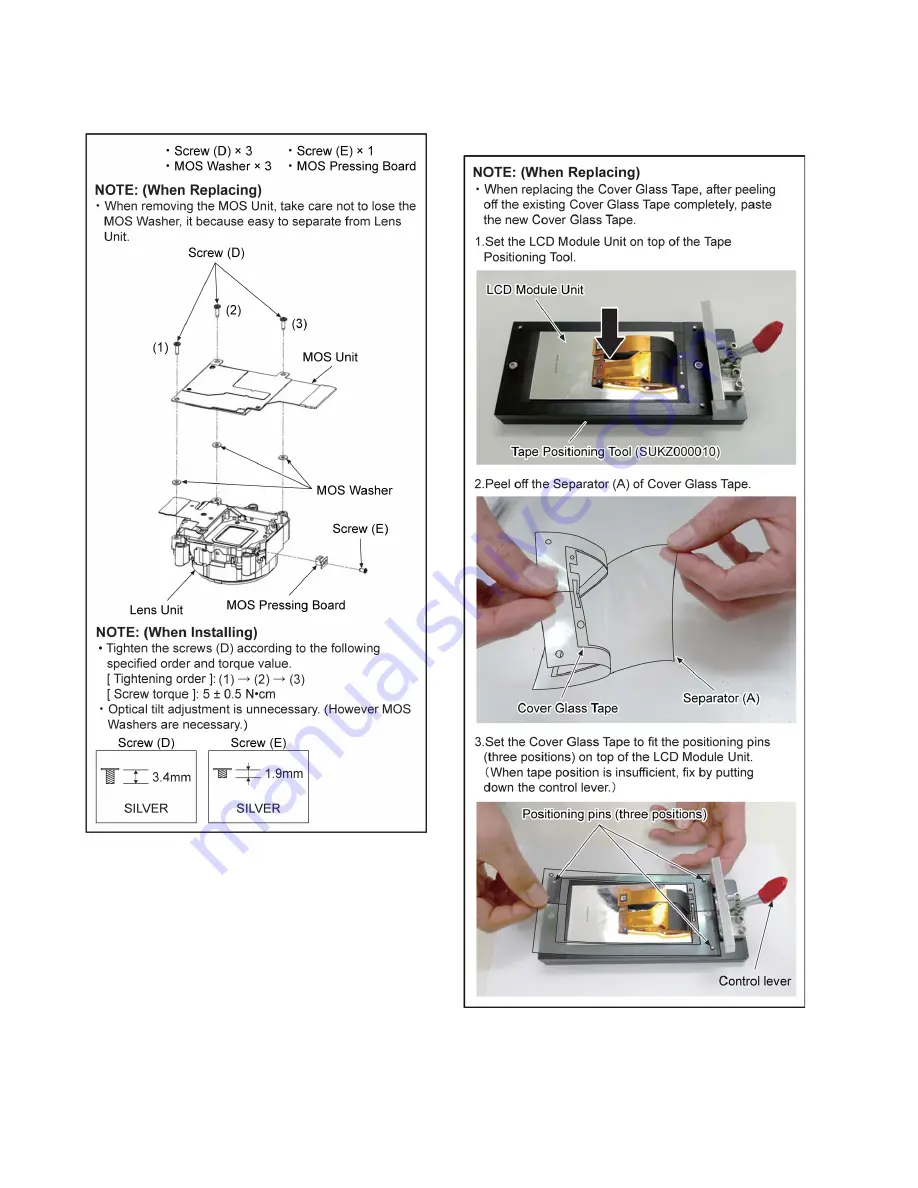
Removal of the MOS Unit

To prevent the MOS Unit from catching the dust and dirt, do not
remove the MOS Unit except for replacing. 

7.5.

How to Use Servicing Tool for 
Assembling

7.5.1.

How to paste the Cover Glass Tape

Summary of Contents for Limux DMC-CM1GC

Page 1: ...nasonic Corporation 2015 Unauthorized copy ing and distribution is a violation of law ORDER NO DSC1504014CE B26 Digital Camera Model No DMC CM1P DMC CM1GC DMC CM1GH DMC CM1GN DMC CM1GT Colour S Silver Type ...

Page 2: ...iption About Lead Free Solder PbF 8 3 4 How to Define the Model Suffix 9 4 Specifications 10 5 Location of Controls and Components 12 6 Service Fixture Tools 13 6 1 Service Fixture and Tools 13 6 2 When Replacing the Main P C B Unit 13 7 Disassembly and Assembly Instructions 14 7 1 Disassembly Flow Chart 14 7 2 P C B Location 14 7 3 Disassembly Procedure 15 7 4 Removal of the MOS Unit 20 7 5 How t...

Page 3: ...ng exposed to shock hazards 1 2 Leakage Current Cold Check 1 Unplug the AC cord and connect a jumper between the two prongs on the plug 2 Measure the resistance value with an ohmmeter between the jumpered AC plug and each exposed metal lic cabinet part on the equipment such as screwheads connectors control shafts etc When the exposed metal lic part has a return path to the chassis the reading shou...

Page 4: ... solder or unsolder ES devices 4 Use only an antistatic solder removal device Some solder removal devices not classified as antistatic ESD protected can generate electrical charge sufficient to damage ES devices 5 Do not use freon propelled chemicals These can generate electrical charges sufficient to damage ES devices 6 Do not remove a replacement ES device from its protective package until immed...

Page 5: ...t designed specifically for its use Replacement batteries must be of same type and manufacture They must be fitted in the same manner and location as the original battery with the correct polarity contacts observed Do not attempt to re charge the old battery or re use it for any other purpose It should be disposed of in waste products destined for burial rather than incineration NOTE Above caution...

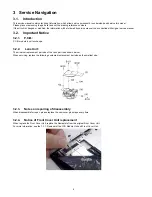
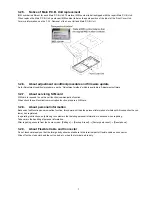
Page 6: ... 2 Important Notice 3 2 1 P C B P C B module is unit exchange 3 2 2 Lens Unit The minimum replacement part size of the Lens part is as shown below When servicing replace the following numbered replacement part size as the smallest size 3 2 3 Notes on repairing of disassembly When disassemble for repair please replace the new cover glass tape every time 3 2 4 Notice of Front Cover Unit replacement ...

Page 7: ...he call function communication function When check the call function communication function prepare a SIM card 3 2 8 About personal information Because of call function communication function this camera unit has the personal information of wireless LAN connection the cus tomer has registered In operating instructions enlightening to customers that deleting personal information in advance when rep...

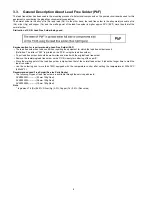
Page 8: ... the equipment for which the lead free solder is used Definition The letter of PbF is printed on the P C B using the lead free solder To put lead free solder it should be well molten and mixed with the original lead free solder Remove the remaining lead free solder on the P C B cleanly for soldering of the new IC Since the melting point of the lead free solder is higher than that of the normal lea...

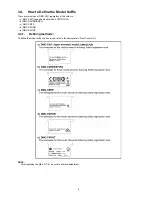
Page 9: ...of the colours a DMC CM1 Japan domestic model CM1GC GH b DMC CM1EB EF EG c DMC CM1P d DMC CM1GN e DMC CM1GT 3 4 1 Defining methods To define the model suffix to be serviced refer to the nameplate in Front Cover Unit NOTE After replacing the Main P C B be sure to achieve adjustment ...

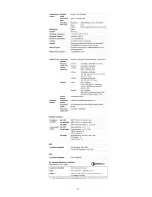
Page 10: ...10 4 Specifications The following specification is for DMC CM1P Some specifications may differ depending on model suffix ...

Page 11: ...11 ...

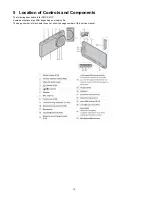
Page 12: ...ion of Controls and Components The following description is for DMC CM1P Some descriptions may differ depending on model suffix The page number in this chapter does not show the page number of this service manual ...

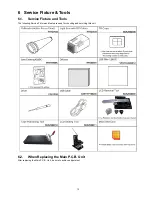
Page 13: ...ols 6 1 Service Fixture and Tools The following Service Fixture and tools are used for checking and servicing this unit 6 2 When Replacing the Main P C B Unit After replacing the Main P C B Unit be sure to achieve adjustment ...

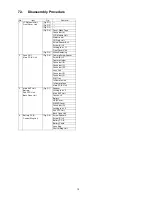
Page 14: ...14 7 Disassembly and Assembly Instructions 7 1 Disassembly Flow Chart This is a disassembling chart When assembling perform this chart conversely 7 2 P C B Location ...

Page 15: ...nit Fig D6 Camera Screw Spacer Screw B 3 Camera Holder Connector B Connector C Connector D Lens Unit Connector E Connector F SIM Tray In Camera Unit In Camera Tape Main P C B Unit 3 Main ANT Unit Battery Sub FPC Unit Back Case Unit Fig D7 Speaker Locking tab 3 Main ANT Unit Convex 3 Battery USB Cover SIM SD Cover Connector G Locking tab 2 Sub FPC Unit Back Case Unit 4 Battery P C B Control Ring Un...

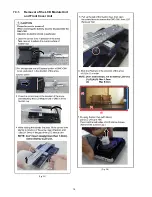
Page 16: ...16 7 3 1 Removal of the LCD Module Unit and Front Cover Unit Fig D1 Fig D2 ...

Page 17: ...17 Fig D3 Fig D4 ...

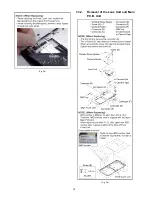
Page 18: ...18 Fig D5 7 3 2 Removal of the Lens Unit and Main P C B Unit Fig D6 ...

Page 19: ...ry P C B and Control Ring Unit Fig D8 NOTE When Installing Make sure to confirm the following points when installing The screw is tightened enough Installing conditions are fine No distortion no abnormal space No dust and or dirt on lens surfaces LCD image is fine No dust and or dirt on it and no gradient images ...

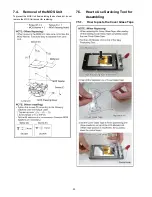
Page 20: ...moval of the MOS Unit To prevent the MOS Unit from catching the dust and dirt do not remove the MOS Unit except for replacing 7 5 How to Use Servicing Tool for Assembling 7 5 1 How to paste the Cover Glass Tape ...

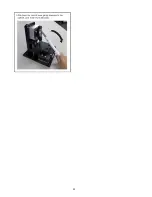
Page 21: ...21 7 5 2 How to install the LCD Module Unit ...

Page 22: ...22 ...

Page 23: ...ng table When concerned part is replaced be sure to achieve the necessary adjustment s As for Adjustment condition procedure see the Adjustment method which is available in Adjustment software NOTE After the adjustment is finished that you do the following Execute from the home screen Settings Backup and Reset Factory data reset Reset phone Please update to the latest firmware ...

Page 24: ... and LCD Panel with your hand When cleaning the lens use air blower to blow off the dust When cleaning the LCD Panel dampen the lens cleaning paper with lens cleaner and the gently wipe the its surface Note The Lens Cleaning Kit VFK1900BK Only supplied as 10 set Box is available as Service Aid ...

Reviews: