


19
Se
tti
ng
S
e
gm
e
nt
at
io
n
Co
n
di
tio
n f
or
C
ha
ra
ct
er
s
2ch
.
2.3.1 Image Filter
Grayscale Preprocess
Select a maximum of 10 types from the following 21 filters for a
captured gray image. The combination is called a preprocess group,
and a maximum of 16 preprocess groups (A to P) for 1 type and 1
camera can be stored.
This preprocess function is the data common to all checkers.
1.
Select one from preprocessing group A to P in "Grayscale Preprocess".
2.
Select “Filter Type” and specify the desired filter from 21 types.
Selectable preprocessings are as follows.
Dilation / Erosion / Erosion -> Dilation / Dilation -> Erosion / Auto Correct. / Gray Cut / Area Averaging
/ Correction Setting / Median / Smoothing / Sobel / Prewitt / Laplacian / Edge Extract. X / Edge Extract.
Y / Sharpen / Tophat / Dynamic / Frequency Extract. / Rotation / Reflect
Refer to Chapter 4.6.5 in the PV200 User's Manual for the details of preprocess filters and setting procedure.
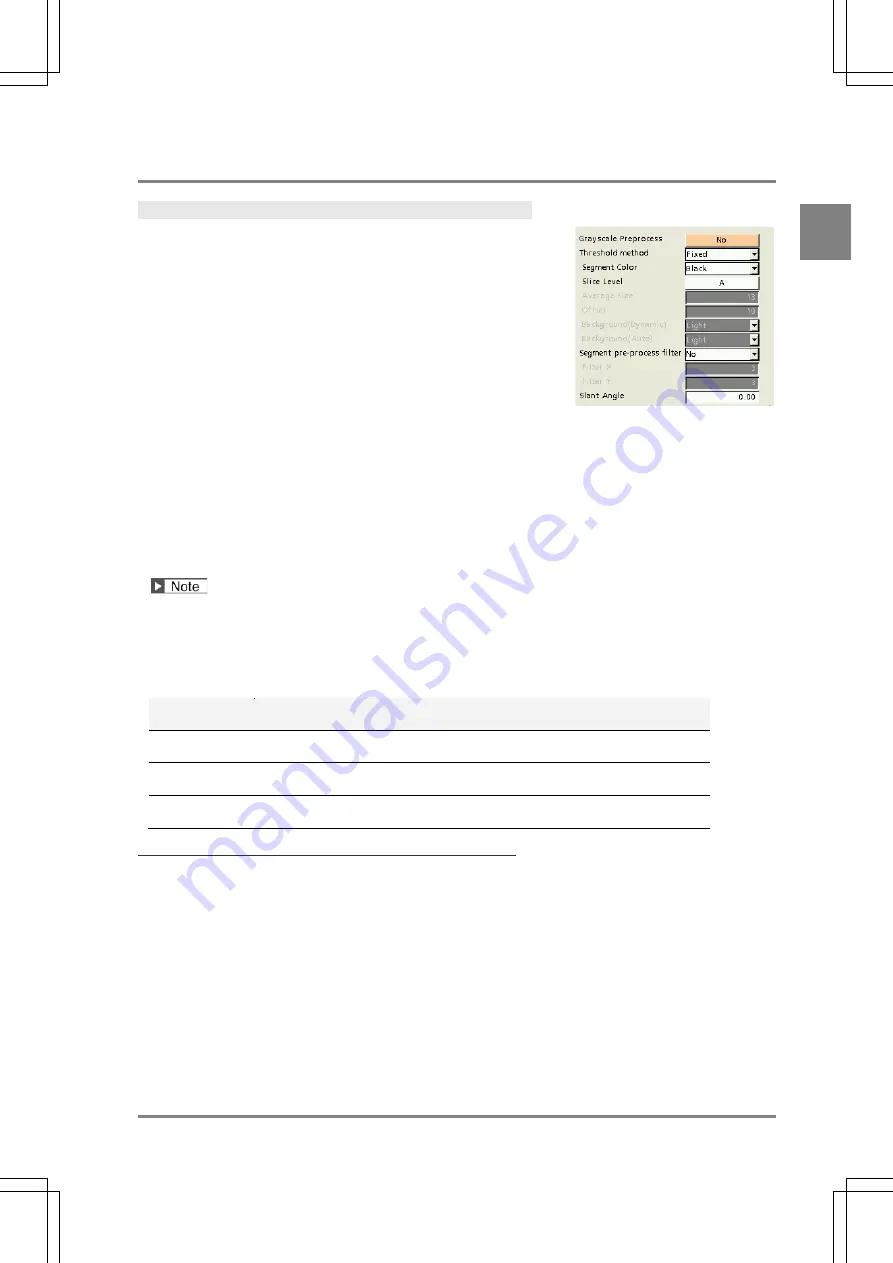
Threshold method
Select one from the following three threshold methods according to the status of images, and set required items.
Adjust checking segmentation results, together with "Segment pre-process filter" mentioned in the next page.
Threshold
method
Usage
Fixed
When the brightness of image is always constant, and the brightness over the
image is even.
Auto
When the brightness of whole image varies every time the inspection is executed
although unevenness of brightness is less.
Dynamic
When the brightness of the image in the inspection area is uneven.
Fixed
A method to binarize based on any specified value.
Use it when there is no uneveness of brightness in the inspection area and the brightness of whole image does
not vary every time the inspection is executed.
1.
Select “Fixed" in "Threshold method".
2.
Set the color of characters in "Segment Color".
If the characters are brighter than the background, select “White”. If the object image is darker than the
background, select “Black”.
3.
Select from slice level A to P in "Slice Level".
Summary of Contents for IMAGECHECKER PV230
Page 9: ...7 Preset menu 1ch Chapter 1 Preset Menu ...
Page 15: ...13 OCR Checker 2ch Chapter 2 OCR Checker ...
Page 61: ...59 Code Reader Checker 3ch Chapter 3 Code Reader Checker ...
Page 86: ......
Page 90: ...88 List of Output to Numerical Calculation Judgement and Data R W 3ch MEMO ...
Page 91: ...89 Communication Commands 4ch Chapter 4 Communication Commands ...
Page 109: ...107 Other Functions 5ch Chapter 5 Other Functions ...


