background image

3

1 Safety Precautions

1.1.

General Guidelines

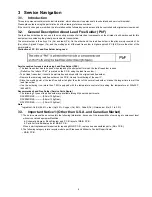
1.

IMPORTANT SAFETY NOTICE

There are special components used in this equipment
which are important for safety. These parts are marked by

in the Schematic Diagrams, Circuit Board Layout,

Exploded Views and Replacement Parts List. It is essen-
tial that these critical parts should be replaced with manu-
facturer’s specified parts to prevent X-RADIATION,
shock, fire, or other hazards. Do not modify the original
design without permission of manufacturer.

2. An Isolation Transformer should always be used during

the servicing of AC Adaptor whose chassis is not isolated
from the AC power line. Use a transformer of adequate
power rating as this protects the technician from acci-
dents resulting in personal injury from electrical shocks. It
will also protect AC Adaptor from being damaged by acci-
dental shorting that may occur during servicing.

3. When servicing, observe the original lead dress. If a short

circuit is found, replace all parts which have been over-
heated or damaged by the short circuit.

4. After servicing, see to it that all the protective devices

such as insulation barriers, insulation papers shields are
properly installed.

5. After servicing, make the following leakage current

checks to prevent the customer from being exposed to
shock hazards.

1.2.

Leakage Current Cold Check

1. Unplug the AC cord and connect a jumper between the

two prongs on the plug.

2. Measure the resistance value, with an ohmmeter,

between the jumpered AC plug and each exposed metal-
lic cabinet part on the equipment such as screwheads,
connectors, control shafts, etc. When the exposed metal-
lic part has a return path to the chassis, the reading
should be between 1 M

Ω

 and 5.2 M

Ω

. When the exposed

metal does not have a return path to the chassis, the
reading must be infinity.

1.3.

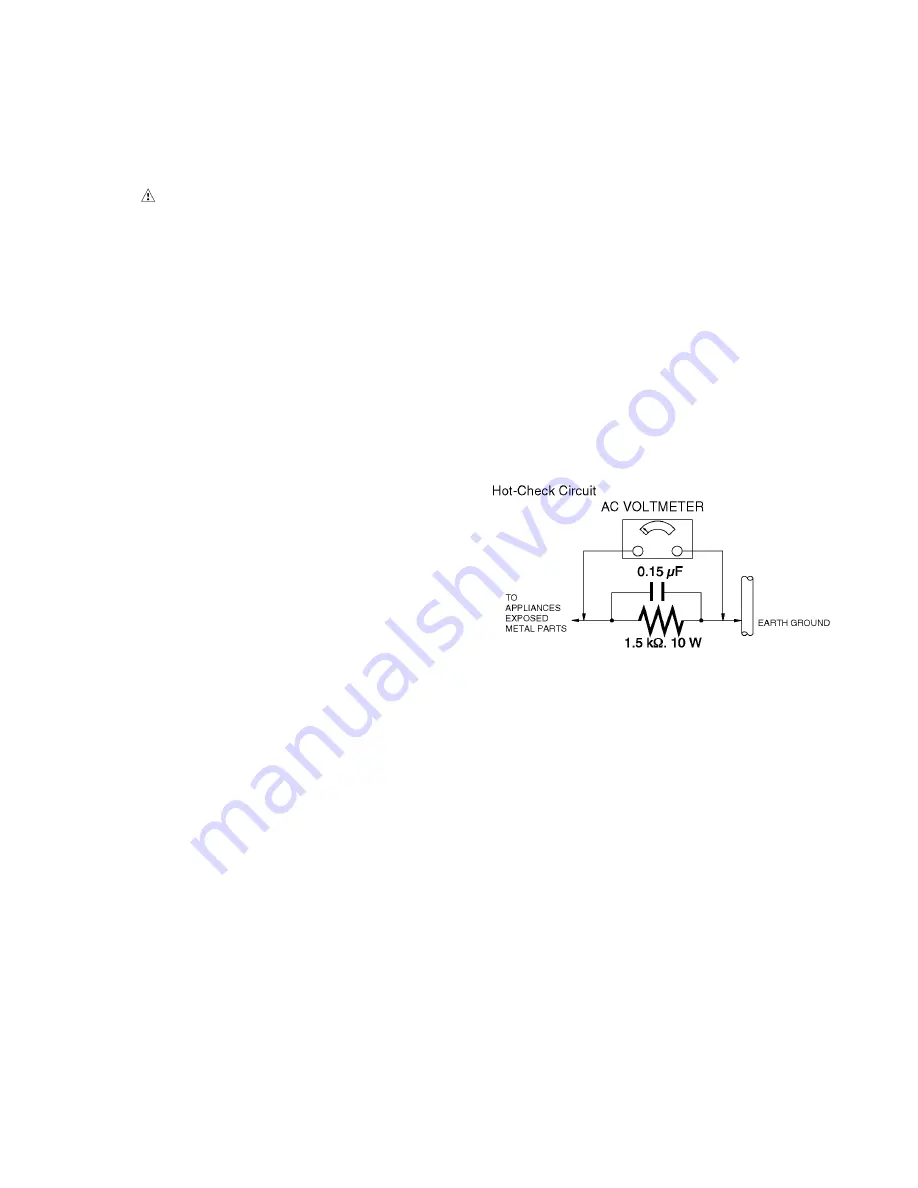
Leakage Current Hot Check
(See Figure 1.)

1. Plug the AC cord directly into the AC outlet. Do not use

an isolation transformer for this check.

2. Connect a 1.5 k

Ω

, 10 W resistor, in parallel with a 0.15 

μ

F

capacitor, between each exposed metallic part on the set
and a good earth ground, as shown in Figure 1.

3. Use an AC voltmeter, with 1 k

Ω

/V or more sensitivity, to

measure the potential across the resistor.

4. Check each exposed metallic part, and measure the volt-

age at each point.

5. Reverse the AC plug in the AC outlet and repeat each of

the above measurements.

6. The potential at any point should not exceed 0.75 V RMS.

A leakage current tester (Simpson Model 229 or equiva-
lent) may be used to make the hot checks, leakage cur-
rent must not exceed 1/2 mA. In case a measurement is
outside of the limits specified, there is a possibility of a
shock hazard, and the equipment should be repaired and
rechecked before it is returned to the customer.

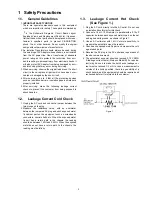
Figure. 1

Summary of Contents for HM-TA20EB

Page 1: ... distribution is a violation of law ORDER NO VM1105035CE B27 High Definition Mobile Camera Model No HM TA20P HM TA20PC HM TA20PU HM TA20EB HM TA20EC HM TA20EF HM TA20EG HM TA20EP HM TA20GC HM TA20GN Vol 1 Colour D Orange Type A Blue Type only PC EB EG GN ...

Page 2: ...ting 7 4 Specifications 8 5 Location of Controls and Components 10 6 Troubleshooting Guide 12 6 1 Confirmation Flow of Waterproof 12 6 2 Airtight Inspection with Air Leak Tester 13 6 3 Air Leak Tester RFKZ0528 Operating Instruction 14 7 Service Fixture Tools 18 7 1 When Replacing the Main P C B 18 7 2 Necessary Tool Jig 18 8 Disassembly and Assembly Instructions 19 8 1 Disassembly Flow Chart 19 8 ...

Page 3: ...exposed to shock hazards 1 2 Leakage Current Cold Check 1 Unplug the AC cord and connect a jumper between the two prongs on the plug 2 Measure the resistance value with an ohmmeter between the jumpered AC plug and each exposed metal lic cabinet part on the equipment such as screwheads connectors control shafts etc When the exposed metal lic part has a return path to the chassis the reading should ...

Page 4: ...ly a grounded tip soldering iron to solder or unsolder ES devices 4 Use only an antistatic solder removal device Some solder removal devices not classified as antistatic ESD protected can generate electrical charge sufficient to damage ES devices 5 Do not use freon propelled chemicals These can generate electrical charges sufficient to damage ES devices 6 Do not remove a replacement ES device from...

Page 5: ...This Lithium battery is a critical component It must never be subjected to excessive heat or discharge It must therefore only be fitted in requirement designed specifically for its use Replacement batteries must be of same type and manufacture They must be fitted in the same manner and location as the original battery with the correct polarity contacts observed Do not attempt to re charge the old ...

Page 6: ...P C B using the lead free solder To put lead free solder it should be well molten and mixed with the original lead free solder Remove the remaining lead free solder on the P C B cleanly for soldering of the new IC Since the melting point of the lead free solder is higher than that of the normal lead solder it takes the longer time to melt the lead free solder Use the soldering iron more than 70W e...

Page 7: ...iced refer to the rating label and caution label which are putted on the Unit NOTE After replacing the MAIN P C B or IC121 be sure to achieve update the Firmware and adjustment 1 The firmware together with version up procedure are available at software download on the Support Information from NWBG VDBG AVC web site in TSN system 2 The adjustment instruction is available at software download on the...

Page 8: ...8 4 Specifications ...

Page 9: ...9 ...

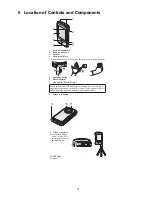
Page 10: ...6 Status indicator 7 LCD monitor Touch screen 8 Screen lock button Due to limitations in LCD production technology there may be some tiny bright or dark spots on the LCD monitor screen However this is not a malfunction and does not affect the recorded picture 1 8 2 3 4 6 7 5 9 Tripod receptacle If you attach a tripod with a 5 5 mm 0 22 S screw or larger it may damage this unit 10 LED light 11 Lens...

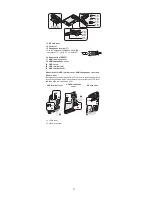
Page 11: ...14 15 16 17 18 19 20 21 φ 19 USB Latch 20 USB terminal 21 USB terminal cover About locks for USB terminal cover HDMI Headphone cover and SD card door Each door cover is equipped with a LOCK lever to lock the open close lever When opening and closing the door cover slide the LOCK lever and then slide the open close lever USB terminal cover HDMI Headphone cover SD card door LOCK lever Open close lev...

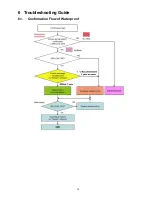
Page 12: ...12 6 Troubleshooting Guide 6 1 Confirmation Flow of Waterproof ...

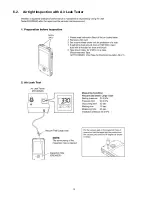
Page 13: ...13 6 2 Airtight Inspection with Air Leak Tester ...

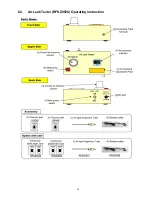
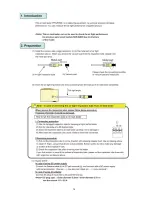
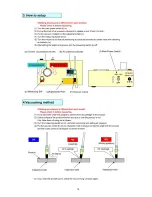
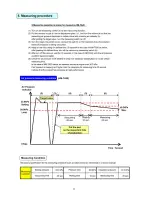
Page 14: ...14 6 3 Air Leak Tester RFKZ0528 Operating Instruction ...

Page 15: ...15 ...

Page 16: ...16 ...

Page 17: ...17 ...

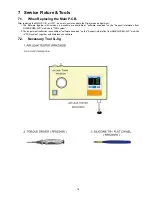
Page 18: ...stment 1 The firmware together with version up procedure are available at software download on the Support Information from NWBG VDBG AVC web site in TSN system 2 The adjustment instruction is available at software download on the Support Information from NWBG VDBG AVC web site in TSN system together with Maintenance software 7 2 Necessary Tool Jig ...

Page 19: ...19 8 Disassembly and Assembly Instructions 8 1 Disassembly Flow Chart This is a disassembling chart When assembling perform this chart conversely 8 2 PCB Location ...

Page 20: ... Cover Shaft Jack Cover Spring Jack Cover Unit 6 Main P C B Fig D10 1 Screw G 4 Screws H 1 Convex Main P C B 7 USB Unit Fig D11 CN131 Flex USB Unit 8 Mic Holder Unit Fig D12 4 Solders Mic Holder Unit 9 Battery Holder Unit Fig D13 2 Screws J Battery Holder Earth 2 Screws K 2 Convexes Heat Sink Back 1 Convex Fig D14 1 Locking tab 1 Convex USB Earth 1 Screw L Fig D15 3 Solders 1 Locking tab 1 Convex ...

Page 21: ...21 8 3 1 Removal of the Battery Fig D1 Fig D2 Fig D3 ...

Page 22: ...22 Fig D4 8 3 2 Removal of the LCD Fig D5 ...

Page 23: ...23 Fig D6 8 3 3 Removal of the Rear Case Unit Fig D7 8 3 4 Removal of the USB Cover Unit Fig D8 8 3 5 Removal of the Jack Cover Unit Fig D9 ...

Page 24: ...24 8 3 6 Removal of the Main P C B Fig D10 8 3 7 Removal of the USB Unit Fig D11 ...

Page 25: ...25 8 3 8 Removal of the Mic Holder Unit Fig D12 8 3 9 Removal of the Battery Holder Unit Fig D13 ...

Page 26: ...26 Fig D14 Fig D15 ...

Page 27: ...27 8 3 10 Removal of the CCD Unit Fig D16 Fig D17 ...

Page 28: ...28 8 3 11 Removal of the Front Case Unit Fig D18 Fig D19 ...

Page 29: ... with PC Connection method of the main unit and an exclusive adjustment jig as follows 9 1 1 Adjustment Procedure Connect the main unit to PC with USB The adjustment instruction is available at Software download on the Support Information from NWBG VDBG AVC web site in TSN System Figure of connection Figure of image when adjustment Part Number of jig Only a necessary jig mentions it in setup of el...

Page 30: ...ock of the Lightbox Refer to following Fig for datailes Adjustment Items Adjustment item as follows The adjustment instruction is available at Software download on the Support Information from NWBG VDBG AVC web site in TSN System ...

Page 31: ...31 10 Maintenance 10 1 Regular Maintenance Flow ...

Page 32: ...32 10 2 Component Kits of Waterproof ...

Page 33: ... JACK SPEAKER 8bit D A ENCODER TO CAA TO LCD TO TOUCH PANEL JPEG CONTROLLER CARD CONTROL SWITCHING CONTROL USB CHARGE LENS DRIVER CONVERTER POWER SW LCD DISPLAY 3 0inch LVDS TO ASIC 5M CMOS IMAGE SENSOR LENS MODULE CAA BLOCK DMA BLOCK PWA BLOCK BATTERY DDR SDRAM OneNAND BACKUP_BAT USB UNIT BACK UNIT SG TG HDMI CONNECTOR POWER SEQUENCER BLOCK AUDIO CODEC 32 768KHz LVDS USB TYPE A TO ASIC USBD TOUCH...

Page 34: ...GND 9 VGL 10 VGH 11 V8 12 V7 13 VDD5 14 VDD3 15 V6 16 V5 17 VDD2 18 V4 19 V3 20 V2 21 V1 22 DVDD 23 VDD 24 GND 25 D0 26 D1 27 D2 28 D3 29 D4 30 D5 31 D6 32 D7 33 DCLK 34 VSYNC 35 HSYNC 36 SCL 37 SDA 38 CS 39 VCOM Z1 Z2 CN302 1 XP 2 YN 3 YN 4 XN 5 XN 6 YP Z1 Z2 CN901 1 AFGND 2 VDD_AF 3 VDD_AF 4 DGND 5 DATA1_P 6 DATA1_N 7 DGND 8 CLK_P 9 CLK_N 10 DGND 11 DATA0_P 12 DATA0_N 13 DGND 14 VDD_SA 15 A_GND ...

Page 35: ...35 12 Exploded View and Replacement Parts List 12 1 Exploded Views ...

Page 36: ...36 ...

Page 37: ... SHEET 1 51 VU6361522564 SHEET 1 52 VU6361503785 SHEET 1 53 VU6361541794 SHEET 1 B1 VU4111911002 SCREW 1 B2 VU4111911002 SCREW 1 B3 VU4111860409 SCREW 1 B4 VU4111860409 SCREW 1 B5 VU4111868207 SCREW 1 B6 VU4111835902 SCREW 1 B7 VU4111835902 SCREW 1 B8 VU4111860409 SCREW 1 B9 VU4111860409 SCREW 1 B10 VU4111860409 SCREW 1 B11 VU4112140708 SCREW 1 B12 VU4112140708 SCREW 1 B13 VU4112140708 SCREW 1 B14...

Page 38: ...38 221 VFC4709 TRIPOD 1 222 VQL2M76 BUTTON LABEL 1 PC VU6361544399 MAINTENANCE KIT 1 Safety Ref No Part No Part Name Description Pcs Remarks ...

Reviews: