background image

PP

RQT8739-1Y

H0706WM1076

En

Cf

Dear customer

Thank you for purchasing this product. 

Before connecting, operating or adjusting this product, please read

the instructions completely. 

Please keep this manual for future reference.

As an ENERGY STAR

®

 Partner

, Panasonic

has determined that this product meets the

ENERGY STAR

®

 guidelines for energy

efficiency.

For Canada only: The word “Participant” is used in
place of the word “Partner”.

If you have any questions, contact

1-800-211-PANA (7262) in the U.S.A. or 1-800-561-5505 in 

Canada.

For the U.S.A. only

The warranty can be found on page 50.

For Canada only

The warranty can be found on page 51.

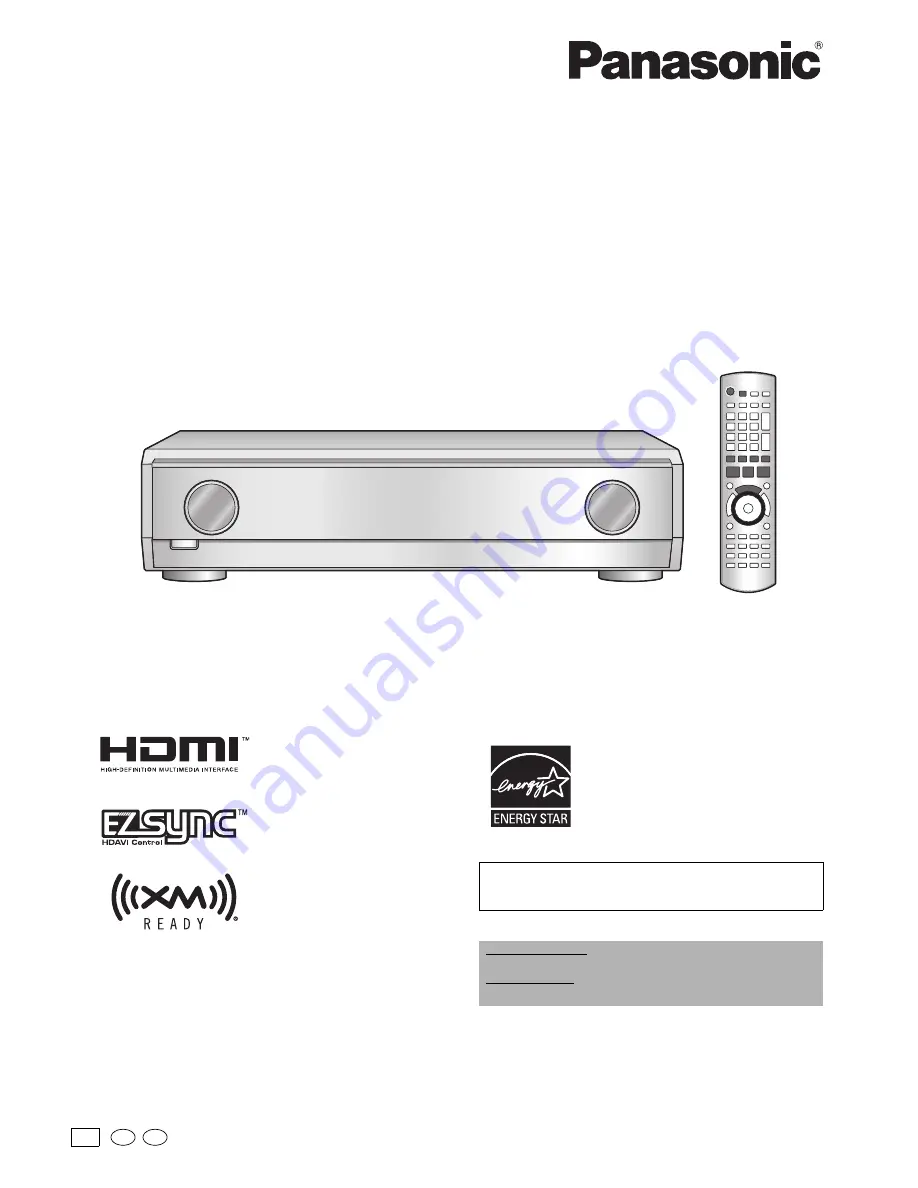
Operating Instructions

AV Control Receiver

Model No. 

SA-XR700

Summary of Contents for HDMI SA-XR700

Page 1: ...artner Panasonic has determined that this product meets the ENERGY STAR guidelines for energy efficiency For Canada only The word Participant is used in place of the word Partner If you have any questions contact 1 800 211 PANA 7262 in the U S A or 1 800 561 5505 in Canada For the U S A only The warranty can be found on page 50 For Canada only The warranty can be found on page 51 Operating Instruc...

Page 2: ...intended to alert the user to the presence of important operating and maintenance servicing instructions in the literature accompanying the appliance FCC Note This equipment has been tested and found to comply with the limits for a Class B digital device pursuant to Part 15 of the FCC Rules These limits are designed to provide reasonable protection against harmful interference in a residential ins...

Page 3: ...peaker We must make speaker settings It s difficult Remote control operations for surround playback The Home Theater begins One touch playback Automatic setting with simple operations It s easy Ez Sync HDAVI Control TM Press just one button and enjoy the Home Theater page 13 Other connections are also possible Speakers provide surround sound when you just play DVDs or receive TV broadcast page 12 ...

Page 4: ...sting the brightness of the display 33 Sleep timer 33 Settings How to set up 34 Setting speakers and their sizes 35 Setting distances 35 Setting the lowpass filter 35 Changing auto speaker settings To return speakers to factory settings Setting the unit against automatic polarity adjustment 36 Making BI AMP settings Canceling BI AMP using the triple amp mode Adjusting the balance Correcting the HF...

Page 5: ...during MULTI ROOM playback á page 27 A B 2CH MIX SPEAKERS BI WIRE TUNED MONO ST SLEEP PCM inft DTS96 24DTS ES DIGITAL EX EX M DIGITAL INPUT kHz MHz Lights on when 2 channel mix is functioning Unit display Lights on when PCM FIX is selected General display Frequency unit indicators Input signals digital audio á page 39 Radio display Sleep timer indicator Displays front speakers in use ONE TOUCH PLA...

Page 6: ...o S video terminals á page 15 You can connect cables to component terminals á page 16 You can connect cables to video terminals in the absence of component or S video terminals á page 14 You install and connect speakers in this step Using automatic speaker detection you can easily set speakers After speakers are set you can confirm audio output using the test signal You can enjoy DVDs with surroun...

Page 7: ...bles to video terminals See page 14 Step 1 CD S VIDEO VIDEO L R CD DVD 6CH IN SUBWOOFER BD DVD VCR TV STB FRONT A FRON Y TV MONITOR OUT DVD RE PB PR SPEAKERS 6 COMPO Y R L R BI WIRE LF HF AUDIO DIGITAL IN DIGITAL TRANSCEIVER BD DVD PLAYER DVD RECODER TV STB OPTICAL1 OPTICAL2 COAXIAL1 COAXIAL2 XM BD DVD PLAYER IN OUT OUT OUT IN IN IN IN IN IN OUT SUBWOOFER SURROUND FRONT IN IN IN IN IN TV STB VCR D...

Page 8: ...er 3 feet higher than ear level When you do not install any surround back speaker sound assigned to them is distributed to surround speakers or front speakers and output from them Subwoofer The subwoofer can be placed in any position as long as it is at a reasonable distance from the TV How to connect speaker cables If using 4 mm plug Connect speaker cords properly to terminals after making sure l...

Page 9: ... TV MONITOR TV STB CENTER BD DVD PLAYER BD DVD PLAYER DVD RECORDER IN LOOP EXT GND LOOP GND LOOP GND AM ANT FM ANT LOOP ANT GND Household AC outlet AC 120 V 60 Hz Speaker impedance Front A 6 to 8 Ω Center 6 to 8 Ω Surround 6 to 8 Ω Surround back 6 to 8 Ω Front speakers R L Center speaker Surround speakers R L Surround back speakers R L Active subwoofer Speaker cable Rear panel Use the terminal for...

Page 10: ...hen you connect surround back speakers to the unit The unit did not detect one of the two surround speakers Check speaker connections Step 3 W MENU SETUP ENTER INPUT SELECTOR VOLUME BI AMP SURROUND SURROUND SPEAKERS AUTO DETECTOR MULTI ROOM TUNE AUX ADVANCEDDUALAMP POWER WIRELESSREADY AUTOSPEAKERSETUP SETUP MIC HDMI MULTIROOM RETURN SURROUND SPEAKERS ENTER MENU SETUP AUTO DETECTOR MULTI ROOM RETUR...

Page 11: ...round back speaker 3 To stop the test signal Press To make detailed settings To make various settings automatically With the supplied setup microphone the unit sets speaker distances polarity size lowpass filter frequency and levels automatically á page 24 To set speakers the way you like Adjusting speaker volumes á page 31 Setting speakers and their sizes á page 35 Setting distances á page 35 Set...

Page 12: ...put source using the remote control á page 5 4 Watch DVDs or TV The HDMI indicator lights on while communicating through HDMI connections 5 To adjust the volume Turn Volume range dB minimum 79dB to 0dB maximum To finish watching Be sure to reduce the volume and press 8 POWER to turn the unit to standby When you play back sources using a CD player and other equipment Step 4 SPEAKERS W MENU SETUP EN...

Page 13: ... HDMI cable It is recommended that you use Panasonic s HDMI cable Non HDMI compliant cables cannot be utilized 2 Make settings in the menu for the TV VIERA to activate linked Ez Sync HDAVI Control operations 3 Perform the following steps to make sure the unit accurately identifies connected equipment 1 Turn all equipment on 2 Switch the TV VIERA off and then put it back on 3 Switch the unit s inpu...

Page 14: ...UT OUT OUT IN IN IN IN IN IN OUT SUBWOOFER SURROUND FRONT IN IN IN IN IN TV STB VCR DVDRECORDER DVD RECORDER DVDRECORDER TV MONITOR TV MONITOR TV STB CENTER BD DVD PLAYER BD DVD PLAYER DVD RECORDER IN LOOP EXT GND LOOP GND LOOP GND AM ANT FM ANT LOOP ANT GND TV Rear panel Changing the digital input settings For example you can connect the unit to a DVD player that makes optical output only by perf...

Page 15: ...N IN IN IN TV STB VCR DVDRECORDER DVD RECORDER DVDRECORDER TV MONITOR TV MONITOR TV STB CENTER BD DVD PLAYER BD DVD PLAYER DVD RECORDER IN TV S VIDEO IN Rear panel To enjoy TV with surround sound make additional connections instructed on page 17 Changing the digital input settings For example you can connect the unit to a DVD player that makes optical output only by performing the steps instructed...

Page 16: ...ITAL TRANSCEIVER BD DVD PLAYER DVD RECODER TV STB OPTICAL1 OPTICAL2 COAXIAL1 COAXIAL2 XM LOOP EXT GND LOOP GND LOOP GND AM ANT FM ANT LOOP ANT GND BD DVD PLAYER IN OUT OUT OUT IN IN IN IN IN IN OUT SUBWOOFER SURROUND FRONT IN IN IN IN IN TV STB VCR DVDRECORDER DVD RECORDER DVDRECORDER TV MONITOR TV MONITOR TV STB CENTER BD DVD PLAYER BD DVD PLAYER DVD RECORDER IN Y PB PR Y PB PR TV COMPONENT VIDEO...

Page 17: ...TV STB CENTER BD DVD PLAYER BD DVD PLAYER DVD RECORDER IN TV DIGITAL AUDIO OUT OPTICAL AUDIO OUT R L Rear panel Changing the digital input settings á page 37 CD S VIDEO VIDEO L R CD DVD 6CH IN SUBWOOFER BD DVD VCR TV STB FRONT A FRONT B CENTER SURROUND SURROUND BACK Y TV MONITOR OUT TV STB IN DVD RECORDER IN PB PR SPEAKERS COMPONENT VIDEO HAUT PARLEURS Y Y PB PR PB PR AC IN R L R L R L R L BI WIRE...

Page 18: ...P ANT GND BD DVD PLAYER IN OUT OUT OUT IN IN IN IN IN IN OUT SUBWOOFER SURROUND FRONT IN IN IN IN IN TV STB VCR DVDRECORDER DVD RECORDER DVDRECORDER TV MONITOR TV MONITOR TV STB CENTER BD DVD PLAYER BD DVD PLAYER DVD RECORDER IN R L AUDIO OUT R L AUDIO OUT DVD player BD player DVD recorder Rear panel CD S VIDEO VIDEO L R CD DVD 6CH IN SUBWOOFER BD DVD VCR TV STB FRONT A FRONT B CENTER SURROUND SUR...

Page 19: ... to the TV Cable box or satellite receiver etc Rear panel Changing the digital input settings á page 37 S VIDEO VIDEO L R CD DVD 6CH IN SUBWOOFER BD DVD VCR TV STB FRONT A FRONT B CENTER SURROUND SURROUND BACK Y TV MONITOR OUT TV STB IN DVD RECORDER IN PB PR SPEAKERS COMPONENT VIDEO HAUT PARLEURS Y Y PB PR PB PR AC IN R L R L R L R L BI WIRE LF HF AUDIO DIGITAL IN DIGITAL TRANSCEIVER BD DVD PLAYER...

Page 20: ...ttings Connecting speakers To connect bi wire speakers Making bi wire setting 1 Press and hold MENU SETUP RETURN for about 2 seconds to enter the SETUP 2 Select and confirm the choice 3 Select and confirm the choice YES When bi wire speakers are connected NO When bi wire speakers are not connected Factory setting NO 4 Select and finish the setting VIDEO 6CH SUBWOOFER VCR TV STB FRONT FRONT CENTER ...

Page 21: ...hen you select MULTI ROOM in Making MULTI ROOM setting á page 22 To perform the auto speaker setup using the supplied setup microphone Settings made with the setup microphone are canceled when you insert or remove the transceiver after performing the setup To connect a second pair of front speakers Making surround speakers wireless with SH FX50 SH FX60 The WIRELESS READY indicator stays on while t...

Page 22: ...TUP 2 Select and confirm the choice 3 Select and confirm the choice MULTI ROOM when SH FX80 is connected SURR SPKR when SH FX50 SH FX60 is connected Factory setting SURR SPKR 4 Select and finish the setting S VIDEO VIDEO L R CD DVD 6CH SUBWOOFER BD DVD VCR TV STB AUDIO DIGITAL IN DIGITAL TRANSCEIVER BD DVD PLAYER DVD RECODER TV STB OPTICAL1 OPTICAL2 COAXIAL1 COAXIAL2 XM LOOP EXT GND LOOP GND LOOP ...

Page 23: ...nd of the antenna where reception is best AM loop antenna included Keep the antenna cord away from DVD recorders DVD players and other cords Black Red FM outdoor antenna not included Disconnect the FM indoor antenna The antenna should be installed by a competent technician Twist the coaxial cable s shield braid firmly and connect it to the GND terminal 20 mm 25 32 Shield braid Core wire 10 mm 3 8 ...

Page 24: ...settings are made COMPLETE appears and the AUTO SPEAKER SETUP indicator lights on The auto speaker setup takes about 3 minutes to finish in the case of a 5 1 channel system The unit cancels the auto speaker setup halfway through when you give a different operational instruction before the setup finishes You can perform other operations after COMPLETE is displayed The unit keeps the settings even i...

Page 25: ...nd arrange the unit to output the missing bass range from the subwoofer With the setup microphone the unit automatically sets the following STEP1 STEP2 STEP3 DISTANCE The unit measures the distance between each speaker and the seating area and corrects the sound delay in the seating area The maximum speaker distance for correcting the delay is 45 feet 15 meters POLARITY The unit checks the polarit...

Page 26: ...TUP AUTO DETECTOR MULTI ROOM RETURN TUNE SETUP MIC W AUX S VIDEO VIDEO L AUDIO R POWER SURROUND BI AMP MULTI ROOM ADVANCED DUAL AMP INPUT SELECTOR A B SPEAKERS SURROUND VOLUME 1 To turn the unit on Press The SURROUND indicator lights on factory setting The standby indicator goes off when you turn the unit on Do not forget to perform speaker detection when you play a source with the unit for the fi...

Page 27: ...ng the triple amp mode á page 36 when you wish to use the triple amp mode You cannot use BI AMP with analog 6 channel connections for DVD Audio sources Playing DVD Audio Make the following speaker settings on the DVD recorder or the DVD player They are normal factory settings for the DVD recorder and the DVD player Speaker size LARGE for all speakers Speaker presence present for all speakers Dista...

Page 28: ...e following modes The modes switch each time you press the button You can also select each of the following modes by pressing and in succession Use this mode when playing movies Movie To cancel Press Press to select one of the following modes The modes switch each time you press the button You can also select each of the following modes by pressing and in succession ONE TOUCH PLAY D I R E C T N A ...

Page 29: ... good effects when you play commercial film titles recorded in the Dolby Digital Surround EX format This mode is effective on sources containing surround channels only Sounds assigned to surround back channels become monaural in playback when you connect two surround back speakers to the unit DIGITAL EX or EX replaces PL on the display when you connect one surround back speaker GAME You can play g...

Page 30: ...nt range 0 Center becomes clearer to 5 Center becomes wider Factory setting 2 Adjusting SFC Sound Field Control Adjusting the output level Press to select a speaker and press for adjustment C Center RS Surround right SBR Surround back right SBL Surround back left SB when only one surround back speaker is connected LS Surround left Adjustment range 20 dB to 10 dB Factory setting 0 dB SUBW Subwoofer...

Page 31: ...peakers start producing the test signal again in the above order 2 seconds after both steps Press TEST AUTO to stop the test signal Volume range dB minimum 79dB to 0dB maximum Adjustment range 20dB to 10dB Factory setting 0dB SUBW only MIN minimum 1 to 29 MAX maximum Factory setting 20 Adjusting the subwoofer level You can adjust the output level while playing sources You can adjust the level acco...

Page 32: ...rns to the original one You can also select EXIT by turning INPUT SELECTOR SPEAKERS W MENU SETUP ENTER INPUT SELECTOR VOLUME BI AMP SURROUND SURROUND SPEAKERS AUTO DETECTOR MULTI ROOM TUNE AUX ADVANCEDDUALAMP POWER WIRELESSREADY AUTOSPEAKERSETUP SETUP MIC HDMI MULTIROOM RETURN SURROUND SPEAKERS ENTER MENU SETUP AUTO DETECTOR MULTI ROOM RETURN TUNE SETUP MIC W AUX S VIDEO VIDEO L AUDIO R INPUT SELE...

Page 33: ... 1 Select and confirm the choice 2 Select audio and confirm the choice MAIN Main audio output SAP Sub channel audio output M S Main and sub channel audio output Factory setting MAIN Adjusting the brightness of the display Dim the display for better viewing in a darkened room 1 Select and confirm the choice 2 Select a setting and confirm the choice Select DIMMER OFF to cancel The light above INPUT ...

Page 34: ...ne You can also select EXIT by turning INPUT SELECTOR SPEAKERS W MENU SETUP ENTER INPUT SELECTOR VOLUME BI AMP SURROUND SURROUND SPEAKERS AUTO DETECTOR MULTI ROOM TUNE AUX ADVANCEDDUALAMP POWER WIRELESSREADY AUTOSPEAKERSETUP SETUP MIC HDMI MULTIROOM RETURN SURROUND SPEAKERS ENTER MENU SETUP AUTO DETECTOR MULTI ROOM RETURN TUNE SETUP MIC W AUX S VIDEO VIDEO L AUDIO R INPUT SELECTOR MENU SETUP ENTER...

Page 35: ...RGE SB does not appear when S is set to NONE The SB size becomes the S size because the unit does not offer SB size setting When you change the number of connected speakers settings made with the setup microphone are canceled á pages 24 and 25 Setting distances By adjusting the distance from each speaker except the subwoofer to the seating area the sound delay time is automatically adjusted so tha...

Page 36: ...n reduce the delay time due to the difference in size of the HF and LF units 1 Canceling BI AMP using the triple amp mode 1 Select and confirm the choice 2 Select and confirm the choice 3 Select and confirm the choice The BI AMP indicator goes off when the unit enters the triple amp mode AUTO When using BI AMP OFF When not using BI AMP when using the triple amp mode Factory setting AUTO 2 Adjustin...

Page 37: ...al When PCM FIX mode is on the unit cannot process other signals Cancel the mode when noise occurs TV TV DVR DVD recorder DVD DVD player CD CD player AUTO Automatic identification of digital and analog signals HDMI takes priority when the input signal is digital ANALOG Fixes the input signal to analog DIG Fixes the input signal to digital PCMFIX Fixes the input signal to PCM Factory setting TV DVR...

Page 38: ...tory settings Re enter settings to your liking when necessary 1 Select and confirm the choice 2 Select and confirm the choice To cancel select NO YES Choice for resetting NO Choice against resetting When you select YES the input source becomes TUNER preset channel 1 Preset radio stations will not be erased 1 Press SPEAKERS A and SPEAKERS B to switch all speakers off 2 Lower the volume by turning V...

Page 39: ...ck speaker Dolby Digital Surround EX decoder Dolby Pro Logic decoder is being used when the input signal is DTS 5 1 channel Displayed only when you connect one surround back speaker Dolby Pro Logic decoder is being used PL DTS DTS 96 24 DTS ES NEO 6 SFC The display informs Dolby Pro Logic the Dolby Pro Logic decoder is used on 2 channel stereo sources when surround back speakers are absent DTS dec...

Page 40: ...ing Press e g FM 107 9 MHz Press 1 0 7 9 Tuning intervals FM 0 1 MHz AM 10 kHz If you do not press a button while the cursor is flashing the display returns to the frequency being received If the frequency has not been input correctly ERROR will be displayed SPEAKERS W MENU SETUP ENTER INPUT SELECTOR VOLUME BI AMP SURROUND SURROUND SPEAKERS AUTO DETECTOR MULTI ROOM TUNE AUX ADVANCEDDUALAMP POWER W...

Page 41: ... select EXIT and press ENTER FM stations can also be preset in the MONO mode below Listening to preset stations Using the remote control Using the unit n Select the channel 1 Press to enter the MENU 2 Select TUNER and confirm the setting 3 Select TUNE MODE and confirm the setting 4 Select PRESET and confirm the setting 5 Press MENU SETUP RETURN twice to select EXIT and press ENTER 6 Press to selec...

Page 42: ...77 You should have your Radio ID ready the Radio ID can be found by selecting channel 0 on the radio Please see below Displaying the XM Satellite Radio ID Positioning the antenna for optimal reception You can confirm your XM Satellite Radio ID necessary for activating XM Satellite Radio as follows The unit has a signal strength indicator that allows you to optimize the XM signal reception 1 Connec...

Page 43: ...TUNER XM Press and hold for 2 seconds 3 To enter an XM channel number direct tuning or to search a channel up and down Press or e g 3 Press DIRECT TUNING DISC 0 0 3 21 Press DIRECT TUNING DISC 0 2 1 123 Press DIRECT TUNING DISC 1 2 3 To return to the previous digit Press 10 ENTER Press Hold down the button to change channels faster Operation on the unit 1 Turn INPUT SELECTOR to select TUNER XM 2 P...

Page 44: ...ckage If you want to inquire about receiving the channel call XM s Listener Care at 1 800 XMRADIO 1 800 967 2346 in the U S A In Canada call XM s Listener Care at 1 877 GET XMSR 1 877 438 9677 NO SIGNL flashing The XM signal is too weak Reorient the XM Connect Play antenna or XM Mini Tuner and Home Dock for better reception Make sure the antenna is properly connected LOADING flashing The XM Connec...

Page 45: ...urn to the previous screen To select an item Press to select after pressing DIRECT NAVIGATOR TOP MENU S SUB MENU XM DISPLAY or FUNCTIONS When operating a Panasonic DVD recorder using the supplied remote control Change the control setting on the supplied remote control to match the DVD recorder s remote control mode Confirm the DVD recorder s remote control mode in its operating instructions 1 Pres...

Page 46: ...W SEARCH PAUSE CH 0 ENTER STOP Note Remote controlling a DVD player To switch the unit s input to BD DVD To switch the remote control to the DVD player operation mode Do not forget to press this before operating a DVD player To turn the DVD player on or off To start playback To skip a track or chapter To search through the disc To play in slow motion To show the direct navigator or the top menu To...

Page 47: ...TUP ENTER RETURN ENTER MENU SETUP RETURN Basic operation Turn to select Press to confirm your choice To return to the previous display To cancel TUNER BAND ENTER This remote control can operate Panasonic audio visual equipment that has remote control sensors You may need to change the remote control code It can also operate some other brands of TVs VCRs and DVD players Check the table for the bran...

Page 48: ...FC settings and select an adequate mode Press SURROUND on when you play 2 channel stereo sources 10 24 25 35 28 to 30 12 26 Sound is not heard from the surround back speaker Ensure the speaker settings for your speakers are correct Press SURROUND on 10 24 25 35 12 26 Dolby Pro Logic NEO 6 and SFC are unavailable Check if the center speaker surround speakers and surround back speakers are connected...

Page 49: ... VIDEO SECTION Output voltage at 1 V input unbalanced 1 0 1 Vp p Maximum input voltage 1 5 Vp p Input output impedance 75 Ω S Video Input BD DVD PLAYER DVD RECORDER TV STB Output TV MONITOR Component Video Input DVD RECORDER TV STB Output TV MONITOR n GENERAL Power supply AC 120 V 60 Hz Power consumption 140W Dimensions W x H x D 430 mm x 107 5 mm x 390 mm 16 15 16 x 4 7 32 x 15 11 32 Mass Approx ...

Page 50: ...50 RQT8739 Limited Warranty Only for the U S A ...

Page 51: ...ty or detracts from the performance nor does it cover any product which is used commercially Dry cell batteries are also excluded from coverage under this warranty This warranty is extended to the original end user purchaser only A purchase receipt or other proof of date of original purchase is required before warranty service is performed THIS EXPRESS LIMITED WARRANTY IS IN LIEU OF ALL OTHER WARR...

Page 52: ... most importantly without affecting your sensitive hearing We recommend that you avoid prolonged exposure to excessive noise Sound can be deceiving Over time your hearing comfort level adapts to higher volumes of sound So what sounds normal can actually be loud and harmful to your hearing Guard against this by setting your equipment at a safe level BEFORE your hearing adapts To establish a safe le...

Reviews: