8
System outer foil
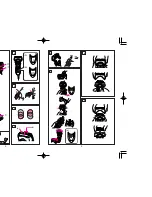
(see fig. 5)
System outer foil has a slit blade (a)
between 2 foils (b). They move up
and down independently to follow the
contours of your face.
The slit blade catches and cuts
longer and lying hairs easily.
Using the trimmer
(see fig. 6)
Slide the trimmer handle up to open
the trimmer.
Place the trimmer at a right angle to
your skin and move it downward to
trim sideburns.
Cleaning your shaver
(see fig. 7)
Warning – To prevent electric
shock or personal injury, discon-
nect the power cord from the
shaver before cleaning with water.
For cleanliness and convenience, we
recommend that you clean your
shaver with water and a liquid hand
soap. Regular cleaning will keep your
shaver in good condition while pre-
venting odors or bacteria from devel-
oping, and maintain the cutting per-
formance.
With the system outer foil in place,
apply some hand soap onto the outer
foil.
Push and hold the On/Off switch
more than 2 seconds to activate the
turbo mode for “sonic” vibration
cleaning.
At the same time, the “sonic” clean-
ing symbol appears in the LCD dis-
play.
Rinse the outer foil with water. After
about 20 seconds, the shaver will au-
tomatically turn off.
Remove the system outer foil and
rinse it with running water.
Wipe off any moisture from the
shaver with a dry cloth and remove
the system outer foil to allow the sys-
tem outer foil to dry completely.
It is recommended to wash your
shaver head with "sonic" vibration
cleaning when the tap symbol (a)
appears in LCD.
Replacing shaving head
components
It is recommended that you replace
the system outer foil at least once a
year and the inner blade at least once
every 2 years to maintain your shav-
er’s cutting performance.
Replacing the system outer foil
(see fig. 8)
Squeeze the system outer foil re-
lease buttons and lift the system
outer foil upward to remove it. To in-
sert the new system outer foil, press
down until it snaps into place.
Replacing the inner blades
(see fig. 9)
Squeeze the system outer foil re-
lease buttons and lift the system
outer foil upward to remove it. Re-
move the inner blade one at a time
by grasping it firmly at both ends and
pulling straight away from the shaver.
Do not touch the metal parts of inner
blades.
To insert the new inner blade, hold
the blade one at a time at both ends
and press downward until it snaps
7
shorten the life span of the re-
chargeable battery, so refrain from
charging over long periods of time.
In this case, the light in the LCD
display blinks twice in about 1 sec-
ond.
A full charge will supply enough
power for approx. 14 shaves (3 min-
utes per shave for a normal beard).
Before travelling, charge it fully for 1
hour if you will not be taking the adap-
tor with you.
In case your shaver is without charge,
you may quick charge it for 1 shave
in about 5 minutes.
Charge with charging
stand
(see fig. 1 (B))
To charge with the charging stand,
connect the power cord to the charg-
ing stand. Place the shaver into the
stand, and plug the adaptor to the
AC outlet.
You can always store your shaver in
the charging stand to maintain full
battery capacity. This shaver cannot
be overcharged.
Using your shaver
Caution – The system outer foil is
very thin and can be damaged if
handled improperly. Before each
use, always check the foil for dam-
age. To avoid personal injury, do
not use if the foil or other parts of
the shaving head is damaged.
Push the On/Off switch to turn the
shaver on.
If you push and hold the On/Off
switch for more than 2 seconds, it
will activate the turbo mode for
“sonic” vibration cleaning.
(see “Cleaning your shaver”)
Caution:
Shaving with “sonic” vibration may
damage your skin. Please turn it
off and on again to deactivate the
turbo mode.
Hold the shaver at a right angle (90
°
)
to your skin (see fig. 3). Start out
shaving by applying gentle pressure
to your face. Stretch your skin with
your free hand and move the shaver
back and forth in the direction of your
beard. You may gently increase the
amount of pressure as your skin be-
comes accustomed to this shaver.
Applying excessive pressure does
not provide a closer shave.
Pivot action selector
(see fig. 4)
Use the pivot action selector to
choose the shaving mode.
Soft/lock, free based on your shav-
ing preference.
The pivot action can be changed no
matter whether the switch is turned
on or off.
For wet shaving
Put a thin layer of shaving foam on
your face which works as a lubrica-
tor. Shaving foam is the most suit-
able among many other shaving aids
(gel, soap, cream, etc). Do not put a
thick layer of shaving foam as it may
affect shaver’s performance. If the
shaving head is clogged with foam,
simply rinse it under running water.
9
8
Summary of Contents for ES-8163
Page 3: ...5 4 6 7 8 9 a 3 4 5 I a b H L 2 A B ...
Page 10: ......


