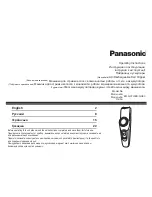
English
ThankyouforchoosingaPanasonicHairClipper.Please
readallinstructionsbeforeuse.
Important
This clipper has a built‑in rechargeable battery. Do not throw into
fire, apply heat, or charge, use, or leave in a high temperature
environment.
Usingtheclipper
Check that the blades are not damaged or deformed before
use.
Terminate the usage when there is abnormality or failure.
Turn off the appliance before changing the trimming length or
removing the comb attachment.
Before each use, apply oil at the places marked with arrows.
(See page 6.)
The appliance should not be used on animals.
Do not press the blade against the skin.
Do not use the clipper for any purpose other than trimming.
This appliance is not intended for use by persons (including
children) with reduced physical, sensory or mental capabilities,
or lack of experience and knowledge, unless they have been
given supervision or instruction concerning use of the
appliance by a person responsible for their safety. Children
should be supervised to ensure that they do not play with the
appliance.
Chargingtheclipper
Never use the AC adaptor in the bathroom or shower room.
Do not use any power cord or AC adaptor other than this AC
adaptor (RE9‑49).
Charge the appliance in a location where it will not be exposed
to direct sunlight or other heat sources, at temperatures of
5 °C to 35 °C.
Plug in the AC adaptor into a household outlet where there is
no moisture and handle it with dry hands.
►
•
•
•
•
•
•
•
•
►
•
•
•
•
Hold the AC adaptor when disconnecting it from the household
outlet. If you tug on the power cord, you may damage it.
Do not damage or deform the power cord. Do not place heavy
objects on the power cord or trap it between objects.
Do not use the clipper if the power cord or the AC adaptor is
worn, or if the AC adaptor does not fit snugly in the outlet.
The power cord cannot be replaced. If the cord is damaged,
the AC adaptor should be scrapped.
Cleaningtheclipper
Warning
Disconnectthepowercordfromtheclipperbefore
cleaningitinwatertopreventelectricshock.
The housing should not be taken apart as this can affect the
watertight construction of the appliance.
If you clean the clipper with water, do not use salt water or hot
water. Do not soak the clipper in water for a long period of
time.
Clean the housing only with a soft cloth slightly dampened
with tap water or soapy tap water. Do not use thinner, benzine,
alcohol or other chemicals.
Clean the power plug regularly to remove any dust or dirt.
Storingtheclipper
Store the clipper in a place with low humidity after use.
Do not store the clipper where it will be exposed to direct
sunlight or other heat sources.
Store the AC adaptor in a dry area where it is protected from
damage.
Keep the oil away from children.
•
•
•
•
►
•
•
•
•
►
•
•
•
•
Summary of Contents for ER-GC70
Page 8: ...Panasonic 12 RE9 49 5 C 35 C...
Page 10: ...10 0 5 1 A 1 5 1 1 2 A 3 1 2 3 4 5 1 2 3 4 5 6 A A 6 1 1 0 2 3 10 11 4 1 1 1 5...
Page 12: ...12 1 0 2 3 4 5 1 2 3 4 5 4 5 6...
Page 13: ...13 20 2 3 3 6 1 8 1 2 2 3 b 4 d 5 f 6 g 7 h 8 i j...
Page 14: ...14 1 2 8 2 5 7 511495 117393 56 7 8 800 200 21 00...
Page 15: ...15 Panasonic 19 RE9 49 5 C 35 C...
Page 17: ...17 1 A 1 5 1 1 2 A 3 1 2 3 4 5 1 2 3 4 5 6 A A 6 6 1 1 0 2 3 17 18 4 1 1 1 5 0 5...
Page 19: ...19 1 0 2 3 4 5 1 2 3 4 5 4 5 6...
Page 20: ...20 2 20 3 3 6 1 8 1 2 2 3 b 4 d 5 f 6 g 7 h 8 i j...
Page 22: ...22 Panasonic 26 RE9 49 5 C 35 C...
Page 24: ...24 1 A 1 5 1 1 2 A 3 1 2 3 4 5 1 2 3 4 5 6 6 1 0 2 3 24 25 4 1 1 1 5 0 5...
Page 26: ...26 1 0 2 3 4 5 1 2 3 4 5 4 5 6...
Page 27: ...27 20 3 3 6 1 8 1 2 2 a 3 b 4 c d e 5 f 6 g 7 h 8 i j 1 2 DC 8...


