63
2
4
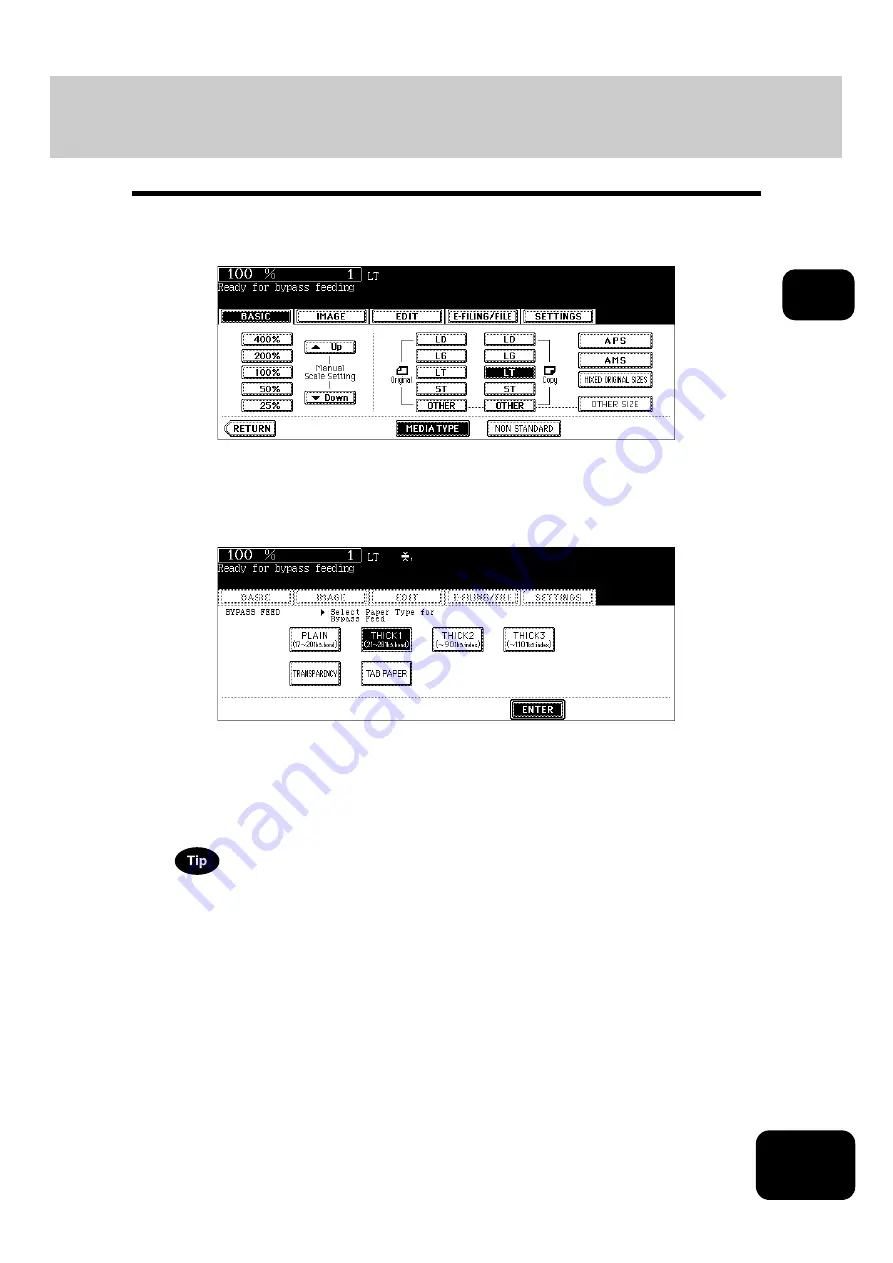
Press the [MEDIA TYPE] button on the touch panel if the media type
of the paper you have set on the tray is other than plain paper.
5
Press the button of the same media type as the one of the paper you
have set on the tray, and then press the [ENTER] button on the touch
panel.
• Set other copy modes as required.
• If a media type which is not same as the one you have set is selected here, this may cause a paper jam or sig-
nificant image trouble.
6
Press the [START] button on the control panel.
When you copy on OHP films, remove the copied OHP films, which have exited on to the receiving tray one by
one. When the films pile up, they may become curled and may not be projected properly.
Summary of Contents for DP-7240
Page 6: ...4 CONTENTS Cont ...
Page 73: ...71 3 2 Press the APS button 4 Press the START button ...
Page 109: ...107 4 4 IMAGE ADJUSTMENT 1 Background Adjustment 108 2 Sharpness 109 ...
Page 112: ...4 110 4 IMAGE ADJUSTMENT ...
Page 151: ...149 5 5 Press the ENTER button Select other copy modes as required 6 Press the START button ...
Page 153: ...151 5 5 Press the ENTER button Select other copy modes as required 6 Press the START button ...
Page 192: ...6 190 6 e FILING ...
Page 222: ...7 220 7 TEMPLATE ...
Page 260: ...8 258 8 JOB STATUS ...
Page 315: ...313 11 11 MAINTENANCE 1 Daily Inspection 314 2 Simple Troubleshooting 315 ...
Page 320: ...11 318 11 MAINTENANCE ...
Page 335: ......


