background image

31

RQT9401

§

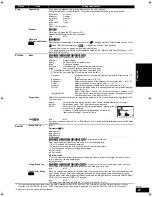
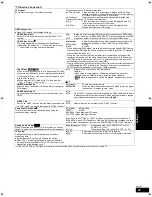
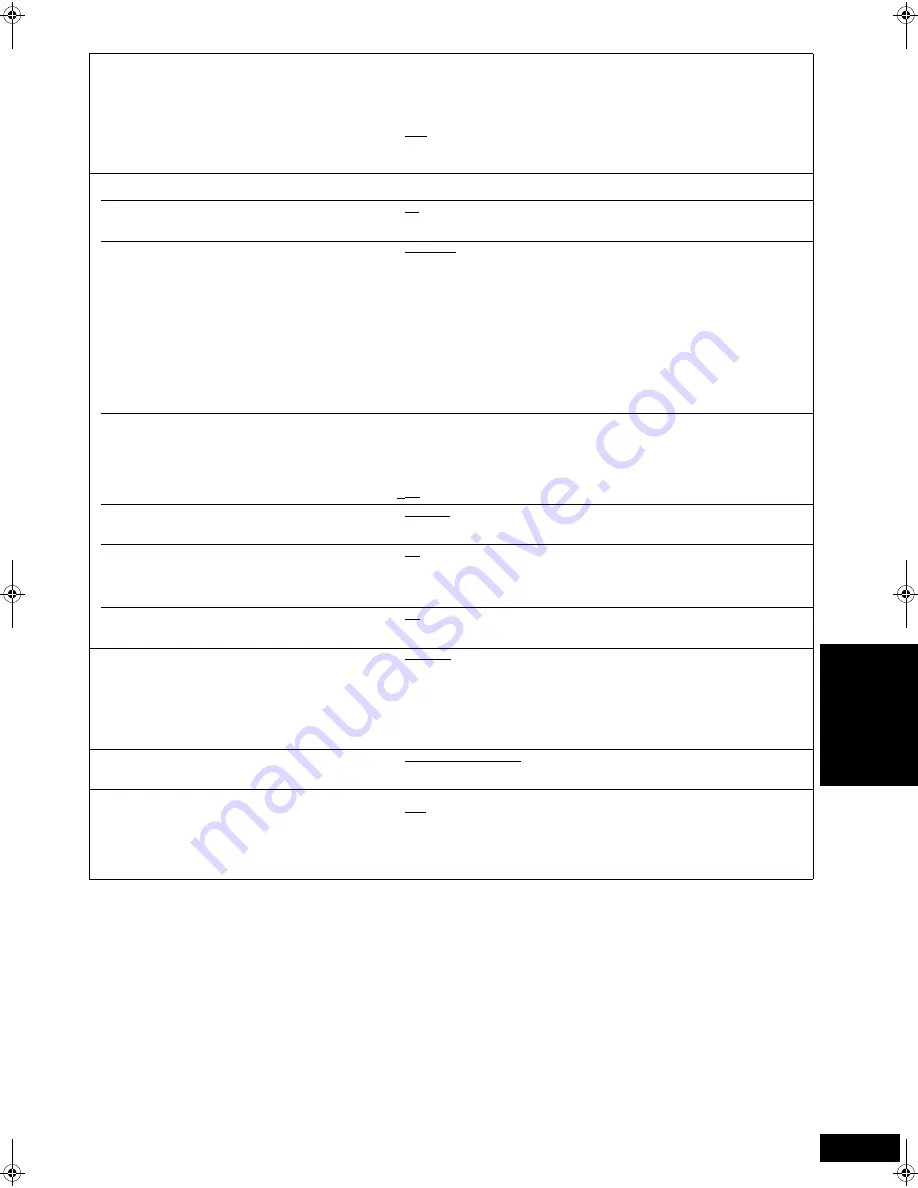
In this unit, a P4HD (

43) video processor is used to provide video of optimal resolution to the connected TV.

“TV/Device Connection”

TV Aspect

Set to match the type of television connected.

When connected to a 4:3 aspect television:

4:3 Pan & Scan: Video recorded for a widescreen is played as Pan & Scan 

(unless prohibited by the producer of the disc). When playing 

BD-Video, video is output as “4:3 Letterbox”.

4:3 Letterbox: 

Video recorded for a widescreen is played in the letterbox style.

When connected to a 16:9 widescreen television:

16:9: 

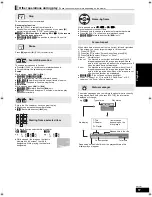
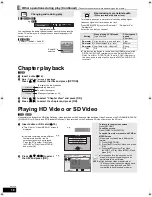
Video recorded for 4:3 aspect screen is displayed as a 4:3 

ratio image in the center of the screen.

16:9 full: 

Video recorded for 4:3 aspect screen is displayed as a 

horizontally stretched 16:9 image.

HDMI Connection

Press [OK] to show the following settings.

HDMI Video Mode

Select “On” when video is output from HDMI AV OUT 
terminal.

On:

Images are output from the HDMI terminal in the resolution set in “HDMI Video 

Format”. Video from COMPONENT VIDEO OUT terminal is output as “576i/480i”.

Off

Images are output in the resolution set in “Component Resolution”.

HDMI Video Format

§

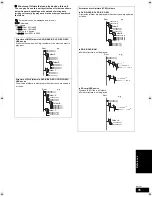
The items supported by the connected devices are 
indicated on the screen as “

¢

”. When any item without 

¢

” is selected, the images may be distorted.

Automatic:

Automatically selects the output resolution best suited to the 

connected television (1080p, 1080i, 720p or 576p/480p).

576p/480p

720p

1080i

1080p

– When outputting 1080p signal, we recommend using High Speed HDMI Cables 

that have the HDMI logo (as shown on the cover) and are less than 5.0 meters to 
prevent video distortion etc.

– When the unit is connected to an amplifier/receiver that does not support the 

resolution set on the unit, the video cannot be output properly. In this case, use 

the HDMI cable to connect the unit to the TV and then connect the unit to the 

amplifier/receiver using a cable other than HDMI.

– To enjoy high definition video up-converted to 1080p, you need to connect the unit directly 

to 1080p compatible HDTV (High Definition Television). If this unit is connected to an 

HDTV through other equipment, it must also be 1080p compatible.

24p Output 

[BD-V]


[DVD-V]

When this unit is connected to a TV supporting 1080/24p 
output via an HDMI cable, this unit displays each frame at 
1/24 second intervals – the same interval originally shot 
with the film camera.

When playing DVD-Video, set to “On” and then set 

“24p” in “Picture” (

27) to “On”

On:

Images in 24p are output in 24p as they are. 

However,

–when video is being output at 24 frames, images from any other 

terminal than the HDMI terminal may not be output properly.

[BD-V]

when images other than 24p are played, images are output at 

60p.

Off

HDMI Output Range

Effective when connected to a device that only supports 
RGB output.

Standard:

The video is output as it is.

Enhanced: 

When the black and white contrast of a video is low, the signal 

is enhanced to reproduce clear video.

HDMI Audio Output

This setting selects whether or not to output audio from 
HDMI.

On:

Off:

When the TV is connected to this unit using an HDMI cable, and this unit 

is also connected to other devices, such as an amplifier/receiver using an 

optical digital audio cable or a coaxial cable (

[BD80]

).

VIERA Link

Set to use “HDAVI Control” function when connected with 
an HDMI cable to a device that supports “HDAVI Control”.

On:

Off:

Select when you do not want to use “HDAVI Control”.

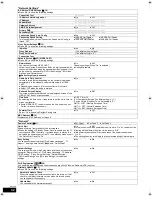
Component Resolution

§

This sets the video output resolution when using the 
component video terminal.

576i/480i

576p/480p

720p

1080i

480i, 480p: When playing NTSC discs
576i, 576p: When playing PAL discs

Even if you select “720p” or “1080i”, the video output resolution is restricted to 
“576p/480p” when DVD-Video discs, DivX and BD-Video discs recorded at a rate 
of 50 field per second are output from the COMPONENT VIDEO OUT terminals.

Analog Audio Output 

[BD80]

When connected with AUDIO OUT terminals, you can set 
the unit to output the best possible sound for your speakers. 

2ch (Downmix) + 5.1ch:

When connecting to 2ch AUDIO OUT or 5.1ch 

AUDIO OUT. (

33)

7.1ch:

When connecting to 7.1ch AUDIO OUT. (

33)

TV System

Change the setting to match the equipment you are 
connecting with.

If picture output is not smooth, change the setting.

When NTSC contents are played, they are outputted in 

the signal format specified in the “NTSC Contents Output”, 

irrespective of the settings here.

NTSC:

Select when connecting to a NTSC television. 

PAL:

Select when connecting to a PAL or multi-system television.

Se

tt

in

gs

DMP-BD80&60EB&EG&EF&GN-RQT9401_eng.book  31 ページ  2009年2月6日 金曜日 午後5時22分

Summary of Contents for DMP-BD80

Page 1: ...uctions carefully Before connecting operating or adjusting this product please read the instructions completely Please keep this manual for future reference Note EB on the packaging indicates the United Kingdom Region management information BD Video This unit plays BD Video marked with labels containing the region code B Example DVD Video This unit plays DVD Video marked with labels containing the...

Page 2: ...nit This can cause electric shock or malfunction If this occurs immediately disconnect the unit from the power supply and contact your dealer Do not spray insecticides onto or into the unit They contain flammable gases which can ignite if sprayed into the unit Do not attempt to repair this unit by yourself If sound is interrupted indicators fail to light smoke appears or any other problem that is ...

Page 3: ...isc and card handling DO DO NOT Maintenance Lens cleaner RP CL720E This lens cleaner is not for sale in Germany and may not be for sale depending on the region This lens cleaner is sold as specific for DIGA but can be used without problem on this unit as well To dispose or transfer this unit Information for Users on Collection and Disposal of Old Equipment and used Batteries These symbols on the p...

Page 4: ... Playing music 21 Playing still pictures 22 Playing DivX videos 24 Enjoying VIERA CASTTM 25 Showing FUNCTIONS menu 25 Changing settings with the on screen menu 26 Linked operations with the TV VIERA Link HDAVI ControlTM 28 Changing the unit s settings 29 About MP3 JPEG DivX files 34 Messages 36 Troubleshooting guide 38 Glossary 42 Specifications 44 Index Back cover Getting started Playback Setting...

Page 5: ...lkaline or manganese batteries Do not mix old and new batteries Do not use different types at the same time Do not heat or expose to flame Do not leave the battery ies in an automobile exposed to direct sunlight for a long period of time with doors and windows closed Do not take apart or short circuit Do not attempt to recharge alkaline or manganese batteries Do not use batteries if the covering h...

Page 6: ...at Version 1 2 of the DVD Video Recording Format MP3 format JPEG format AVCHD format DivX format DVD V DVD VR MP3 JPEG AVCHD DivX BD R Version 2 of the BD R Recording Format BD V rR rRW rR DL VR R RW Video Recording Format AVCHD format DVD V AVCHD DVD RAM Version 1 1 of the DVD Video Recording Format JPEG format AVCHD format DVD VR JPEG AVCHD CD R RW CD DA format MP3 format JPEG format DivX format...

Page 7: ...ameras connected via USB cable Compatible USB devices USB devices which are defined as USB mass storage class USB devices that support USB 1 0 1 1 and USB 2 0 Full Speed High Speed USB devices of up to 128 GB can be used USB devices that support bulk only transfer CBI Control Bulk Interrupt is not supported Digital Cameras which require additional programme installation when connected to a PC are ...

Page 8: ...sound Use connections D E F or G 9 10 additionally In case of the connection E F or G set HDMI Audio Output to Off 31 With this connection you can use VIERA Link HDAVI Control 28 B Connecting to COMPONENT VIDEO OUT terminal You can enjoy high definition images by connecting to a component video terminals that supports 720p 750p and 1080i 1125i signals NECESSARY SETTINGS BD80 Analog Audio Output 2c...

Page 9: ...With this connection you can use VIERA Link HDAVI Control 28 Enjoying High Bit rate Audio with 7 1ch speaker and 5 1ch speaker 20 HDMI IN Multi channel speakers HDMI cable Amplifier receiver HDMI compatible television HDMI IN HDMI OUT Back of the unit NOTE TIPS E Connecting to 7 1ch AUDIO OUT terminal BD80 When connected to a compatible amplifier receiver using the 7 1ch AUDIO OUT terminals you ca...

Page 10: ...enter speaker d Subwoofer Connect Audio cables to terminals corresponding to the speakers you have connected Back of the unit Amplifier receiver Multi channel speakers NOTE G Connecting to DIGITAL AUDIO OUT terminal You can enjoy surround sound when connected to an amplifier receiver using the COAXIAL BD80 or OPTICAL terminal With COAXIAL BD80 or OPTICAL NECESSARY SETTINGS Digital Audio Output Dep...

Page 11: ...creen of VIERA CAST 25 AG Reproduce more natural audio 18 AH Select audio 18 AI Show FUNCTIONS menu 25 BJ Selection OK Frame by frame 17 BA Show on screen menu 26 BB Return to previous screen BC Select drive BD DVD CD SD card or USB device 16 BD Switch on off Secondary Audio 19 CAUTION Do not place objects in front of the unit The disc tray may collide with objects when it is opened and this may c...

Page 12: ...eiver brand is not listed or if the code listed for them does not allow control of your television or amplifier receiver this remote control is not compatible with them Use their remote control Brand TV Code Brand TV Code Brand Amplifier Receiver Code NOTE Panasonic 01 02 03 04 AIWA 35 AKAI 27 30 BEJING 33 BEKO 05 71 72 73 74 BENQ 58 59 BP 09 BRANDT 10 15 BUSH 05 CENTREX 66 CHANGHONG 69 CURTIS 05 ...

Page 13: ...is restarted the screen display disappears and START is displayed on the unit s display After the firmware is updated and the system is restarted the following screen indicates that the firmware update has been completed During the update process no other operations can be performed Serious damage may occur if you turn off the unit and or press any buttons Downloading will require several minutes ...

Page 14: ... server functions or when the router s DHCP server function is disabled After performing steps 1 3 left 4 Press 3 4 to select IP Address Auto Assignment and press 2 1 to select Off 5 Press 3 4 to select IP Address Subnet Mask or Gateway Address and press OK 6 Enter numbers with the numbered buttons and press OK After checking the specifications for your broadband router enter each number If the nu...

Page 15: ...se use this setting when instructed to by your Internet service provider After performing steps 1 3 left 4 Press 3 4 to select Proxy Address and press OK The text entry screen is displayed Text field shows the text you have entered 5 Press 3 4 2 1 to select a character and press OK Repeat this step to enter other characters Press to delete 6 Press when you complete the entry 7 Press 3 4 to select ...

Page 16: ...t When the USB device indicator is flashing the USB device is being read from Do not turn off the unit or remove the USB device Such action may result in malfunction or loss of the USB device s contents About the use of USB device Since the physical size of USB device can vary please consider its width when connecting any USB device to this unit It is possible that some devices may accidentally ac...

Page 17: ...laying the chapter is designated STOP PAUSE SLOW SEARCH SKIP Frame by frame While paused press 2 2 or 1 1 Each press shows the next frame Press and hold to change in succession forward or backward Press 1 PLAY to revert to normal playback speed BD V AVCHD Forward direction 1 1 only Screen Aspect When black bars are shown at the top bottom left and right sides of the screen you can enlarge the imag...

Page 18: ...DMI terminal or the DIGITAL AUDIO OUT terminal only when Dolby D Dolby D Dolby TrueHD or DTS DTS HD is set to PCM However in this case audio is output as 2ch from the DIGITAL AUDIO OUT terminal RE MASTER Properties Chapter View To Picture To display the title properties recording date etc Playing still pictures 22 To select the chapter 1 Insert a disc or SD card 16 Title View or Video MPEG 2 scree...

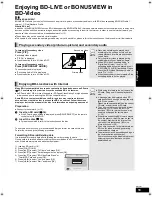
Page 19: ...ompatible disc Some BD Live content available on the Blu ray discs may require an Internet account to be created in order to access the BD Live content Follow the screen display or instruction manual of the disc for information on acquiring an account Preparation Connect to the network 13 1 Insert an SD card 16 If the SD card menu screen is displayed press DRIVE SELECT on the remote control select...

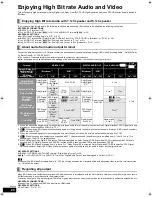
Page 20: ... When BD Video Secondary Audio is set to On Dolby Digital EX is output as Dolby Digital and DTS ES is output as DTS Digital Surround however if playing BD Video without secondary audio or clicking sound the audio is output as the original format NECESSARY SETTINGS HDMI AV OUT DIGITAL AUDIO OUT terminal Digital Audio Output 30 BD80 7 1ch AUDIO OUT 5 1ch AUDIO OUT terminal Digital Audio Output and A...

Page 21: ...aying e g CD TIPS MP3 Playing a track in another folder 1 While the Music list is displayed Press OPTION press 3 4 to select Select Folder and press OK 2 Press 3 4 to select a folder and press OK The Music list for the folder appears You cannot select folders that contain no compatible tracks To return to the previous screen Press RETURN DIRECTNAVIGATOR Select Folder CD MP3 001 My favorite 002 Bra...

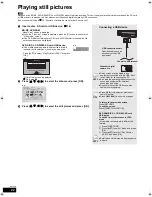
Page 22: ... OK Connecting a USB device Setup screen may be displayed on equipment connected with the USB Set it to the mode for connecting to a PC Also read the operating instructions of the connected equipment for details of connection and setup Do not disconnect the USB connection cable while recognizing Press 2 1 to display the previous or next still picture Press 9 to show other pages To return to the pr...

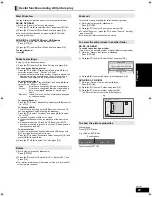
Page 23: ...show stops the playback of the music also stops When both the music CD and the USB device with MP3 recorded is inserted to this unit the music CD has a priority to be played back as BGM To select a folder A folder to playback can be selected when a USB device with MP3 recorded is connected to this unit Press 3 4 to select Soundtrack Folder and press OK and press 2 1 to select folder 3 Press 3 4 2 ...

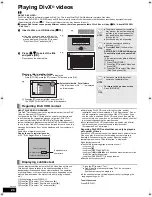
Page 24: ... video files that do not display Text do not contain subtitles text Subtitles text cannot be displayed If the subtitles text are not displayed correctly try changing the language settings 29 To exit the screen Press DISPLAY ABOUT DIVX VIDEO DivX is a digital video format created by DivX Inc This is an official DivX Certified device that plays DivX video You can play DVD R R DL CD R RW discs and US...

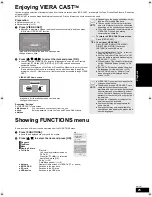
Page 25: ...e may be discontinued either temporarily or permanently without notice Therefore Panasonic will make no warranty for the content or the continuity of the services All features of websites or content of the service may not be available Some content may be inappropriate for some viewers Some content may only be available for specific countries and may be presented in specific languages Welcome to Ne...

Page 26: ...dio attributes appear below Audio attribute DivX Select the soundtrack number Soundtrack numbers are displayed even when there is only one audio type Subtitle BD V AVCHD DVD V Turn the subtitle on off and select the language below Language DVD VR Only discs that contain subtitle on off information Turn the subtitle on off DivX Turn the subtitle on off and select Text or the subtitle number Subtitl...

Page 27: ...sion for progressive output to suit the type of material being played 42 Film and video Auto Automatically detects the film and video content and appropriately converts it Video Select when using Auto and the content is distorted Film Select this if the edges of the film content appear jagged or rough when Auto is selected However if the video content is distorted as shown in the illustration to t...

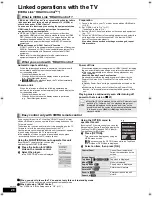
Page 28: ...t this unit to your TV or other device with an HDMI cable 8 9 2 Set VIERA Link to On 31 The default setting is On 3 Set the HDAVI Control operations on the connected equipment e g TV 4 Turn on all HDAVI Control compatible equipment and select this unit s input channel on the connected TV so that the HDAVI Control function works properly Also when the connection or settings are changed repeat this ...

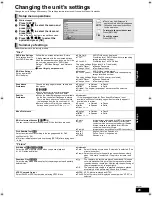
Page 29: ...en 16 Enter a code 45 with the numbered buttons when you select Other English German French Italian Spanish Dutch Original The original language of each disc will be selected Other Subtitle Preference Automatic If the language selected for Soundtrack Preference is not available subtitles of that language will automatically appear if available on that disc English German French Italian Spanish Dutc...

Page 30: ...kHz Choose when the connected equipment can process signals with sampling frequency of 96 kHz Downmix Switch the downmix system for playing back multi channel surround sound When Dolby D Dolby D Dolby TrueHD or DTS DTS HD is set to Bitstream there are no downmix effects for the outputted audio The audio will be outputted in Stereo in the following cases AVCHD playback Playback of clicking sound on...

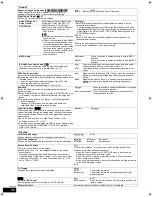
Page 31: ...24p Output BD V DVD V When this unit is connected to a TV supporting 1080 24p output via an HDMI cable this unit displays each frame at 1 24 second intervals the same interval originally shot with the film camera When playing DVD Video set to On and then set 24p in Picture 27 to On On Images in 24p are output in 24p as they are However when video is being output at 24 frames images from any other ...

Page 32: ...e set Set the time zone if necessary GMT 12 to 12 For Continental Europe The initial setting is 1 For the United Kingdom The initial setting is 0 GMT 0 l WET Western European Time GMT 1l CET Central European Time GMT 2l EET Eastern European Time Summer Time Select On when using Daylight Saving time On Off MAC Address 14 Displays the MAC Address of this unit General Remote Control 41 Set Code 1 Set...

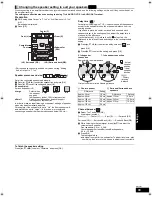
Page 33: ...s less than B below find the difference in the relevant table and change to the recommended setting 1 Press 3 4 2 1 to select the delay time box and press OK 2 Press 3 4 to select the setting and press OK Channel balance 1 Select Test and press OK A test signal is output Front L _ Center C _ Front R _ Surround RS Surround LS Surround Back LB Surround Back RB 2 While listening to the test signal pr...

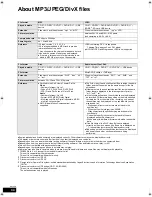
Page 34: ...rt sub txt In the following situations the subtitles cannot be displayed as recorded Furthermore depending on the methods used to create the file or the state of the recording only parts of the subtitles may be displayed or the subtitles may not be displayed at all When special text or characters are included in the subtitles text When the file size is larger than 256 KB When characters with speci...

Page 35: ...7XXXX mp3 008XXXX mp3 009XXXX mp3 001XXXX mp3 002XXXX mp3 Root Folder A Folder B Folder C e g P0000010 divx P0000011 divx P0000012 divx P0000003 divx P0000004 divx P0000005 divx P0000001 divx P0000002 divx P0000006 divx P0000007 divx P0000008 divx P0000009 divx Root Folder A Folder B Folder C e g Structures of still picture JPEG folders in DVD R DVD R DL CD R CD RW Files inside a folder are displa...

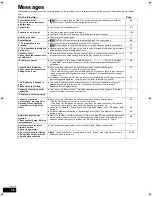
Page 36: ...cable connection LAN terminal connection cable itself a cross cable may be used by mistake etc If the above conditions are OK then the router may not operate in DHCP mode Check the router settings and operation You may reset the router to restore it to normal 13 13 This IP address is already in use Please check the setting This unit s IP address is used by another device Check the IP addresses of ...

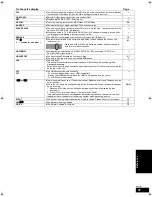
Page 37: ...or DVD RW DVD Video format UNSUPPORT You have inserted a media the unit cannot play You tried to operate with a non compatible USB device 6 7 7 U59 The unit is hot The unit switches to standby for safety reasons Wait for about 30 minutes until the message disappears Select a position with good ventilation when installing the unit Do not block the cooling fan on the rear of the unit U72 U73 The HDM...

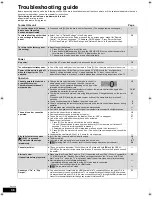
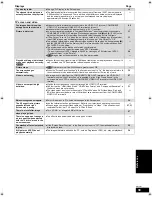
Page 38: ...number button at the same time for more than 5 seconds The batteries are depleted Replace them with new ones You are not pointing the remote control at the main unit s remote control signal sensor during operation Colored glass may obstruct the signal reception transmission Don t place the signal sensor in direct sunlight or in areas that may be subject to sunlight exposure 12 12 41 41 5 5 The uni...

Page 39: ...be played back correctly if it was recorded on a DVD compatible to double speed or slower Picture stops DivX Picture may stop if the DivX files are greater than 2 GB The screen changes automatically When the Screen Saver Function in the Setup menu is set to On the display may return to the screen saver mode automatically if there is no operation for 10 minutes or more 30 Video is not output An ima...

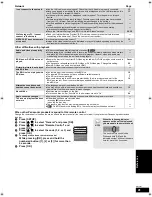
Page 40: ...ayed When 24p Output is set to On jittering may occur while playing DVD Video In this case turn 24p Output to Off 32 31 31 31 The 4 3 aspect ratio picture expands left and right Screen size is wrong Change TV Aspect type to 16 9 31 When playing DVD Video using progressive output one part of the picture momentarily appears to be doubled up When you use the HDMI AV OUT terminal for video output foll...

Page 41: ...rrect BD Video region code or DVD Video region number and is not defective You have set a ratings level to limit BD Video or DVD Video play Change this setting Some BD Video can only be output with HDMI Cover 29 Picture in picture is not played with BD Video Confirm whether the disc supports picture in picture The BD Live is not played with BD Video Confirm whether the disc supports the BD Live Th...

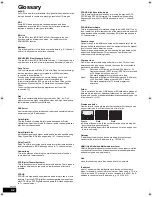
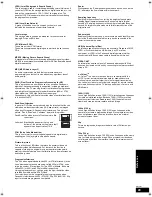
Page 42: ... DTS Digital Surround audio BD Video supports up to 7 1 channel output DTS HD High Resolution Audio This is a signal format achieved by improving the previous DTS DTS ES and DTS 96 24 formats It is compatible with sampling frequency 96 kHz 48 kHz BD Video supports up to 7 1 channel output DTS HD Master Audio This is a lossless audio format and compatible with 96 kHz 7 1ch or less In addition faith...

Page 43: ...ndard has 625 or 576 interlaced i scan lines whereas progressive scanning called 625p or 576p uses twice the number of scan lines For the NTSC standard these are called 525i or 480i and 525p or 480p respectively Using progressive output you can enjoy the high resolution video recorded on media such as DVD Video Your television must be compatible to enjoy progressive video Panasonic televisions wit...

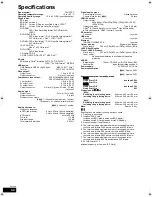
Page 44: ...1080i 1125i 1080p 1125p Output connector Type A 19 pin HDMITM V 1 3a with Deep Colour x v ColourTM High Bit rate Audio This unit supports HDAVI Control 4 function SD card slot Connector 1 system USB slot Connector 1 system Ethernet 10BASE T 100BASE TX 1 system Optical pick up System with 2 lenses Wave length 790 nm CDs 650 nm DVDs 405 nm BDs LASER Specification Class 1 LASER Product Wave length 79...

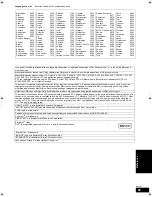
Page 45: ...tions of this product are protected under copyright law and are provided under license by ARIS SOLANA 4C x v ColourTM is a trademark VIERA CASTTM is a trademark of Panasonic Corporation Plays DivX video DivX is a registered trademark of DivX Inc and is used under license Blu ray Disc is trademark BD LIVE logo is trademark of Blu ray Disc Association BONUSVIEW is trademark of Blu ray Disc Associati...

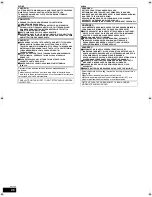
Page 46: ...ÄYTETTÄVÄKSI LEUDOSSA ILMASTOSSA ADVARSEL DETTE PRODUKTET ANVENDER EN LASER BETJENING AV KONTROLLER JUSTERINGER ELLER ANDRE INNGREP ENN DE SOM ER BESKREVET I DENNE BRUKSANVISNING KAN FØRE TIL FARLIG BESTRÅLING DEKSLER MÅ IKKE ÅPNES OG FORSØK ALDRI Å REPARERE APPARATET PÅ EGENHÅND ALT SERVICE OG REPARASJONSARBEID MÅ UTFØRES AV KVALIFISERT PERSONELL ADVARSEL FØLG NEDENSTÅENDE INSTRUKSER FOR Å REDUSE...

Page 47: ...47 RQT9401 Memo Reference ...

Page 48: ...26 Pop up 16 Setup 29 MPEG2 43 MP3 21 34 43 N Noise reduction NR Integrated NR 27 3D NR 27 O On screen Language 30 Menu 26 Status messages 17 P PCM Down Conversion 30 Picture in picture 19 Playback Information Window 27 Playlist 25 Pop up Menu 16 Progressive 27 43 Properties Chapter 18 Still picture 23 Proxy Server 15 P4HD 43 Q Quick Start 32 R Ratings level 29 Re master 18 27 Remote control code ...

Reviews: