background image

3

FCC and IC STATEMENT

This equipment has been tested and found to comply with the limits for a Class B digital device, pursuant to Part 
15 and Part 18 of the FCC Rules. These limits are designed to provide reasonable protection against harmful 
interference in a residential installation. This equipment generates, uses and can radiate radio frequency energy 
and, if not installed and used in accordance with the instructions, may cause harmful interference to radio 
communications. However, there is no guarantee that interference will not occur in a particular installation. If this 
equipment does cause harmful interference to radio or television reception, which can be determined by turning 
the equipment off and on, the user is encouraged to try to correct the interference by one or more of the following 
measures:

Reorient or relocate the receiving antenna.

• 

Increase the separation between the equipment and receiver.

• 

Connect the equipment into an outlet on a circuit different from that to which the receiver is connected.

• 

Consult the Panasonic Service Center or an experienced radio/TV technician for help.

• 

FCC Caution: To assure continued compliance, follow the attached installation instructions and use only 
shielded interface cable when connecting to computer or peripheral devices. Any changes or modi

¿

 cations 

not expressly approved by Panasonic Corp. of North America could void the user’s authority to operate this 
device.

Under Industry Canada regulations, this radio transmitter may only operate using an antenna of a type and 
maximum (or lesser) gain approved for the transmitter by Industry Canada. To reduce potential radio interference 
to other users, the antenna type and its gain should be so chosen that the equivalent isotropically radiated power 
(e.i.r.p.) is not more than that necessary for successful communication.

FCC Declaration of Conformity

Models:

DKB-DP13, SSR-RFNANO, N0HZZY000003

Responsible Party:

Panasonic Corporation of North America
One Panasonic Way, Secaucus, NJ 07094

Contact Source:

Panasonic System Communications Company of North America

Panasonic North America 3 Panasonic Way 7D-6, Secaucus NJ 07094
Tel1-855-772-8324
http://panasonic.com/business/

À

 at-panel-displays/

This device complies with Part 15 and Part 18 of the FCC Rules and all applicable IC RSS standards. Operation 
is subject to the following two conditions: (1) This device may not cause harmful interference, and (2) this device 
must accept any interference received, including interference that may cause undesired operation.

Summary of Contents for DKB-DP13

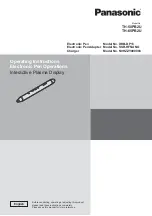
Page 1: ...nteractive Plasma Display Before connecting operating or adjusting this product please read these instructions completely Please keep this manual for future reference English Electronic Pen Model No DKB DP13 Electronic Pen Adapter Model No SSR RFNANO Charger Model No N0HZZY000003 ...

Page 2: ...ts Computer IBM PC AT compatible CPU Intel Core 2 processor or later Operating System Windows XP Service Pack 3 except for Media Center and Tablet PC versions Windows Vista Service Pack 2 except for Starter and Home Basic versions Windows 7 Service Pack 1 except for Starter and Home Basic versions Windows 8 except for Windows RT version Language Japanese English German French Italian Spanish Chine...

Page 3: ... the attached installation instructions and use only shielded interface cable when connecting to computer or peripheral devices Any changes or modi cations not expressly approved by Panasonic Corp of North America could void the user s authority to operate this device Under Industry Canada regulations this radio transmitter may only operate using an antenna of a type and maximum or lesser gain app...

Page 4: ...ries Supplied 8 Names and Uses of the Parts 9 How to Charge 11 About Electronic Pen 13 Using Electronic pen with Easy WhiteBoard 15 Using Electronic Pen with Panasonic WhiteBoard Software 19 Registering Electronic Pen 20 Maintenance and Adjustment 21 Disposal 25 Speci cations 28 ...

Page 5: ...oke detectors and other automatically controlled equipment Electromagnetic waves generated by this device can affect equipment and can cause equipment to malfunction Use at least 22 cm 9 in away from pacemakers Electromagnetic waves generated by this device can affect the operation of pacemakers Keep the pen tip eraser tip clamper electronic pen adapter optical attachment and screws out of reach o...

Page 6: ...nufacturer of any personal medical devices such as pacemakers to determine if they are adequately shielded from external RF radio frequency energy The unit operates in the frequency range of 2 405 GHz to 2 480 GHz and the power output level is 1 milliwatts Do not use the unit in health care facilities if any regulations posted in the area instruct you not to do so Hospitals or health care faciliti...

Page 7: ... scratch the screen Be careful not to hit or scratch with the pen tip of electronic pen because it is protruding Also note that the electronic pen will not function correctly if the pen tip cannot receive the light from the display Do not use the electronic pen for other purposes than operating the Interactive Plasma Display Do not aim the optical attachment lens at the Sun or other intense light ...

Page 8: ...1 Electronic pen adapter 1 Pen tip 1 Model No DKB DP13 Parts No N2FZ00000025 Model No SSR RFNANO Parts No N5EDZ0000010 TKKL55591 Eraser tip 1 Optical attachment 1 Charger 1 TO DISPLAY TKKL55601 TGAD003 N0HZZY000003 Stand 1 Mounting plate 1 Clamper 1 TMWX0841 TXFUW041JHJ TMME190 Charger cable 1 Cable 2 Screw 2 K1HY05YY0098 K1HY05YY0099 XTV3 12GFJK Note Store the extra pen tip and eraser tip along w...

Page 9: ...cond or more The Power Button lights as below according to the status of the electronic pen Off Power off Lighting green Power on Blinking green Low battery Blinking green rapid blinking With optical attachment inserted Lighting red Charging Blinking red Charging error Blinking green and red alternately Registering the electronic pen Blinking orange and red alternately Unregistering Lighting orang...

Page 10: ...ice Check that the power button is green when using the electronic pen Using the electronic pen with the wireless module ET WM200U connected may result in malfunction of the electronic pen due to radio wave interference as an example In that case set WIRELESS LAN to OFF before using the electronic pen See Network Operations of the operating instructions Notes When 30 minutes have passed without op...

Page 11: ... MEMORY CHARGE CHARGE Connect to the CHARGE port on the rear of the charger Charger cable Connect to the CHARGE port of the display External input ports on the rear of the display 2 Turn the pen tip down and set the electronic pen in the charger TO DISPLAY The power button lights red and charging starts When charging is completed the power button lights green ...

Page 12: ...ct the charger cable to the WIRELESS MODULE port or PEN ADAPTER port of the display When you store the electronic pen for a long period of time avoid full charge 3 and turn the power off 3 The electronic pen is not fully charged if the power button lights red when the electronic pen is set in the charger or connected to the charger cable Notes It is possible to use the electronic pen even during c...

Page 13: ...e imported from a le using the electronic pen Desktop operation You can operate the desktop functions shown on the screen or other software using the electronic pen Not available with the Easy WhiteBoard Remote Operation Remote Pointer If you attach the included optical attachment to the electronic pen you can draw select or drag an object without touching the screen with the electronic pen and al...

Page 14: ...rawing with its pen tip even when the optical attachment is attached When you use the eraser detach the optical attachment Display and the remote pointer are not far enough apart from each other the on screen pointer will be slightly shifted towards the screen edge and away from the location to which the remote pointer is actually pointing The pointer cannot be changed with Easy WhiteBoard The hol...

Page 15: ...er PEN CHARGER Electronic pen adapter Recording medium compatible with USB2 0 Note Connect a recording medium when saving the drawn characters and other objects See 18 page 3 Register the electronic pen to the electronic pen adapter See 20 page 4 Make the display settings to use the electronic pen Make the setting of TOUCH PEN SETTINGS in the SETUP menu of the display and select the input See Disp...

Page 16: ... tab Switch the mode The software has two modes that are switched to each other by clicking when the main menu is started from other inputs than WHITEBOARD The characters drawn in each mode are not deleted even when the mode is switched WhiteBoard mode An object will be drawn on the white background Transparent mode The image of each input will be displayed on the background When the input is swit...

Page 17: ...object drawn on the screen Some parts may be left in the surrounding area on the screen Use the eraser again to ease them or erase the entire screen Erase selected area If you click and then move the electronic pen in an oblique direction keeping it touched to the screen an area whose diagonal line corresponds to the oblique movement is selected and you can erase the character or other object in t...

Page 18: ...Save Overwrites and saves the current page Save as a new page The current page is left as before drawing is made and the image with drawn objects is saved as a new page Delete this page The page currently displayed is deleted and the next page is displayed Remove USB Memory A recording medium becomes ready to be removed Always perform this operation before removing a recording medium Notes If a re...

Page 19: ...tall the Panasonic WhiteBoard Software since the software can be run directly on your computer as an executable le 1 Copy WhiteBoardSoft folder contained in the supplied CD ROM to your computer desktop 2 Double click WhiteBoard exe le in the copied WhiteBoardSoft folder with the left mouse button Notes For more information on how to operate Panasonic WhiteBoard Software see the instruction manual ...

Page 20: ...utton lights red for approximately one second Turn off the electronic pen and perform registration again 5 When registration of the electronic pen is completed the pairing completion screen will be displayed Select OK or Return To unregister the electronic pen To unregister the electronic pen select PAIRING of TOUCH PEN SETTINGS in the SETUP menu of the display or select Settings ĺ Start Pairing T...

Page 21: ...g the pen tip eraser tip 1 Remove the pen tip cover eraser tip cover Pen tip Eraser tip Raising the pen makes replacement easier 2 Remove the used pen tip eraser tip and attach the new pen tip eraser tip Remove the used pen tip Attach the new pen tip Projections Cutouts Spring Remove the used eraser tip Attach the new eraser tip Projections Cutouts Spring Align the projection of pen tip eraser tip...

Page 22: ...ews TO DISPLAY TO DISPLAY The illustration shows the case that the charger is attached to the left side of display when seen from the front To attach it to the right side reverse the mounting plate TO DISPLAY 2 Among the screws shown below remove the screw of the position where you mount the charger TH 50PB2U TH 65PB2U For portrait installation For portrait installation ...

Page 23: ... removed TO DISPLAY If necessary use the included clamper to clamp the cables TO DISPLAY Mounting hole Close after bundling the cables Insert the projection into the mounting hole Mounting hole Attach Stand to Charger Attach the stand when placing the charger on the table TO DISPLAY TO DISPLAY FRONT mark ...

Page 24: ...echargeable battery in the electronic pen is low ĺ Charge the electronic pen 11 12 The electronic pen is used with the wireless module ETWM200U connected ĺ Using the electronic pen with the wireless module ETWM200U connected may result in malfunction of the electronic pen due to radio wave interference as an example In that case set WIRELESS LAN to OFF before using the electronic pen See Network O...

Page 25: ... or store the battery with a necklace hair pin or the like Do not charge use or leave the battery in a hot location such as near a re or under the hot sun Doing so may cause the battery to generate heat ignite or rupture Warning Do not place the removed battery screws and other items within reach of infants Accidental swallowing of such an item may have an adverse effect on the body In the event t...

Page 26: ...off light off and perform the procedure again Leave the electronic pen untouched while the power button repeats blinking When the battery is exhausted the power button stops blinking and you can disassemble the electronic pen It may take approximately 5 hours at most to exhaust the battery Do not disassemble this product except when disposing of it The following gures are intended to explain how t...

Page 27: ...le battery with vinyl tape to prevent the metal parts inside the cord from contacting each other Rechargeable battery Battery case Hook Hook Base plate Screw Cord Notice Be extremely careful not to get injured Do not damage or disassemble the rechargeable battery Dispose of other parts than the rechargeable battery in accordance with the local regulations ATTENTION A lithium ion battery that is re...

Page 28: ...ont 16 feet 5 m At an angle of 45 9 8 feet 3 m Battery Lithium ion polymer rechargeable battery DC 3 7 V 200 mAh Operation time 1 Approx 5 hours Charging time 1 Approx 4 hours 1 Operation time charging time The battery deteriorates after repeated use and the operation time eventually becomes short The gures above are at shipping from the factory and are not a guarantee of performance Replacement r...

Page 29: ...Service purposes Model Number Serial Number USA Only Disposal may be regulated in your community due to environmental considerations For disposal or recycling information please visit Panasonic website http www panasonic com environmental or call 1 888 769 0149 Panasonic Corporation 2013 Panasonic System Communications Company of North America Unit of Panasonic Corporation of North America Executi...

Reviews: