background image

63

RQTV0134

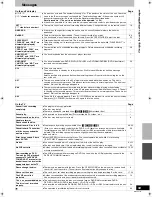
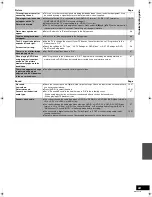
Picture

Page

Sound

Page

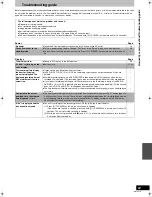
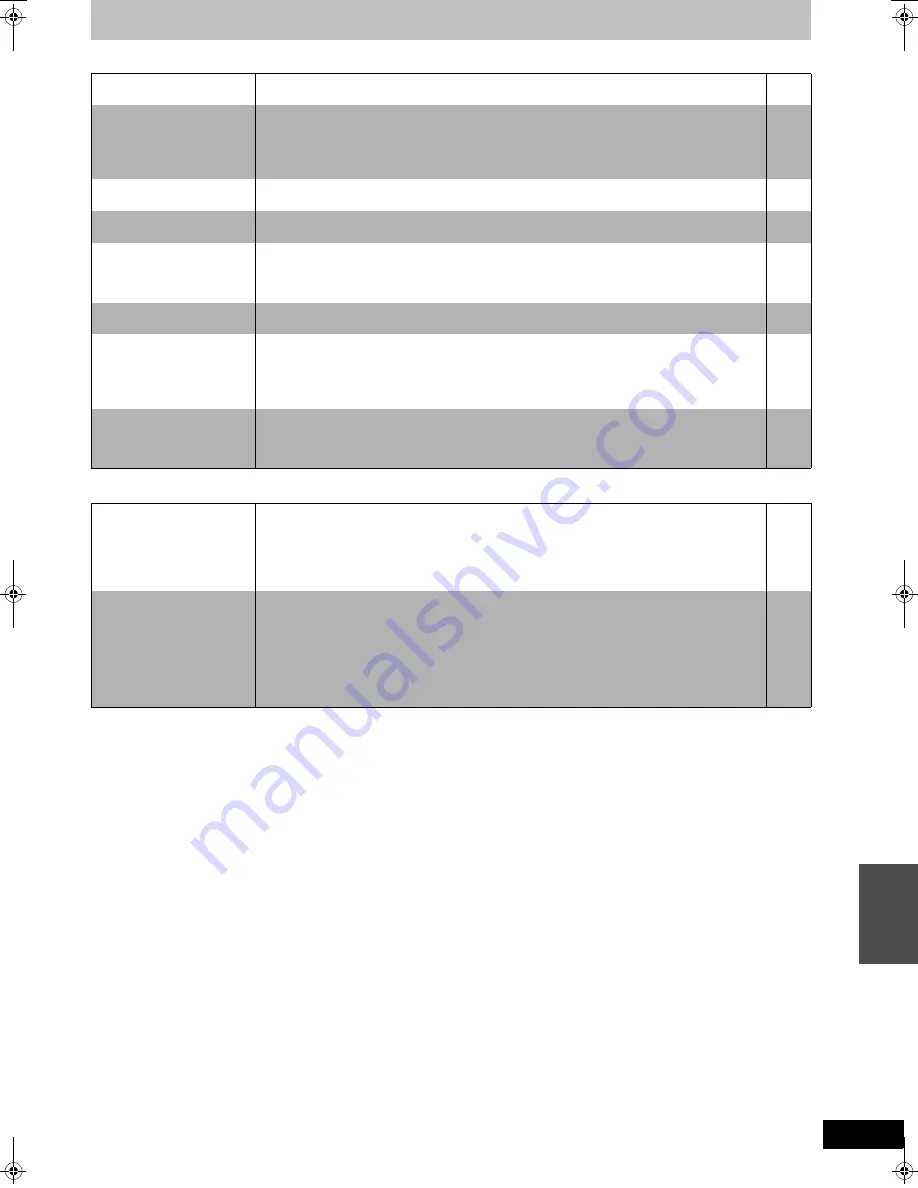
TV reception worsens after 
connecting the unit.

This can occur because the signals are being divided between the unit and other equipment. It can 
be solved by using a signal booster, available from audio-visual suppliers.

The images from the unit do 
not appear on the TV.

Picture is distorted.

Make sure that the TV is connected to the VIDEO OUT terminal, S VIDEO OUT terminal or 
COMPONENT VIDEO OUT terminals on the unit.

Make sure that the TV’s input setting (e.g., VIDEO 1) is correct.

The TV isn’t compatible with progressive signals. Press and hold [

] and [

DVD] on the main unit at 

the same time for about 5 seconds. The setting will change to interlace.

13–15


Status messages do not 
appear.

Select “Automatic” in “Status Messages” in the Setup menu.

58

The blue background does 
not appear.

Select “On” in “Blue Background” in the Setup menu.

58

The 4:3 aspect ratio picture 
expands left and right.

Screen size is wrong.

Use the TV to change the aspect. If your TV does not have that function, set “Progressive” in the 
Video menu to “Off”.

Check the settings for “TV Type”, “4:3 TV Settings for DVD-Video”, or “4:3 TV Settings for DVD-
RAM” in the Setup menu.

37

58

There is a lot of after-image 
when playing video.

Set “DNR” in the Video menu to “Off”.

37

When playing DVD-Video 
using progressive output, 
one part of the picture 
momentarily appears to be 
doubled up.

Set “Progressive” in the Video menu to “Off”. This problem is caused by the editing method or 
material used on DVD-Video, but should be corrected if you use interlace output.

37

There is no apparent change 
in picture quality when 
adjusted with the Video menu 
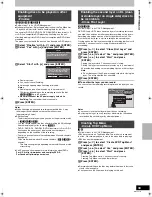
in the on-screen menus.

The effect cannot be seen with certain types of video.

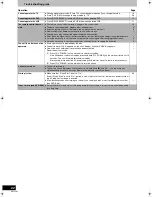
No sound.
Low volume.
Distorted sound.
Cannot hear the desired 
audio type.

Check the connections and “Digital Audio Output” settings. Check the input mode on the amplifier if 
you have connected one.

Press [AUDIO] to select the audio.

Set “V. Surround Sound” in the Audio menu to “Off” in the following cases.

-

When using discs that do not have surround sound effects such as Karaoke discs.

-

When playing MTS broadcast titles.

15, 57

25, 31

37

Cannot switch audio.

You cannot change the audio type when a DVD-R, a DVD-R DL, a DVD-RW (DVD-Video format), a 
+R, a +R DL or a +RW is in the disc tray.

You cannot change the audio type when playing a DVD-R, a DVD-R DL, a DVD-RW (DVD-Video 
format), a +R, a +R DL or a +RW. (You can select “Main” or “Secondary Audio Program (SAP)” in 
“Multi-channel TV sound (MTS)” in the Setup menu before recording.)

You have used a digital connection. Set “Dolby Digital” to “PCM” or connect using audio cables 
(analog connection).

There are discs whose audio cannot be changed because of how the disc was created.

57

15, 57

T

roub

le

s

hooting guide

M6VP&PC.book  63 ページ  2006年2月6日 月曜日 午後3時20分

Summary of Contents for Diga DMR-ES35V

Page 1: ... La guía rápida en español se encuentra en la página 71 78 Dear Customer Thank you for purchasing this product For optimum performance and safety please read these instructions carefully Before connecting operating or adjusting this product please read the instructions completely Please keep this manual for future reference 2 Region number supported by this unit Region numbers are allocated to DVD...

Page 2: ... cable ground shall be connected to the grounding system of the building as close to the point of cable entry as practical The socket outlet shall be installed near the equipment and easily accessible The mains plug of the power supply cord shall remain readily operable To completely disconnect this apparatus from the AC Mains disconnect the power supply cord plug from AC receptacle THE FOLLOWING ...

Page 3: ...akdown To clean the unit wipe with a soft dry cloth Never use alcohol thinner or benzine to clean the unit Before using chemically treated cloth carefully read the instructions that came with the cloth Observe the following points to ensure continued listening and viewing pleasure Dust and dirt may adhere to the unit s lens over time possibly making it impossible to record or play discs Use the DV...

Page 4: ... 26 Playing VHS while recording DVD 26 Watching the TV while recording 26 Playing while you are recording 26 Playing from the beginning of the title you are recording Chasing playback 26 Playing a title previously recorded while recording Simultaneous rec and play 26 Flexible Recording Recording that fits the remaining disc space 27 Scheduled Recording 28 Cautions for using scheduled recording on ...

Page 5: ...rmat Disc DVD 54 Selecting whether to show the Top Menu first Playback will start with 54 Enabling discs to be played on other equipment Finalize 55 Enabling the second layer on DL dual or double layer on single side discs to be recordable Close First Layer 55 Creating Top Menu Create DVD Top Menu 55 Changing the unit s settings 56 Common procedures 56 Entering a password Ratings 56 Summary of set...

Page 6: ...s recordable until the disc is full Re writable discs One time recording discs recordable until the disc is full One time recording discs recordable until the disc is full Re writable discs Compatibility Usable high speed recording disc 4 Up to 5x Up to 16x Up to 4x Up to 6x Up to 16x Up to 2 4x Up to 4x 5 Play on other player Only on DVD RAM compatible players It is not necessary to finalize the ...

Page 7: ...c you can record to it in DVD Video format It may be necessary to finalize the disc on the equipment used for recording Recorded audio and music including CD R RW CD R and CD RW with music recorded in MP3 l 32 Still pictures JPEG and TIFF recorded on CD R RW Recorded music and video including CD R RW Regarding DVD Audio Some multi channel DVD Audio will prevent down mixing l 68 of all or part of t...

Page 8: ...is unit Restrictions with DVD R etc 16 9 aspect programs are recorded in 4 3 aspect Either Main or SAP can be recorded for MTS broadcasts Playing the disc on other DVD players is not possible before finalizing DVD R DVD R DL DVD RW R R DL and RW are collectively referred to as DVD R etc on this page Therefore follow the steps below when you use DVD R etc Record to DVD R etc Hola 16 9 aspect progra...

Page 9: ...ge discs Be careful about scratches and dirt If there is dirt or condensation on the disc Wipe with a damp cloth and then wipe dry Handling precautions Do not attach labels or stickers to discs This may cause disc warping and unbalanced rotation rendering it unusable Write on the label side of the disc only with a soft oil based felt pen Do not use ballpoint pens or other hard writing implements D...

Page 10: ...15 18 If you connect the unit with a progressive output compatible TV you can enjoy higher quality and less flicker images than conventional TVs of the interlace output type can present Finalize l 55 This function enables you to play recorded DVD R DVD R DL DVD RW DVD Video format R and R DL on other players Instant play l 30 This function can quickly find and play a video program you wish to watc...

Page 11: ...o not protrude as much as other buttons to stop them from being pressed accidentally The word button is not used in these operating instructions so Press the ENTER button is shown as Press ENTER You can use this remote control to operate your TV if you set the TV manufacturer code l 19 Remote control DVD VHS CHAPTER CREATE TV VIDEO RETURN A B SCHEDULE DELETE ADD DLT CH ENTER F U N C T I O N S VOLU...

Page 12: ...e indicator lights during the TV mode and it goes out during the VCR mode You can switch the mode by using VCR TV l 21 C Main display Current time Disc recording and play counter VHS recording and play counter Transfer Copying messages Miscellaneous messages etc VHS 1 Scheduled recording indicator l 28 On When a scheduled recording program is registered and recordable tape is inserted Flashes The ...

Page 13: ...tion systems and the picture will not be shown correctly on the TV A Connection with a television R AUDIO L VIDEO R AUDIO L VIDEO S VIDEO Y PB PR OPTICAL COMPONENTVIDEO OUT DIGITAL AUDIO OUT PCM BITSTREAM DVD VHS COMMON OUT RF OUT VHF UHF RF IN R AUDIO L VIDEO S VIDEO AC IN DVD PRIORITY OUT VHF UHF RF IN AUDIO IN VIDEO IN R L Red White Red White Yell ellow Red White Yellow 1 2 To RF IN To To DVD V...

Page 14: ...z Connect only after all other connections are complete This unit s rear panel Audio Video cable Included 75 h h coaxial cable 75 h h coaxial cable 6 Audio Video cable To IN1 AC power supply cord Included To household AC outlet 4 To To DVD VHS COMMON OUT DVD VHS COMMON OUT To DVD VHS COMMON OUT 7 75 h h coaxial cable Red White Red White Yell ellow Red White Yellow Red White Red White Yell ellow Re...

Page 15: ...output will be only 2 channels when playing DVD Audio Connection to a stereo amplifier To enjoy higher picture quality Connecting to the TV S VIDEO IN terminal R AUDIO L VIDEO R AUDIO L VIDEO S VIDEO Y PB PR OPTICAL COMPONENTVIDEO OUT DIGITAL AUDIO OUT PCM BITSTREAM DVD VHS COMMON OUT DVD PRIORITY OUT R AUDIO L VIDEO S VIDEO S Video cable Television Red White Red White AUDIO IN VIDEO IN S VIDEO IN...

Page 16: ...ER BAND 14 to 36 CATV HYPER BAND 37 to 65 ULTRA BAND 66 to 94 100 to 125 SPECIAL CATV CHANNEL 1 Regarding DST Daylight Saving Time l 17 Legal revision is expected to change the DST period in 2007 When you use the unit with DST on the change may cause the unit s clock to go behind the actual time Check the DST setting in Set Clock manually in the Setup menu set DST off and reset the clock precisely...

Page 17: ... Select Other Functions with 3 4 and press ENTER 3 Select Setup with 3 4 and press ENTER 4 Select Setup with 3 4 and press 2 1 5 Select Clock Settings with 3 4 and press ENTER 6 Select Set Clock Manually with 3 4 and press ENTER 7 Use 2 1 to select the item you want to change and press 3 4 to change the setting DST Daylight Saving Time On or Off If you select On the clock is advanced one hour star...

Page 18: ...ER To return to the previous screen Press RETURN To exit the screen Press RETURN You do not have to change the setting when connected to a 4 3 standard aspect TV that is not compatible with progressive output l 68 1 While stopped Press FUNCTIONS 2 Select Other Functions with 3 4 and press ENTER 3 Select Setup with 3 4 and press ENTER 4 Select TV Screen with 3 4 and press 2 1 5 Select TV Type with ...

Page 19: ...and press ENTER 3 Select Setup with 3 4 and press ENTER 4 Select Setup with 3 4 and press 2 1 5 Select Remote Control Code with 3 4 and press ENTER 6 Use 3 4 to select the code 1 2 or 3 and press ENTER The code on the unit has been set 7 While pressing ENTER press and hold for about 2 seconds the numeric button 1 2 or 3 corresponding to the code you selected in step 6 The code on the remote contro...

Page 20: ...ss RETURN Follow steps 1 to 5 of Clock Settings Adjust the time zone j1 or i1 if it was not set correctly with auto clock setting You can set this menu only after Set Clock Automatically is completed 6 Select Adjust Time Zone with 3 4 and press ENTER 7 Select j1 or i1 with 3 4 and press ENTER To return to the previous screen Press RETURN Clock Settings Set Clock Automatically DVD VHS CHAPTER CREAT...

Page 21: ...et the RF output channel of the DVD Video Recorder to OFF RF OFF when the DVD Video Recorder is connected to the TV via the Audio Video cable 3 Press ENTER to finish this setting Removing Interference When you set the RF output channel to CH3 or CH4 A picture is output on CH3 or CH4 from RF output Press VCR TV to switch the mode from TV to VCR and vice versa When the TV mode is selected the TV ind...

Page 22: ...SELECT to select VHS side and then press and hold STOP for about 3 or more seconds RW The created title menu is deleted when recording on the disc Create the title menu again by using Create DVD Top Menu in DVD Management l 55 Inserting discs DVD VHS CHAPTER CREATE TV VIDEO RETURN A B SCHEDULE DELETE ADD DLT CH ENTER F U N C T I O N S VOLUME CH CH POWER POWER PLAY PAUSE STOP SKIP INDEX SLOW SEARCH...

Page 23: ...aterial is recorded as a separate title To pause recording Press PAUSE Press again to restart recording Title is not split into separate titles DVD You can also press REC to restart recording To stop recording Press STOP Recorded as 1 title until the position where stopped DVD R R DL RW V R R DL RW It takes about 30 seconds for the unit to complete recording management information after recording ...

Page 24: ...g 8 hours maximum 8 hours maximum for one side 8 hours maximum DVD R DL R DL 3 8 5 GB First layer Second layer XP High quality 55 minutes 50 minutes SP Normal 1 hour 50 minutes 1 hour 40 minutes LP Long recording 3 hours 40 minutes 3 hours 20 minutes EP Extra long recording 7 hours 25 minutes 5 hours 30 minutes 2 6 hours 50 minutes 5 hours 15 minutes 2 FR Flexible Recording 7 hours 25 minutes maxi...

Page 25: ... RAM Press AUDIO Stereo SAP Audio Mono If you change the sound setting while recording the recorded sound will also change R R DL RW V R R DL RW Select the audio Main or SAP in Multi channel TV sound MTS in the Setup menu l 57 VHS When a stereo broadcast or SAP broadcast is recorded and played back on the unit stereo sound will be automatically selected in the case of a stereo broadcast and SAP so...

Page 26: ...orded while you are recording another title 1 While recording or scheduled recording Press DIRECT NAVIGATOR l 30 2 Use 3 4 2 1 to select a title and press ENTER Play starts while recording proceeds To exit the Direct Navigator screen Press DIRECT NAVIGATOR For your reference During simultaneous recording and play you cannot edit or erase titles with the Direct Navigator or playlists Even if you st...

Page 27: ...unit s display It is not possible to change the channel or recording mode while Flexible Recording is paused Flexible Recording Recording that fits the remaining disc space Using FLEXIBLE RECORDING is convenient in these kind of situations When the amount of free space on the disc makes selecting an appropriate recording more difficult When you want to record a long program with the best picture q...

Page 28: ...ave finished making changes lights on the unit s display l 12 Invalid Entry is displayed when you enter the wrong item Reenter the item Make sure that the scheduled recording has been programmed correctly on the SCHEDULE LIST screen l 29 To continue programming Select New Scheduled Recording and repeat steps 2 to 3 4 Press RETURN Notes When the unit is carrying out a scheduled recording you may ut...

Page 29: ...ly recording W Programs are overlapped Recording of the program with the later start time starts when the earlier program finishes recording Scheduled recording standby is cancelled Recording will not start at the scheduled time n You stopped a weekly or daily scheduled recording The icon disappears when the next scheduled recording starts F The disc was full not enough space The TV program may no...

Page 30: ...les by entering a 2 digit number with the numeric buttons e g 5 0 5 15 1 5 If you enter a number larger than the total number of titles the last title is selected To show other pages l 38 To clear the title list Press RETURN For your reference Direct Navigator screen icons Title protected Copy protected so it was not recorded t Unable to play Currently recording Title with One time only recording ...

Page 31: ...he password refer to the disc s jacket etc RAM R R DL RW V R R DL RW RW VR You can skip approximately 1 minute with one press During play Press CM SKIP RAM During play Press CREATE CHAPTER Press SKIP or 9 SKIP to skip to the start of a chapter You cannot activate this function when you are carrying out transfer copy RAM R R DL RW V R R DL RW RW VR 1 During play Press TIME SLIP 2 Press 3 4 to selec...

Page 32: ...own below However depending on how you create the disc writing software play may not be in the order you numbered the folders English alphabetical characters and Arabic numerals are displayed correctly Other characters may not be displayed correctly When the highest level folders are DCIM folders they are displayed first on the tree Regarding MP3 and still pictures JPEG TIFF Compatible formats ISO...

Page 33: ...ATUS twice Press STATUS again the properties disappear Make sure that Pictures Menu screen appears by following the steps To show Pictures Menu You can display still pictures one by one with constant interval 1 Select Folder with 3 and press SUB MENU 2 Select Start Slideshow with 3 4 and press ENTER To Change the display timing 1 Select Slide Interval with 3 4 in step 2 and press ENTER 2 Press 2 1...

Page 34: ...storted if it is played at approx 35 times speed A vertical scroll may occur It is not a malfunction but if it happens change to approx 27 times speed The picture may not be in color or may be distorted depending on the TV During play Press and hold PAUSE for about 2 seconds or more Press 1 PLAY to restart normal playback To perform a Higher Speed Rewind Press 6JET REW Depending on the tape or an ...

Page 35: ...al is located This feature may not work correctly if the index signals are too close together Make recordings of at least 5 minutes On screen display below appears during play on VHS To see these displays set the Status Messages item in the Setup to Automatic l 58 Press STATUS The time and operation details appear on the screen Note The on screen display may be distorted depending on the playback ...

Page 36: ... on the disc PBC Playback control VCD l 68 Indicates whether menu play playback control is on or off A Sound track Subtitle language B Audio attributes LPCM PPCM Î Digital DTS MPEG Signal type k kHz Sampling frequency b bit Number of bits ch channel Number of channels For your reference The display changes according to the disc content You cannot make a change when there is no recording Some discs...

Page 37: ...ings Dialog Enhancer RAM R R DL RW V R R DL RW DVD A DVD V RW VR Dolby Digital 3 channel or over only including a center channel The volume of the center channel is raised to make dialog easier to hear On Off Position To change the display position 1 Standard 5 The higher the setting the lower the screen moves By using the FUNCTIONS window you can access the main functions quickly and easily 1 Whi...

Page 38: ...itles The available recording space on DVD R DVD R DL R or R DL does not increase when you delete titles The available recording space on a DVD RW DVD Video format or RW increases when the last recorded title is deleted The recording space may increase slightly when other titles are deleted RAM R R DL RW V R R DL RW RW VR Follow steps 1 to 3 of Editing titles Chapters and playing chapters Title in...

Page 39: ...and then repeat step 6 7 Select Exit with 3 4 and press ENTER The thumbnail picture will be changed at this point RAM Follow steps 1 to 3 of Edit Title You can divide a selected title into two You must be careful when dividing a title because it cannot be recovered after the procedure 4 Select Divide Title with 3 4 and press ENTER 5 Press ENTER at the point you want to divide the title l 40 For qu...

Page 40: ...ut Create when the resulting part s are extremely short RAM Follow steps 1 to 5 of View Chapters 6 Select Combine Chapters with 3 4 and press ENTER 7 Select Combine with 2 and press ENTER The selected chapter and next chapter are combined Follow steps 1 to 5 of View Chapters 6 Select View Titles with 3 4 and press ENTER You go back to Title View Chapter operations View Chapters DVD VHS CHAPTER CRE...

Page 41: ...NCTIONS 2 Select Other Functions with 3 4 and press ENTER 3 Select Playlists with 3 4 and press ENTER 4 Use 3 4 2 1 to select a playlist and press ENTER Chapters are not displayed if you have not yet created a playlist with the disc You can also select a playlist from the Playlist View by entering a 2 digit number with the numeric buttons e g 5 0 5 15 1 5 If you enter a number larger than the tota...

Page 42: ...TER 6 Use 3 4 to select a desired item and press ENTER To return to the previous screen Press RETURN To exit the screen Press RETURN Follow steps 1 to 5 of Edit 6 Select Create with 3 4 and press ENTER Refer to Creating playlists steps 5 8 l 41 Multiple editing l 38 Follow steps 1 to 5 of Edit 6 Select Copy with 3 4 and press ENTER 7 Select Copy with 2 and press ENTER Follow steps 1 to 5 of Edit 6...

Page 43: ... 7 of View Chapters 8 Select Create Chapter with 3 4 and press ENTER 9 Press ENTER at the point you want to divide l 40 For quicker editing Repeat this step to divide at other points 10 Select Exit with 4 and press ENTER Note A short portion of the recording just after the creation point may be lost For your reference The divided titles retain the name of the original title They also retain the CP...

Page 44: ...ected etc VHS Easy transferring copying with one button Cannot transfer Transferring copying with detailed settings When you want to transfer copy whole of a disc When you want to transfer only for the specified time DVD Video Transfer l 49 Caution for transfer copying from VHS to DVD Copy protected video tapes cannot be copied Most video tapes are copy protected to prevent illegal copying so they...

Page 45: ...alizing after it has started Notes While One Touch Transfer Copying is activated a scheduled recording cannot be started When the transfer copying is not started or not executed the COPYING indicator blinks for about 7 seconds Check if the unit is properly prepared Transfer Copying from VHS One Touch Transfer Copying VHS l DVD DVD VHS CHAPTER CREATE TV VIDEO RETURN A B SCHEDULE DELETE ADD DLT CH E...

Page 46: ...n screen appears 7 Select Yes with 2 and press ENTER R R DL RW V R R DL And then press 2 1 to select Copy and finalize or Copy only and press ENTER Transfer copying is started Transfer copying is automatically stopped when the tape reaches the end or the remaining capacity of the disc is filled A message appears on the TV screen and then disappears a few seconds later If Copy and finalize is selec...

Page 47: ...activated the DVD is copied from the beginning of the title which you stopped Transfer Copying from DVD DVD VHS CHAPTER CREATE TV VIDEO RETURN A B SCHEDULE DELETE ADD DLT CH ENTER F U N C T I O N S VOLUME CH CH POWER POWER PLAY PAUSE STOP SKIP INDEX SLOW SEARCH REW FF 3 2 1 6 5 4 9 8 7 0 INPUT SELECT VCR TV F Rec RECMODE SUB MENU CM SKIP TIME SLIP JET REW D I R E C T N A V I G A T O R DISPLAY AUDI...

Page 48: ... list is smaller than the value on Current Remaining 6 Press 4 6 When you finish creating the copying list Make sure to select Start Copying and press ENTER The confirmation screen appears 7 Select Yes with 2 and press ENTER Transfer copying is started To stop transfer copying in the middle Press and hold RETURN for about 3 seconds or more GUI Graphical User Interface Transfer Copying DVD VHS CHAP...

Page 49: ...ally press 1 PLAY to start REC only appears on the unit s display when transferring from DVD Video To edit the transfer copying list Select the item in step 5 4 l 48 1 Select a desired item with 3 4 and press SUB MENU 2 Press 3 4 to select the operation and press ENTER Clear All Clear all items registered on the transfer copying list Press 2 1 to select Yes and press ENTER Add Add new items to the...

Page 50: ...t is created automatically RAM Preparation Turn on the main unit and DV equipment Select the type of audio recording from Select Audio Channel for DV Input in the Audio menu l 57 When recording from DV equipment e g digital video camcorder you can record audio video recordings from DV tape only Pause play on the DV equipment at the point you want recording to start Press REC MODE to select the rec...

Page 51: ...CHEDULE DELETE ADD DLT CH ENTER F U N C T I O N S VOLUME CH CH POWER POWER PLAY PAUSE STOP SKIP INDEX SLOW SEARCH REW FF 3 2 1 6 5 4 9 8 7 0 INPUT SELECT VCR TV F Rec RECMODE SUB MENU CM SKIP TIME SLIP JET REW D I R E C T N A V I G A T O R DISPLAY AUDIO REC STATUS TRACKING V LOCK TRACKING V LOCK RESET RESET CANCEL DRIVE SELECT DRIVE SELECT SUB MENU 1 RETURN REC MODE FUNCTIONS INPUT SELECT 9 3 4 2 ...

Page 52: ...ble space does not increase after erasing RW V RW Available recording space increases when the last recorded title is deleted The recording space may increase slightly when other titles are deleted DVD VHS CHAPTER CREATE TV VIDEO RETURN A B SCHEDULE DELETE ADD DLT CH ENTER F U N C T I O N S VOLUME CH CH POWER POWER PLAY PAUSE STOP SKIP INDEX SLOW SEARCH REW FF 3 2 1 6 5 4 9 8 7 0 INPUT SELECT VCR ...

Page 53: ...ceeding 4 Select Delete All Titles with 3 4 and press ENTER 5 Select Yes with 2 and press ENTER 6 Select Start with 2 and press ENTER A message appears when finished 7 Press ENTER Notes Deleting all video titles will result in all playlists also being deleted Delete does not work if one or more titles are protected Providing a disc with a name DVD RAM FUNCTIONS Cartridge Protection Off Disc Protec...

Page 54: ...hether to show the top menu after finalizing the disc Do this before finalizing the disc 4 Select Playback will start with with 3 4 and press ENTER 5 Use 3 4 to select a desired item and press ENTER DVD s Top Menu The top menu appears first First Title on DVD The disc content is played without displaying the top menu DVD VHS CHAPTER CREATE TV VIDEO RETURN A B SCHEDULE DELETE ADD DLT CH ENTER F U N...

Page 55: ... must close the first layer to start recording on the second layer Closing makes the first layer unavailable for recording edition is still available You cannot cancel closing Make certain before proceeding 4 Press 3 4 to select Close First Layer and press ENTER 5 Press 2 1 to select Yes and press ENTER 6 Press 2 1 to select Start and press ENTER Closing the layer starts You cannot cancel closing ...

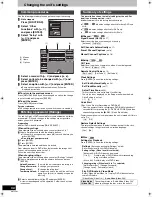
Page 56: ...s effective for both DVD and VHS indicates settings effective for DVD only indicates settings effective for VHS only Channel Signal Source RF IN l 17 Select to suit the type of antenna you are using Antenna CableTV Set Channels Automatically l 17 Preset Channel Captions l 18 Manual Channel Captions l 18 Setup Off Timer Select how long the unit remains on when it is not being used 2 Hours 6 Hours O...

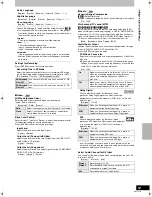
Page 57: ...ain Secondary Audio Program SAP Digital Audio Output Change the settings when you have connected equipment through the unit s DIGITAL AUDIO OUT terminal l 15 Press ENTER to display the menu PCM Down Conversion Select how to output audio with a sampling frequency of 96 kHz or 88 2 kHz Signals are converted to 48 kHz or 44 1 kHz despite the above settings if the signals have a sampling frequency of ...

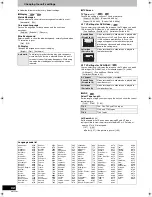
Page 58: ... Letterbox Shrink to fit Video recorded for a widescreen is played in the letterbox style 4 3 Aspect Titles are played as recorded Pan and Scan Stretch to fit Video recorded for a widescreen is played with the sides cut off Letterbox Shrink to fit Video recorded for a widescreen is played in the letterbox style T120 T30 T60 T90 and T120 tapes T160 T140 and T160 tapes T180 T180 tapes Language code ...

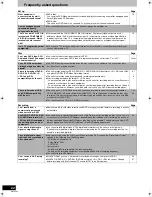
Page 59: ...ails to operate properly Press Í I POWER on the main unit to switch the unit to standby Now press Í I POWER on the main unit again to turn the unit on Cannot finish recording completely The program was copy protected The disc may be full There are already 99 recorded titles R R DL RW 49 recorded titles Cannot play You inserted an incompatible disc Discs recorded in PAL video etc Cannot record on t...

Page 60: ...e able to play and record discs on other equipment after recording them on this unit After finalizing the disc however you will be able to play it on any DVD Video compatible player 6 7 6 Please tell me about CD R and CD RW compatibility with the unit This unit plays CD R CD RW discs which have been recorded in one of the following standards CD DA Video CD MP3 and still pictures JPEG TIFF Close th...

Page 61: ...from the actual time Times shown may disagree with actual times In DVD R DVD R DL R or R DL the remaining capacity does not increase even if titles are deleted Available recording space on a DVD RW DVD Video format or RW increases when the last recorded title is deleted The recording space may increase slightly when other titles are deleted If you repeat recording or editing about 200 times or mor...

Page 62: ...t be operated Some operations are prohibited by the disc The unit is warm U59 appears on the unit s display Wait until U59 disappears One of the unit s safety devices may have been activated Reset the unit as follows 1 Press Í I POWER on the main unit to switch to standby If the unit doesn t switch to standby press and hold Í I POWER on the main unit for about 10 seconds The unit is forcibly switc...

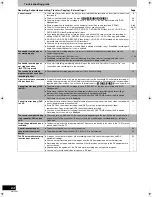
Page 63: ...en playing DVD Video using progressive output one part of the picture momentarily appears to be doubled up Set Progressive in the Video menu to Off This problem is caused by the editing method or material used on DVD Video but should be corrected if you use interlace output 37 There is no apparent change in picture quality when adjusted with the Video menu in the on screen menus The effect cannot ...

Page 64: ...nnected from the household AC outlet while recording or editing the program may be lost or the disc may become unusable We cannot offer any guarantee regarding lost titles or discs You will have to format the disc RAM RW V RW or use a new disc Cannot transfer copy VHS to DVD The write protect tab on the cartridge is set to PROTECT or the disc is protected with DVD Management Some video tapes on th...

Page 65: ... create chapters Cannot mark the start point or the end point during Shorten Title operation The unit writes the chapter division information to the disc when you turn it off or remove the disc The information is not written if there is an interruption in the power before this These operations are not possible with still pictures You cannot set points if they are too close to each other You cannot...

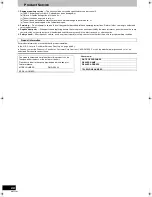
Page 66: ...arts that have the same characteristics as the original parts Unauthorized substitutes may result in fire electric shock or other hazards 4 Safety check After repairs or service ask the servicer to perform safety checks to confirm that the unit is in proper working condition For product information or assistance with product operation In the U S A refer to Customer Services Directory on page l 69 ...

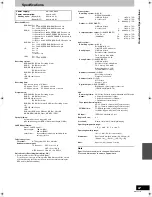
Page 67: ...CATV Channel 5A A 5 ch to EEE ch Quick Start for Recording Quick Start ON 1 Sec Quick Start for Recording on DVD RAM From the power off state recording on DVD RAM starts about 1 second after first pressing the Power button and then sequentially pressing the REC button Quick Start Mode Video system Recording system for DVD MPEG2 Hybrid VBR Input LINE pin jack k2 1 0 Vp p 75 S connectork2 Y 1 0 Vp p...

Page 68: ...till shows 2 fields so there may be some blurring between them but picture quality is generally better A field still shows less picture information so it may be rougher but there is no blurring JPEG Joint Photographic Experts Group This is a system used for compressing decoding color still pictures If you select JPEG as the storage system on digital cameras etc the data will be compressed to 1 10 ...

Page 69: ...e to acts of God THERE ARE NO EXPRESS WARRANTIES EXCEPT AS LISTED UNDER LIMITED WARRANTY COVERAGE THE WARRANTOR IS NOT LIABLE FOR INCIDENTAL OR CONSEQUENTIAL DAMAGES RESULTING FROM THE USE OF THIS PRODUCT OR ARISING OUT OF ANY BREACH OF THIS WARRANTY As examples this excludes damages for lost time travel to and from the servicer loss of media or images data or other recorded content The items list...

Page 70: ...ranty service is performed THIS EXPRESS LIMITED WARRANTY IS IN LIEU OF ALL OTHER WARRANTIES EXPRESS OR IMPLIED INCLUDING ANY IMPLIED WARRANTIES OF MERCHANTABILITY AND FITNESS FOR A PARTICULAR PURPOSE IN NO EVENT WILL PANASONIC CANADA INC BE LIABLE FOR ANY SPECIAL INDIRECT OR CONSEQUENTIAL DAMAGES In certain instances some jurisdictions do not allow the exclusion or limitation of incidental or cons...

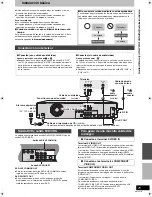
Page 71: ... la unidad mediante una videograbadora Los sistemas de protección de los derechos de autor afectarán las señales de video enviadas mediante una videograbadora y la imagen no se mostrará bien en el televisor Conexión con un televisor Conexión con cable de audio vídeo Conecte por orden numérico de 1 a 4 Después de esta conexión ajuste el canal de salida RF OFF l 72 y luego pulse el botón TV VIDEO de...

Page 72: ...el huso horario en el menú CONFIGURACIÓN Usted no tiene que cambiar el ajuste cuando está conectado a un televisor de aspecto estándar de 4 3 que no sea compatible con la salida progresiva 1 Durante la parada Pulse FUNCTIONS 2 Seleccione Otras funciones con 3 4 y pulse ENTER 3 Seleccione CONFIGURACIÓN con 3 4 y pulse ENTER 4 Seleccione Pantalla TV con 3 4 y pulse 2 1 5 Seleccione Tipo TV 3 4 y pul...

Page 73: ...eccionar la unidad en la que quiere grabar DVD o VHS 3 Inserte un disco Cuando usa un DVD RAM por la primera vez con esta unidad formatéelo para garantizar una esmerada grabación o Inserte un videocasete que tenga intacta la lengüeta de protección contra el borrado accidental 4 Pulse CH W X para seleccionar el canal Para seleccionar con los botones numéricos 5 Pulse REC MODE para seleccionar el mo...

Page 74: ...ión extralarga 8 horas 6 horas 2 16 horas 12 horas 2 8 horas 6 horas 2 FR Grabación flexible 8 horas máximo 8 horas máximo para una cara 8 horas máximo DVD R DL R DL 3 8 5 GB Primera capa L0 Segunda capa L1 XP Alta calidad 55 minutos 50 minutos SP Normal 1 hora 50 minutos 1 hora 40 minutos LP Larga duración 3 horas 40 minutos 3 horas 20 minutos EP Duración extralarga 7 horas 25 minutos 5 horas 30 ...

Page 75: ...nidad computa una velocidad de grabación que permite adaptarla a la hora establecida dentro del tiempo que queda en el disco con la mejor calidad de la imagen Preparación Seleccione el lado DVD pulsando DRIVE SELECT Seleccione el canal para grabar 1 Durante la parada Pulse F Rec 2 Pulse 2 1 para seleccionar Hora y Min y pulse 3 4 para ajustar el tiempo de grabación También puede poner el tiempo de...

Page 76: ...los botones numéricos Ej 5 0 5 15 1 5 Si inserta un número más grande que el número total de títulos se selecciona el último título Para eliminar la lista de títulos Pulse RETURN Para su referencia Iconos de la pantalla Direct Navigator Título protegido Protegido contra copia así que él no se pudo grabar t No puede reproducir En grabación Título con restricción grabación de una sola vez RAM Puede ...

Page 77: ... la contraseña con los botones numéricos y pulse ENTER Por lo que respecta a la contraseña se remite a la funda del disco etc RAM R R DL RW V R R DL RW RW VR Puede saltar aproximadamente 1 minuto con una presión Durante la reproducción Pulse CM SKIP RAM Durante la reproducción Pulse CREATE CHAPTER Pulse SKIP o 9 SKIP para saltar al comienzo de un capítulo No puede activar esta función cuando está ...

Page 78: ...pulsado PAUSE durante 2 segundos o más Pulse 1 PLAY para reiniciar la normal reproducción Para rebobinar a una más alta velocidad Pulse JET REW6 En la pantalla del televisor se visualiza la indicación J REW salvo cuando aparece la del tiempo que queda en la cinta Según sea la cinta o la condición de funcionamiento la velocidad de rebobinado podría cambiar algún tanto Cuando ésta esté rebobinada a ...

Page 79: ...ize 55 68 Flexible Recording 27 Format Disc 54 FR Flexible Recording Mode 24 FUNCTIONS window 37 GUI Transfer Copying 46 48 Intact erasure prevention tab 10 Jet Rewind 34 JPEG 32 68 Language audio 57 code list 58 on screen 58 soundtrack 36 subtitle 36 57 Menu MP3 32 on screen 36 Picture 33 Setup 56 Mode recording 24 Still Mode 57 MP3 32 Noise reduction NR DNR 37 Line in NR 37 One Touch Transfer Co...

Page 80: ... other rights owners Use of this copyright protection technology must be authorized by Macrovision Corporation and is intended for home and other limited viewing uses only unless otherwise authorized by Macrovision Corporation Reverse engineering or disassembly is prohibited Panasonic Consumer Electronics Company Division of Panasonic Corporation of North America One Panasonic Way Secaucus New Jer...

Reviews: