


25
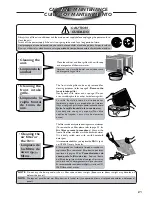
• The room is too big for the unit’s cooling capacity.
• The ventilation lever is set to OPEN.
• The air circulation is impeded by curtains or furniture.
• After 15 minutes of operation, it is normal for the temperature difference between intake
and outlet air to be more than 14.4°F.
• El tamaño de la habitación es muy grande para la capacidad de enfriamiento de la unidad.
• La palanca de ventilación se encuentra en la posición "OPEN".
• El aire no puede circular bien por que cortinas o muebles se lo impiden.
• Después de 15 minutos de operación, es normal que la diferencia de temperatura entre la
toma de aire y la salida será más de 14,4°F.
• The main power cord is not plugged in.
• The internal fuse has blown.
• The main circuit breaker has tripped.
• Remote control batteries are weak.
• El cable de alimentación no está enchufado.
• El fusible interno se ha quemado.
• El interruptor de circuitos de la casaha disparado.
• Las baterías remotas del control son débiles.
Condition
Condición
Condition
Condición
Condition
Condición
Condition
Condición
2
3
4
5
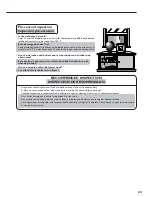
• Humidity is high.
• Condensed water is overflowing.
• To rectify the problem, mount an optional drain pan to the unit (part no. CWH40175,
obtained from your nearest servicenter).
• La humedad es alta.
• El agua condensada se está desbordando.
• Para solucionar el problema, monte un bandeja de drenaje opcional a la unidad (serie
no. CWH40175, disponible con su servicentro más cercano).
• The unit is tilted inward. To rectify this, tilt the unit slightly outward.
• The drain pan may be blocked.
• Mount the optional drain pan if you prefer.
• La unidad está inclinada hacia adentro. Para corregir, incline la unidad un poco hacia
afuera.
• La bandeja de drenaje puede estar bloqueada.
• Monta el optativo tubo de desagüe, si prefíeres.
If the trouble persists after you have
checked all of these, call your authorized
Panasonic dealer or servicenter.
Service information can be obtained 24
hours/day by calling
1-800-211-PANA (7262).
To expedite the repair of your air
conditioner:
• Please have your proof of purchase.
• List all symptoms the unit is exhibiting.
Si todavía tiene problemas después de haber
verifícado todos los puntos anteriores, llame a su
distribuidor o al centro de servicio autorizado de
Panasonic. El servicio de atención al público esta
disponible las 24 horas del día, llamando por teléfono
al número 1-800-211-PANA (7262).
Para rápido servicio de su aire acondicionador:
• Por favor tenga su recibo de compra.
• Haga una lista de todos los síntomas que ha notado
con su acondicionador de aire.