background image

36

37

CQ-VD5505W

English

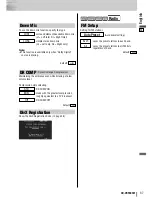
Down Mix

To use the down mix function, specify the type.

: surround element decodable down mix

(Lt = Left total, Rt = Right total)

: simple stereo down mix

(Lo = Left only, Ro = Right only)

Note

¡

This function is available only when “Dolby Digital”
source is playing.

default: 

Lt/Rt

Lo/Ro

Lt/Rt

DivX Registration

Show the DivX Registration Code (

a

page 38)

DR COMP 

(Dynamic Range Compression)

Maintaining the ambience even while listening at a low
volume level

Compression style selecting 

: DR COMP ON

: made with the greatest compression,

roughly equivalent to a TV broadcast.

: DR COMP OFF

default: 

Off

Off

MIN

STD

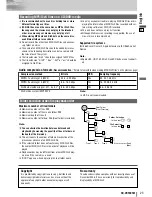
FM Setup

Setting for FM stations

: saves the preset stations in each band.

: saves the preset stations in all FM lists

regardless of band.

default: 

Each

All

Each

(Auto preset setting)

Auto Preset

Radio

DVD

Audio

Screen

User

Summary of Contents for CQ-VD5505W

Page 1: ...Model CQ VD5505W MUTE VOL SRC PWR DIMMER SETUP TUNE TRCK TILT TEXT ...

Page 2: ...fety related vehicle components fuel tank brake suspension steering wheel pedals airbag etc for wiring or fixing the product or its accessories Installing the product on the air bag cover or in a location where it interferes with airbag operation is prohibited Check for piping gasoline tank electric wiring and other items before installing the product If you need to open a hole in the vehicle chas...

Page 3: ... care not to damage the leads Prevent them from getting caught in the vehicle chassis screws and moving parts such as seat rails Do not scratch pull bend or twist the leads Do not run them near heat sources or place heavy objects on them If leads must be run over sharp metal edges protect the leads by winding them with vinyl tape or similar protection Use the designated parts and tools for install...

Page 4: ...E DO NOT OPEN COVERS AND DO NOT REPAIR BY YOUR SELF REFER SERVICING TO QUALIFIED PERSONNEL This system is designed so that you cannot see moving pictures while you are driving Park your car in a safe place and pull the side brake parking brake lever before watching the monitor A rear monitor option displays moving pic tures while driving Note Be sure to connect the side brake parking brake connect...

Page 5: ...seem to be out of synchronization or the image quality may decline in such environments Note that this is not a malfunction or problem In order to protect the liquid crystal panel keep it out of direct sunlight while the unit is not in use Sudden changes in the temperature inside the car such as those which occur immediately after the car s air conditioner or heater has been turned on may cause th...

Page 6: ...ignal auto detection function of this unit allows users to be free from selection between PAL and NTSC before use of your discs For output signal set a page 36 TV Type Touch Panel Operation Simply touch the screen lightly to operate virtually all functions Easy to use menus and icons let you touch and choose what you want so you can start using your system from the very first day That also means t...

Page 7: ...eration Overview 12 General 14 Power on power off display open close source selection volume mute tilt angle Before Disc Playback 16 Disc Player 18 Notes on MP3 DivX 22 Radio 24 TV Tuner Control 26 AV1 AV2 28 Settings 30 Setup operation User screen audio DVD radio About DivX VOD Content 38 Troubleshooting 39 Maintenance 43 Notes on Discs 44 Language Code List 45 Definition of Terms 46 Specificatio...

Page 8: ...ion DivX registration radio settings a page 37 FM set up Note Refer to Settings a page 30 for further information about operations settings and others of the menu screen Radio DVD Audio Screen User You may need to set the following depending on the devices to be connected AV1 AV2 Camcorder VCR etc Adjust a page 33 Input Select Settings Warning When you connect external devices to AV1 IN AV2 IN AV1...

Page 9: ... files CD Rs RWs or DVD Rs RWs containing DivX files DivX DivX DivX MP3 MP3 MP3 CD CD CD VCD VCD VCD DVD DVD DVD Compatible types of disc The discs compatible with the targeted operation Compatible Discs Compatible Discs Compatible Discs Disques compatibles Compatible Discs Compatible Discs Compatible Discs Discos compatibles Compatible Discs Operation on the Touch Panel You can use the touch pane...

Page 10: ...low playback d s d TUNE TRCK Shows the setup screen Switches on off the power Changes the modes such as sound and picture SRC PWR The screen brightness is toggled between the set level and maximum luminance DIMMER Adjusts the sound volume Mutes the sound temporarily y s d TUNE TRCK MUTE VOL SRC PWR DIMMER SETUP TUNE TRCK TILT Remote control sensor Reset switch e DIMMER w VOL q MUTE r SRC PWR SOURC...

Page 11: ...10 11 CQ VD5505W English Disc slot Panel Open ...

Page 12: ... not supported by the disc contents Displays the Source Selection Screen Source Button Setup Button Example DVD mode Displays the Setup Screen Current mode Disc indicator a page 17 Lights when a disc is loaded Clock time a page 32 Note The following picture is partly darkened for explanation Displaying contents and their positions partly vary with each mode Refer to the description of each mode fo...

Page 13: ...o cancel If no operation takes place for more than 10 seconds when Operation Screen is ON Operation Screen is turned off DVD DivX Operation Screen List Screen Touch Touch Touch Touch Touch Touch Touch Operation Screen 1 Operation Screen 2 Operation Screen 3 Operation Screen 1 Operation Screen 2 List Screen Touch Touch Touch Touch Operation Screen 1 folder file name Operation Screen 2 ID3 tag List ...

Page 14: ...approximately 30 seconds When a disc is already loaded the disc will be ejected SRC PWR Power OFF Preparation Turn your car s ignition key to the ACC or ON position Touch Press and hold for more than 2 seconds RADIO AM FM a page 24 a page 18 a page 28 AV1 AV2 DVD DVD VCD Video CD CD MP3 DivX Note If there is no external sources connected AV1 AV2 mode can be set to skip a page 33 Up Down Volume Not...

Page 15: ...UTE Mute Note After adjusting its angle also adjust the brightness as well a page 34 The car model and installation conditions may impose some restrictions on the adjustment of the monitor s angle Warning Do not touch the unit while the display is moving Inserting hands fingers or for eign objects into the unit can cause injuries and damage to the unit General Operations continued 1 6 ...

Page 16: ...16 9 LB 16 9 LB 4 3 3 2 2 3 2 ALL 4 5 2 3 4 5 Example Notes on DVD Rs RWs Do not mix DVD Video formatted data and other format ted data on the same disc Discs in the video recording VR format are unplayable Unfinalized discs are unplayable Use disc at once recording for DVD R DL double layer Some discs are unplayable depending on the disc itself device drive and software that are used for disc rec...

Page 17: ...nto the disc slot This unit does not support 8 cm disc In case of load such a disc eject and remove the disc from the slot immediately Caution When the disc is inserted or ejected to prevent disc scratches never exert any downward force on the disc Disc Insert Press u TILT to open the display The mode that supports the disc is selected and play back starts When a disc is in the player change to di...

Page 18: ...P3 DivX file Note s and d of the main unit can scroll up and down the file list by 1 page respectively too It is not possible to display the whole tree and file list in a folder The displayed contents on the touch panel vary with circumstances Note Touch to change the display a page 13 CD MP3 Operation Buttons Audio Mode Display List Folder File Track Selection Source Button Playing time Operation...

Page 19: ... DivX DivX MP3 MP3 MP3 CD CD CD VCD VCD VCD DVD DVD DVD To resume playback touch Pause DivX DivX DivX MP3 MP3 MP3 CD CD CD VCD VCD VCD DVD DVD DVD Slow Playback DivX DivX DivX VCD VCD VCD DVD DVD DVD Repeat Play DivX DivX DivX MP3 MP3 MP3 CD CD CD VCD VCD VCD DVD DVD DVD Repeat Play within the Current Folder DivX DivX DivX MP3 MP3 MP3 To resume playback touch again or touch Note Reverse slow playb...

Page 20: ...d Setup button Press The Source button and Setup button appear Source Button a page 12 Setup Button a page 12 Operations Operations Compatible Discs Compatible Discs Compatible Discs Disques compatibles Compatible Discs Compatible Discs Compatible Discs Discos compatibles Compatible Discs 1 VCD VCD VCD DVD DVD DVD Showing menu and selecting an item q Menu appears w Select the desired item e Determ...

Page 21: ...e Discs Discos compatibles Compatible Discs DivX DivX DivX DVD DVD DVD DivX DivX DivX DVD DVD DVD Subtitle Language It is possible to change the subtitle language during play if multiple lan guages are recorded on the disc Note There may be a brief delay before the subtitles appear Touch during playback Touch during playback Touch during playback Audio Language It is possible to change the audio l...

Page 22: ...greater than 2GB or having no index may not play properly on this unit This unit supports all resolutions up to maximum of 720 x 480 NTSC 720 x 576 PAL You can select up to 8 types of audios and subtitles on this unit GMC Global Motion Compensation is not supported Display Information on the Main Unit Displayed items Displayable characters Displayable length of file name folder name within 64 char...

Page 23: ...files on a CD media Folder selection order file playback order Maximum number of files folders Maximum number of files 999 Maximum number of files in one folder 999 Maximum depth of trees 8 Maximum number of folders 255 Root folder is included Note You can shorten the duration between data read and playback by decreasing the quantity of files or folders or the depth of the hierarchy This unit coun...

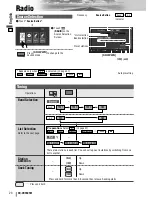
Page 24: ...n is selected a page 37 e e e e All Each Auto Preset FM Setup Radio Setup All Operations Band Selection List Selection Refer to the next page Station Selection Seek Tuning Press and hold Press and hold for more than 0 5 second then release Seeking starts FM 1 FM 2 FM 3 AM There are 6 stations in each list You can call up next 6 stations by switching from one list to another Tuning Up Down Up Down ...

Page 25: ...tations Touch and hold for more than 2 seconds Once set the preset stations are sequentially scanned for 5 seconds each scanning New stations overwrite existing saved stations Touch and hold for more than 2 seconds Once set the preset stations are sequentially scanned for 5 seconds each scanning New stations overwrite existing saved stations In total 18 FM stations are automatically preset A stati...

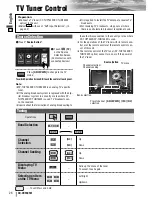
Page 26: ...touch the center of touch panel Channel selection Channel seeking TV menu Band selection Preset channel selection q Touch Source Button d w Touch TV on the Source Selection Screen Content varies with connected devices Source Selection Press SRC PWR to change to the TV mode Note CY TUP133W CY TUN133W is an analog TV specific tuner If the analog broadcast system is replaced with the dig ital broadca...

Page 27: ...t the preset chan nel once Writing Preset Memory Determine Touch and hold for more than 2 seconds appears if the number of receivable channels is less than 12 New channels overwrite existing saved channels 12 channels with first to 12th highest in signal strength will be preset to each band Preset channel writing mode display appears d d Select a preset number that you want to delete Select a band...

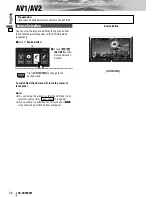
Page 28: ... operation buttons disappear Input Select Preparation Connect an optional external device to the AV1 AV2 You can view the images and listen to the sounds from the connected external devices in the AV1 AV2 mode respectively To switch Operation Screen ON touch the center of touch panel q Touch Source Button d w Touch AV1 AV2 on the Source Selection Screen Source Selection Press SRC PWR to change to ...

Page 29: ...28 29 CQ VD5505W English ...

Page 30: ...of compression style a page 37 Selection of type of down mix a page 36 Appearance of DVD image a page 36 Language Setting DVD DVD a page 35 Balance fader adjustment a page 35 Bass treble adjustment a page 35 SQ3 setting Audio Audio a page 34 Display aspect setting a page 34 Display appearance a page 34 Adjusting the brightness Screen Screen a page 33 Other settings a page 33 Memory clearance a pag...

Page 31: ...ting menu The item may not be temporarily selected depending on the current disc type or the state of this unit In such a case change the source to another one and try to set up the item again Example DVD mode Touch in Operation Screen Touch desired setting q w Example setting screen of a page 33 Input Select Determines the setting and goes back to the pre vious menu out of the menu e Determines t...

Page 32: ...l the known ID code q Enter the preset old 4 digit ID code If the wrong ID code is entered it is not possible to cancel the ID code function w Touch and hold until Completed is displayed The ID code cancelling procedure is complet ed The unit now works without an ID code Note Should your unit ever require service cancel your ID code before sending for repair The ID code setting cannot be eliminate...

Page 33: ...uctions connected to the CAMERA IN unconnected default Note Make sure to select when no rear view camera is connected The image from the rear view camera may be blurred in the night or a dark place Off Off Off On Rear view camera set up Camera AV2 Skip TV NAVI AV2 AV2 input selection AV2 AV1 Skip AV1 AV1 input selection AV1 Other Other settings sets to ON if your car has ACC position sets to OFF i...

Page 34: ...iew camera is in operation with the transmission gear shift in the reverse position the image is shown on the Full screen only In some cases the picture looks different from the original one due to your selection of aspect Aspect Caution This is to remind you that compression or extension of the screen using the aspect ratio screen mode changing function of this product for commercial purpose of p...

Page 35: ...nge 12 dB to 12 dB Adjustable frequency BASS 60 Hz 80 Hz 100 Hz 200 Hz MID 500 Hz 1 kHz 2 kHz 3 kHz TRE 10 kHz 12 kHz 15 kHz 18 kHz Note The new level adjustment will overwrite the previous level adjustment For resuming the factory settings touch and hold for more than 2 seconds Bass Treble Bass treble adjustment more less more less Setting range 12 dB to 12 dB default 0 dB Treble adjustment Trebl...

Page 36: ... the equipment connected to VIDEO OUT default The angle mark is displayed to indicate the parts where multi angle data is recorded activates angle mark inactivates angle mark default On Off On Angle mark setting Angle Mark PAL NTSC PAL VIDEO OUT terminal setting TV Type Letter Box Pan Scan Pan Scan Letter Box Pan Scan DVD software mode Letter Box Language Language Setting English Chinese French ot...

Page 37: ...tion Show the DivX Registration Code a page 38 DR COMP Dynamic Range Compression Maintaining the ambience even while listening at a low volume level Compression style selecting DR COMP ON made with the greatest compression roughly equivalent to a TV broadcast DR COMP OFF default Off Off MIN STD FM Setup Setting for FM stations saves the preset stations in each band saves the preset stations in all...

Page 38: ... content Authorization Error is dis played Regarding DivX content that can only be played a set num ber of times Some DivX VOD content can only be played a set number of times When you play this content the remaining num ber of plays is displayed You cannot play this content when the number of remaining plays is zero Rental Expired is displayed When playing this content The number of remaining pla...

Page 39: ...et to ON aSet MUTE to OFF The wiring of speaker lines is not correct or a break or poor contact arises aCheck the wiring in accordance with the wiring diagram Installation Instructions Noise There is an electromagnetic wave generator such as a cellular phone near the unit or its electrical lines aKeep the electromagnetic wave generator such as a cellular phone away from the unit and the wiring of ...

Page 40: ...n object on the disc aRemove the foreign object or use a flawless disc No playback or disc ejected The disc is inserted upside down aInsert a disc correctly There is a flaw or foreign object on the disc aRemove the foreign object or use a flawless disc Sound skipping due to vibration The unit is not sufficiently secured aSecure the unit to the console box The unit is tilted at over 30 in the front...

Page 41: ...playback or disc ejected The disc has unplayable formatted data aRefer to the description about MP3 DivX for playable formats The CD Rs RWs DVD Rs RWs that are playable on other devices are not playable on this unit The playability of some CD Rs RWs DVD Rs RWs may depend on the combina tion of media recording software and recorder to be used even if these CD Rs RWs DVD Rs RWs are playable on other...

Page 42: ... The type of the file that is selected is not supported aCheck disc No Disc No disc is in the player aInsert disc into the disc slot Region Code Error The region code of the disc to be used is not compatible with this unit aPress u TILT and check the disc You are trying to play the DivX VOD content that was purchased with a different registration code aPurchase the DivX VOD content with the regist...

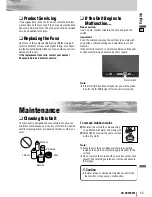
Page 43: ...ormal condition call the near est Panasonic Service Center and ask for repairs Note If the ID CODE has been already set you will be asked to enter the ID CODE right after the unit is restarted SRC PWR DIMMER SETUP T Reset switch Maintenance To remove stubborn stains 1 Moisten the soft cloth in dishwashing soap diluted with water and wring well 2 Wipe lightly Go over the same surface with a dry clo...

Page 44: ...allel with the unit Otherwise the disc may be scratched or marked in the process When inserting a disc do not put one disc on anoth er Failure to observe this may cause the discs to be jammed Do not leave discs in the following places Direct sunlight Near car heaters Dirty dusty and damp areas On seats and dashboards Disc cleaning Use a dry soft cloth to wipe from the center outward Do not attach ...

Page 45: ...odian 7578 Kannada 7579 Korean 7583 Kashmiri 7585 Kurdish 7589 Kirghiz 7665 Latin 7678 Lingala 7679 Laothian 7684 Lithuanian 7686 Latvian Lettish 7771 Malagasy 7773 Maori 7775 Macedonian 7776 Malayalam 7778 Mongolian 7779 Moldavian 7782 Marathi 7783 Malay 7784 Maltese 7789 Burmese 7865 Nauru 7869 Nepali 7876 Dutch 7879 Norwegian 7982 Oriya 8065 Panjabi 8076 Polish 8083 Pashto Pushto 8084 Portugues...

Page 46: ...screen by looking at the menu shown on the screen In these instructions playback using the menu screen is referred to as the menu play for video CDs This player supports Video CDs with playback control DivX DivX is a popular media technology created by DivX Inc DivX media files contain highly compressed video with high visual quality that maintains a rela tively small file size DivX files can also...

Page 47: ...tio 50 dB Audio section Output voltage Impedance 2 Vrms 600 Ω Frequency characteristics 20 Hz 20 kHz 1 dB Dynamic range 96 dB during CD playback S N ratio 95 dB during CD playback Monitor Liquid crystal panel 7 inch wide Screen dimensions W x H x D 154 x 87 x 177 mm Number of pixels 336 960 pixels 234 vertical x 480 horizontal x 3 Valid pixel ratio Over 99 99 Display method Transparent color filte...

Page 48: ...YFM284C686CA PTW1206 2037 Printed in China Matsushita Electric Industrial Co Ltd Web Site http panasonic net CQ VD5505W ...

Page 49: ...Installation Instructions àÌÒÚ Û͈Ëfl ÔÓ ÏÓÌÚ ÊÛ Model CQ VD5505W TEXT ...

Page 50: ... CAUTION PLEASE FOLLOW THE LAWS AND REGULATIONS OF YOUR STATE PROVINCE OR COUNTRY FOR INSTALLATION OF THE UNIT TO REDUCE THE RISK OF FIRE OR ELECTRIC SHOCK OR PRODUCT DAMAGE DO NOT EXPOSE THIS APPLIANCE TO RAIN SPLASHING DRIP PING OR MOISTURE ...

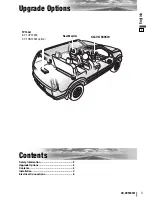
Page 51: ...2 3 CQ VD5505W English Upgrade Options Safety Information 2 Upgrade Options 3 Contents 3 Installation 4 Electrical Connections 8 Contents CQ VD5505W Rear Monitor TV Tuner CY TUP133W CY TUN133W option ...

Page 52: ...y a page 8 13 Failure to do so may result in damage to the unit 3 Connect the power lead after all other connections are made 4 Be sure to connect the battery lead yellow to the pos itive terminal of the battery or fuse block BAT ter minal 5 Insulate all exposed wires to prevent short circuiting 6 Secure all loose wires after installing the unit 7 Please carefully read the operating and installati...

Page 53: ...t prior notice due to improvements Mounting Collar w is mounted on the main unit at shipment Use the supplied screws for installation exclusively In case of losing any of them please order the specific screw Qty Diagram Item No Trim Plate YFC054C091ZA q 1 Mounting Collar YFX214C437ZA w 1 ZZBISVD6503 Round Head Screw 5 mmø x 8 mm t 2 Flat Head Screw 5 mmø x 8 mm y 6 YEJV01060 Mounting Bolt 5 mmø r ...

Page 54: ...o the dash board and bend the mounting tabs out with a screwdriver Establish the rear connection of the unit After fixing Power Connector u fix the rear of the unit to the car body by either method a or b Insert the unit into Mounting Collar w Secure the clamp plate of Mounting Collar w to the hook Insert Trim Plate q After installation reconnect the negative battery terminal Snapping point q w e ...

Page 55: ...emoving Procedures q Remove the trim plate q w Lock release q Insert the lock cancel plate e until you hear a click w Pull the unit out e Pull the unit out with both hands q w Note Use pliers to bend the fingers on the bracket vertically Select mounting screws according to the hole positions and hole shape of the bracket t Round Head Screw 5 mmø x 8 mm Note Recycle the Round Head Screws that fixed...

Page 56: ... be extremely high Pre Out Connector front To external amplifier Pre Out Connector rear To external amplifier Camera Input Terminal CAMERA IN Connect a rear view camera a page 12 Video Input Terminal AV1 IN Video Input Terminal AV2 IN Connect a TV tuner VCR camcorder other brand s car navigation system etc a page 13 R Red Red White Black L White Yellow q Remote Out Connector To Remote In of connec...

Page 57: ...ipe To an external amplifier Note Use the power control lead of the TV tuner for TV tuner connection Connect both the power control lead of the TV tuner and the amplifier control connector of the external amplifier when the TV tuner and external amplifier are connected at the same time Side Brake Parking Brake Connection Lead Bright green Be sure to wire the side brake parking brake for safety and...

Page 58: ...rake parking brake lever Connecting the Side Brake Parking Brake Connection Lead Hand brake Foot brake Side Brake Parking Brake Connection Lead Bright green When the side brake parking brake lever is engaged the unit is grounded by the chassis Side brake parking brake switch Car chassis Battery Brake light Clip Connector Commercialized product Side Brake Parking Brake Connection Lead Bright green ...

Page 59: ...Power Connector Power Control Lead RCA Cord supplied with CY TUP133W CY TUN133W External Amplifier Control Power Lead Note Connect both the power control lead of the TV tuner and the amplifier control connector of the external amplifier when the TV tuner and external amplifier are connected at the same time Power Connector supplied with CY TUP133W CY TUN133W Clip Connector L White R Red L White R ...

Page 60: ...Note Connect the reverse lead after cutting the terminal at the end Use a Reverse Extension Cord option if needed Connection with Rear View Camera Rear View Camera CY RC50KW Video Yellow RCA Cord Rear View Camera Control Unit CQ VD5505W Rear u Power Connector Reverse lamp Clip connector Commercialized product Battery Car chassis Transmission gear Reverse Lead Violet white stripe Camera Input Camer...

Page 61: ...ellow Example Rear Monitor Video Input Audio Right Audio Left Caution For people sitting in the front seats please enjoy only audio during driving INTELLIGENT SYSTEM BS G CODE POWER Connection with VCR or Camcorder CQ VD5505W Rear R Red L White Video Yellow VCR Camcorder R Red L White Video Yellow RCA Cord Video Output Audio Right Audio Left Note Refer to the operating instructions for the connect...

Page 62: ...YFM294C106CA PTW1206 2037 Printed in China Matsushita Electric Industrial Co Ltd Web Site http panasonic net ...

Reviews: