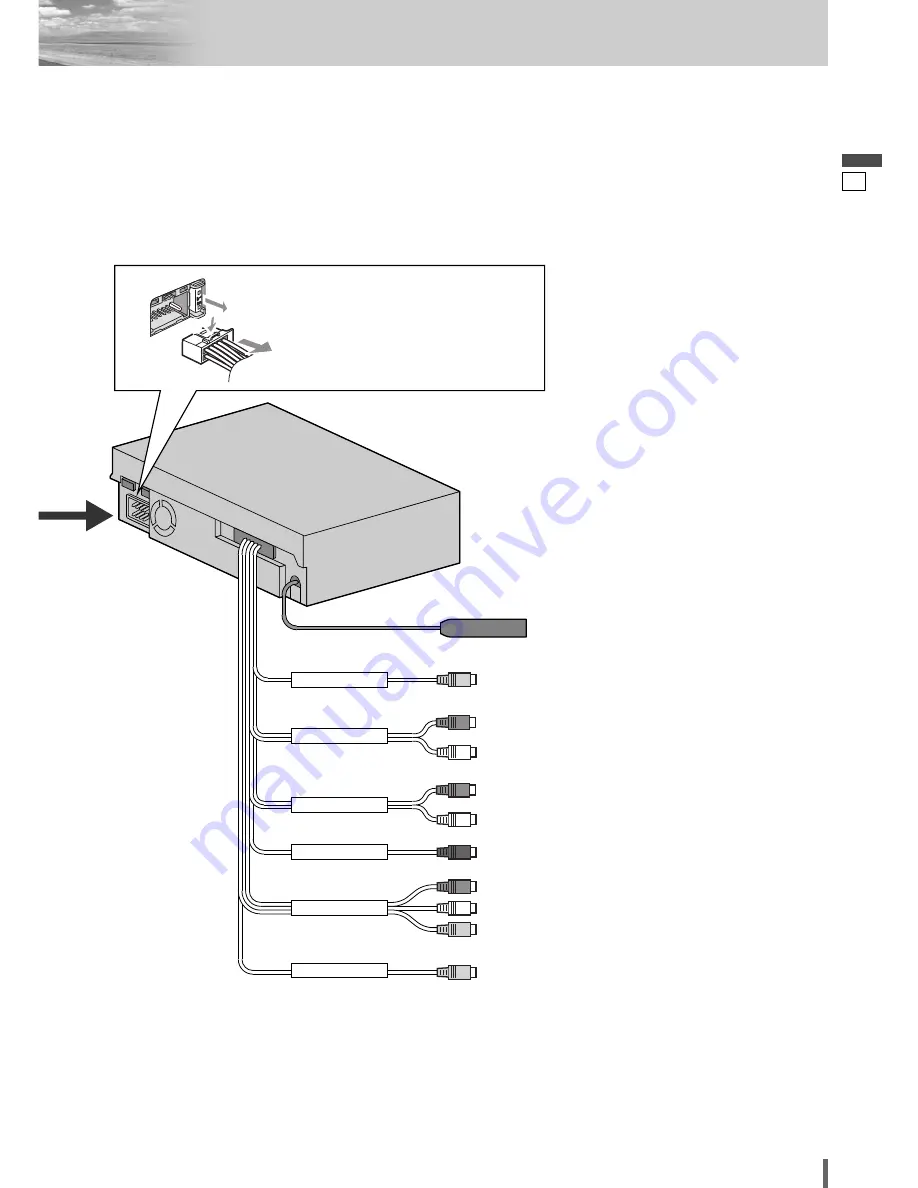
VIDEO OUT
PRE OUT REAR
REMOTE OUT
PRE OUT FRONT
CAMERA IN
AV2 IN
10
11
CQ-VD5005W
English
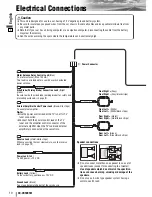
Note:
¡
To prevent from damage to the unit, be sure to follow the wiring diagrams below.
¡
Be sure to fully plug in the connectors. Secure them with clamps and tapes.
¡
All other installation methods require the use of dedicated metal fittings. Consult with a qualified servicing engineer or
your dealer if other methods are required.
¡
Installation of this product may interfere with the grounding properly. In such a case, connect the ground lead of the
external equipment to be connected to the mounting bolt
r
that secures this product.
¡
The pre-out connector is used exclusively to an external amplifier. Accordingly, do not connect the audio input termi-
nal and the like of other external devices to this connector.
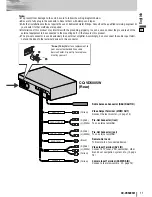
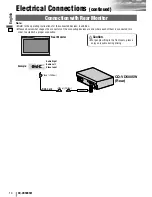
Video Output Terminal (VIDEO OUT)
Connect the rear monitor. (
a
page 14)
Radio Antenna Connector (RADIO ANT IN)
Pre-Out Connector (front)
To an external amplifier.
Pre-Out Connector (rear)
To an external amplifier.
Remote-Out Lead
To Remote-In of connected device.
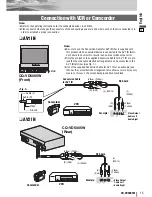
Video Input Terminal (AV2 IN)
Connect a TV tuner, VCR, camcorder, other
brand’s car navigation system, etc. (
a
page
15)
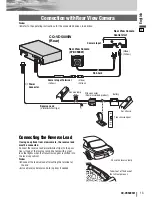
Camera Input Terminal (CAMERA IN)
Connect a rear view camera. (
a
page 13)
(Yellow)
(R)(Red)
(L)(White)
(R)(Red)
(L)(White)
(R)(Red)
(L)(White)
(Yellow)
(Yellow)
(Black)
CQ-VD5005W
(Rear)
1
3
2
*Fuse (15 A)
Refer fuse replacement to
your nearest authorized Panasonic
Service Center. Do not try fuse replace-
ment by yourself.

