


CQ-C7413U/C7113U
15
English
XM Receiver
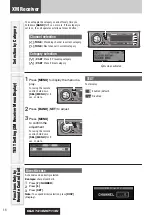
Operation Flow
1
Press
[SRC]
(Source) to select the XM
Satellite Radio mode.
2
Press
[BAND]
to select a band.
Notes:
¡
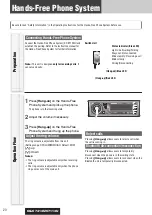
Connect the optional XM receiver (XMD-1000).
¡
To connect the XM receiver (XMD-1000), it is
required to use an optional extension cord that is
produced by XM exclusively for Panasonic prod-
ucts.
¡
“RADIO ID” is displayed with channel 0.
¡
“UPDATING” is displayed during the update of the
identification code.
¡
“LOADING” is displayed during the acquisition of
audio data or information.
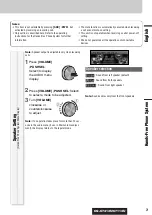
3
Select a channel.
Channel selection
[
]
]
(
TUNE
): Preceding channel
[
[
]
(
TUNE
): Next channel
Preset channel selection
[
{
]
(
P·SET
: Preset): Lower preset channel
[
}
]
(
P·SET
: Preset): Higher preset channel
Note:
Direct selection can be executed with
[1]
to
[6]
buttons on remote control.
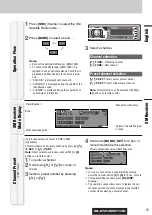
Channel Preset
(P·SET: Preset)
Up to 6 channels can be preset in XM1 to XM3
respectively.
Preset channels can be simply called up by pressing
[
}
]
(
P·SET
) or
[
{
]
(
P·SET
).
Note:
Direct selection can be executed with
[1]
to
[6]
buttons on remote control.
1
Tune into a channel.
2
Hold down
[
}
]
or
[
{
]
for 2 sec. or
more.
3
Select a preset number by pressing
[
}
]
or
[
{
]
.
4
Hold down
[BAND]
(
SET
) for 2 sec. or
more to determine the selection.
Preset number/channel number blinks once.
Notes:
¡
In step 2, a channel can be registered by holding
down the numeric button
[1]
to
[6]
for 2 sec. or more.
¡
To stop presetting channels, press
[D]
(
DISP:
Display
).
¡
The operation above allows users to replace the cur-
rent channel with the channel preset in the selected
number while selecting a preset channel.
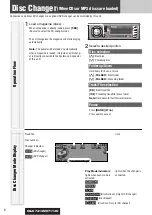
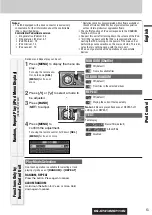
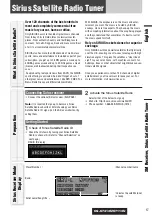
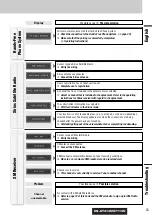
XM Receiver
Mode Display
Artist name/Song title
Band
Preset Number
Channel number/name
indicates the satellite tuner
is ready.


