


Using with a rear monitor
Audiovisual function images from the main unit are
displayed on the rear monitor. When
is pressed
while the Audiovisual screen displays, the navigation
screen displays on the main unit while the selected
image is output to the rear monitor.
[DVD, AV only]
Display the Audiovisual screen on the
rear monitor
Example: The Audiovisual screen is displayed on the
rear monitor while the navigation screen is
displayed.
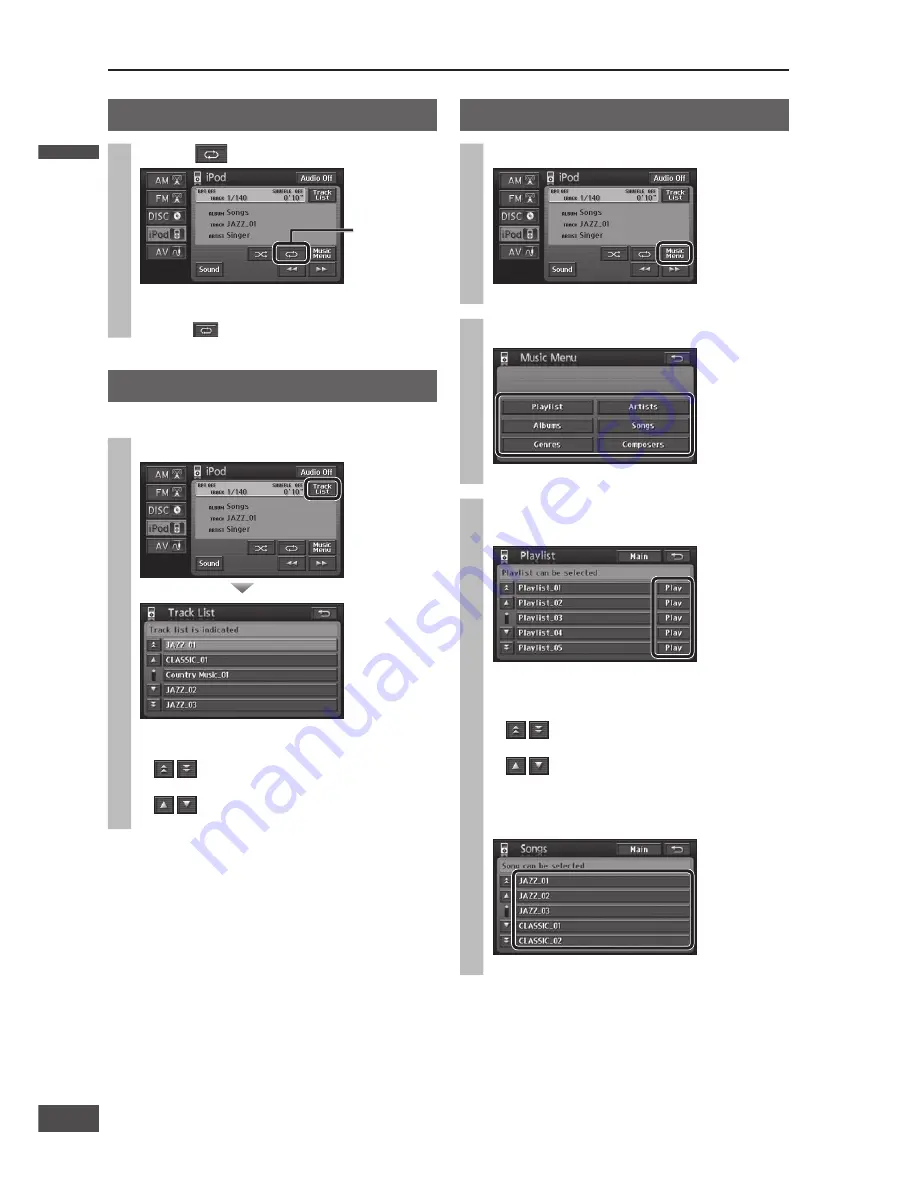
Repeat play
Select
.
Illuminates
when On.
The track being played is played repeatedly.
1 track indicator illuminates.
Select
again to cancel repeat play.
Track list
All tracks to be played are listed.
Select [Track List].
The track being played is displayed in bold.
Select a track to play that track.
: Moves the cursor to the previous/next
screen.
: Moves the cursor to the previous/next
item.
Select a track from the list
1
Select [Music Menu].
The iPod Music Menu screen is displayed.
2
Select the list to display.
The list screens are displayed.
3
Select [Play] for the items to play
from the list.
Plays the selected items.
Select [Main] to return to the iPod operation
screen.
: Moves the cursor to the previous/next
screen.
: Moves the cursor to the previous/next
item.
When an item is selected, the track list within the
item is displayed.
Select a track to play that track.
Note:
Category registration on the iPod itself is required for
use of lists.
TV tuner control
Preparation:
Connect a TV tuner (CY-TUN153U, option) to the
unit.
You must install the TV antenna to receive TV
broadcasts.
To receive TV broadcasts, park your car in an
area free from any obstacles that would impede
reception.
Switch to TV
Select [AV] on the Audiovisual
source operation screen.
(
Operating Instructions)
TV (AV) operation screen is displayed.
When [PICTURE] is selected, the image is
displayed.
Refer to the Operating Instructions for operation
of [Sound] and [ASPECT].
AV menu
Touch the screen while video is displayed to display the
AV menu.
Refer to the Operating Instructions for [Display]
operations.
Select [Hide Buttons] to close the AV menu.
Note:
For TV operation, use the remote control unit provided
with the TV tuner (CY-TUN153U, option), pointing it
towards the remote control signal sensor of the main
unit.
Refer to the TV tuner instruction manual for details of
its operation.
Rear monitor
Preparation:
Connect a rear monitor to the unit.
iPod control
(continued)
[Rear monitor]
The selected source is displayed.
Switch the rear monitor to the input mode that
is connected to the main unit. (video input, etc.)
[Main unit]
The navigation screen is displayed.
English
English
14
15
15
14


