background image

3

English

Safety Information

CQ-C8401U/C8301U/C7401U/C7301U

2

Safety Information

CQ-C8401U/C8301U/C7401U/C7301U

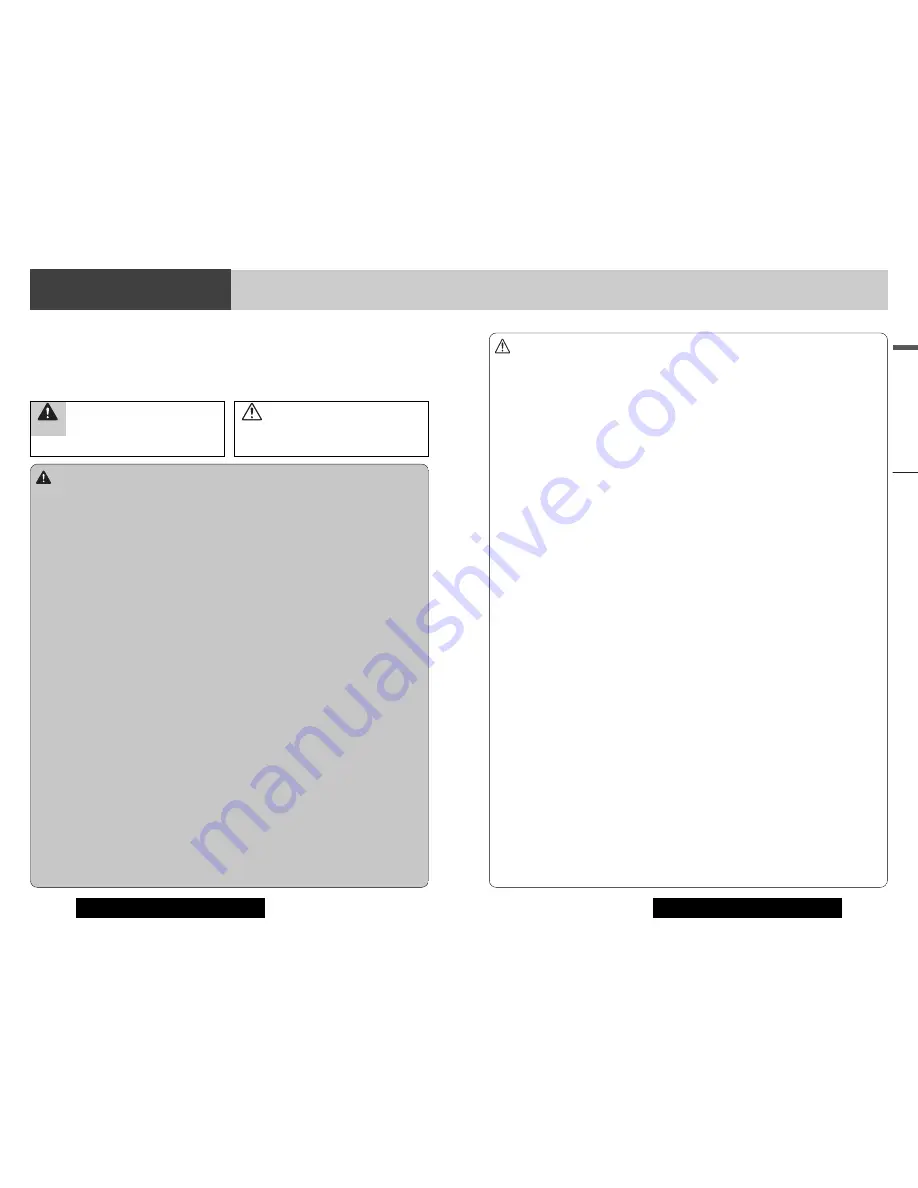
Warning

Observe the following warnings when using
this unit.

The driver should neither watch the display nor
operate the system while driving.

Watching the display or operating the system will distract
the driver from looking ahead of the vehicle and can cause
accidents. Always stop the vehicle in a safe location and use
the parking brake before watching the display or operating
the system.

Use the proper power supply.

This product is designed for operation with a negative
grounded 12 V DC battery system. Never operate this prod-
uct with other battery systems, especially a 24 V DC battery
system.

Keep batteries and insulation film out of reach of
infants.

Batteries and insulation film can be ingested, so keep them
out of the reach of infants. If an infant ingests a battery or
insulation film, please seek immediate medical attention.

Protect the Deck Mechanism.

Do not insert any foreign objects into the slot of this unit.

Do not disassemble or modify the unit.

Do not disassemble, modify the unit or attempt to repair the
product  yourself. If the product needs to be repaired, con-
sult your dealer or an authorized Panasonic Servicenter.

Do not use the unit when it is out of order.

If the unit is out of order (no power, no sound) or in an
abnormal state (has foreign objects in it, is exposed to
water, is smoking, or smells), turn it off immediately and
consult your dealer.

The remote control unit should not lie about in the
car.

If the remote control unit lies about, it could fall on the floor
while driving, get wedged under the brake pedal, and lead to
a traffic accident.

Refer fuse replacement to qualified service person-
nel.

When the fuse blows out, eliminate the cause and have it
replaced with the fuse prescribed for this unit by a qualified
service engineer. Incorrect replacement of the fuse may lead
to smoke, fire, and damage to the product.

Observe the following warnings when
installing.

Disconnect the lead from the negative (–) battery
terminal before installation.

Wiring and installation with the negative (–) battery terminal
connected may cause electrical shock and injury due to a
short circuit.
Some cars equipped with the electrical safety system have
specific procedures of battery terminal disconnection.

FAILURE TO FOLLOW THE PROCEDURE MAY LEAD TO THE
UNINTENDED ACTIVATION OF THE ELECTRICAL SAFETY
SYSTEM RESULTING IN DAMAGE TO THE VEHICLE AND
PERSONAL INJURY OR DEATH.

Never use safety-related components for installa-
tion, grounding, and other such functions.

Do not use safety-related vehicle components (fuel tank,
brake, suspension, steering wheel, pedals, airbag, etc.) for
wiring or fixing the product or its accessories.

Installing the product on the air bag cover or in a
location where it interferes with airbag operation is
prohibited.

Check for piping, gasoline tank, electric wiring, and
other items before installing the product.

If you need to open a hole in the vehicle chassis to attach or
wire the product, first check where the wire harness, gaso-
line tank, and electric wiring are located. Then open the hole
from outside if possible.

Never install the product in a location where it inter-
feres with your field of vision.

Never have the power cord branched to supply other
equipment with power.

After installation and wiring, you should check the
normal operation of other electrical equipment.

The continuation of their using in abnormal conditions may
cause fire, electrical shock or a traffic accident.

In the case of installation to an airbag-equipping
car, confirm warnings and cautions of the vehicle
manufacturer before installation.

Make sure the leads do not interfere with driving or
getting in and out of the vehicle.

Insulate all exposed wires to prevent short circuit-
ing.

Caution

Observe the following cautions when using this
unit.

Keep the sound volume at an appropriate level.

Keep the volume level low enough to be aware of road and
traffic conditions while driving.

Do not insert or allow your hand or fingers to be
caught in the unit.

To prevent injury, do not get your hand or fingers caught in
moving parts or in the disc slot. Especially watch out for
infants.

This unit is designed for use exclusively in automo-
biles.

Do not operate the unit for a prolonged period with
the engine turned off.

Operating the audio system for a long period of time with the
engine turned off will drain the battery.

Do not expose the unit to direct sunlight or exces-
sive heat.

Otherwise these will raise the interior temperature of the
unit, and it may lead to smoke, fire, or other damage to the
unit.

Do not use the product where it is exposed to water,
moisture, or dust.

Exposure of the unit to water, moisture, or dust may lead to
smoke, fire, or other damage to the unit. Make especially
sure that the unit does not get wet in car washes or on rainy
days.

Observe the following cautions when
installing.

Refer wiring and installation to qualified service
personnel.

Installation of this unit requires special skills and experience.
For maximum safety, have it installed by your dealer.
Panasonic is not liable for any problems resulting from your
own installation of the unit.

Follow the instructions to install and wire the prod-
uct.

Not following the instructions to properly install and wire the
product could cause an accident or fire.

Take care not to damage the leads.

When wiring, take care not to damage the leads.  Prevent
them from getting caught in the vehicle chassis, screws, and
moving parts such as seat rails. Do not scratch, pull, bend or
twist the leads. Do not run them near heat sources or place
heavy objects on them. If leads must be run over sharp
metal edges, protect the leads by winding them with vinyl
tape or similar protection.

Use the designated parts and tools for installation.

Use the supplied or designated parts and appropriate tools
to install the product. The use of parts other than those sup-
plied or designated may result in internal damage to the unit.
Faulty installation may lead to an accident, a malfunction or
fire.

Do not block the air vent or the cooling plate of the
unit.

Blocking these parts will cause the interior of the unit to
overheat and will result in fire or other damage.

Do not install the product where it is exposed to
strong vibrations or is unstable.

Avoid slanted or strongly curved surfaces for installation. If
the installation is not stable, the unit may fall down while
driving and this can lead to an accident or injury.

Installation Angle

The product should be installed in a horizontal position with
the front end up at a convenient angle, but not more than
30˚.
The user should bear in mind that in some areas there may
be restrictions on how and where this unit must be installed.
Consult your dealer for further details.

Wear gloves for safety. Make sure that wiring is
completed before installation. 

To prevent damage to the unit, do not connect the
power connector until the whole wiring is complet-
ed.

Do not connect more than one speaker to one set of
speaker leads. (except for connecting to a tweeter)

Observe the following cautions when handling
the battery for the remote control unit.

Use only specified battery (CR2025).

Match the polarity of the battery with the (+) and (–) marks
in the battery case.

Replace dead battery as soon as possible.

Remove the battery from the remote control unit when not
using it for an extended period of time.

Insulate the battery (by placing them in a plastic bag or cov-
ering them with vinyl tape) before disposal or storage. 

Dispose of the battery according to the local regulations.

Do not disassemble, recharge, heat or short the battery. Do
not throw a battery into a fire or water.

In case of battery leakage

Thoroughly wipe the battery liquid off the battery case and
insert new battery.

If any part of your body or clothing comes into contact with
battery liquid, wash it with plenty of water.

If battery liquid comes into contact with your eyes, wash
them with plenty of water and get immediate medical atten-
tion.

This pictograph intends to alert you to the pres-
ence of important operating instructions and
installation instructions. Failure to heed the
instructions may result in severe injury or death.

Read the operating instructions for the unit and all other com-
ponents of your car audio system carefully before using the
system. They contain instructions about how to use the sys-
tem in a safe and effective manner. Panasonic assumes no
responsibility for any problems resulting from failure to
observe the instructions given in this manual.

This manual uses pictographs to show you how to use the
product safely and to alert you to potential dangers resulting
from improper connections and operations. The meanings of
the pictographs are explained below. It is important that you
fully understand the meanings of the pictographs in order to
use this manual and the system properly.

Warning

This pictograph intends to alert you to the pres-
ence of important operating instructions and
installation instructions. Failure to heed the
instructions may result in injury or material dam-
age.

Caution

Summary of Contents for C7301U - Cd Rcvr W/ Custm Dsply

Page 1: ... Garantie limitée et le Répertoire des services à la clientèle avant d utiliser ce produit et conserver ce mode d emploi pour s y référer ultérieurement Lea con atención estas instrucciones antes de utilizar el producto y guarde este manual para poderlo consultar en el futuro YEFM285591A ND1104 1124 Printed in China Imprimé en Chine Impreso en China Panasonic Consumer Electronics Company Division ...

Page 2: ...ose the unit to direct sunlight or exces sive heat Otherwise these will raise the interior temperature of the unit and it may lead to smoke fire or other damage to the unit Do not use the product where it is exposed to water moisture or dust Exposure of the unit to water moisture or dust may lead to smoke fire or other damage to the unit Make especially sure that the unit does not get wet in car w...

Page 3: ...ory part name is the part number for maintenance and service Accessories and their parts numbers are subject to modification without prior notice due to improvements Mounting Collar and Trim Plate are mounted on the main unit at shipment Hex Nut 5 mmø YEP0FZ5701 Q ty 1 set Rear Support Strap YEFG04019 Q ty 1 This operating instruction manual is for 4 models CQ C8401U CQ C8301U CQ C7401U and CQ C73...

Page 4: ...chase CANADA Panasonic Canada Inc 5770 Ambler Drive Mississauga Ontario L4W 2T3 PANASONIC PRODUCT LIMITED WARRANTY Panasonic Canada Inc warrants this product to be free from defects in materials and workmanship and agrees to remedy any such defect for a period as stated below from the date of original purchase CAR AUDIO PRODUCT ONE 1 YEAR PARTS AND LABOUR The labour to install or remove the produc...

Page 5: ...0 Call 1 800 XM RADIO 96 72346 Extension cord P N XMDPAN100 Call 1 800 942 TERK 8375 The XM name and related logos are trademarks of XM Satellite Radio Inc Notes A changer and an XM receiver are not connectable at the same time To connect the XM receiver XMD1000 it is required to use an optional extension cord XMDPAN100 that is produced by XM exclusively for Panasonic products Customize Initially ...

Page 6: ...3 Press BAND SET SRC Source PWR Power SQ Sound Quality MENU DIM Dimmer VOLUME PUSH SEL Select DISP Display TUNE TRACK FILE Release TILT OPEN eject SRC Controls Layout Main Unit Remote Control Unit Functions Only by Remote Control Unit Disc slot P SET Preset DISC FOLDER MUTE SBC SW Super Bass Control Subwoofer D M Direct Memory When Face Plate Opens SEL SEL SRC SRC BAND BAND MUTE MUTE 2 3 1 5 8 0 6...

Page 7: ...0 Radio ID also can be found by turning your XM Radio to channel 0 a page 28 2 Activate the XM Satellite Radio Select either of the below to sign up Web site http www xmradio com activation Phone number 1 800 XM RADIO 1 800 967 2436 Note Refer to the operating instructions for the XM receiver for details The following functions are activated when the Security Function is ON a page 35 The security ...

Page 8: ...n unit since this may result in poor electrical contacts If dirt or other foreign substances get on the con tacts wipe them off with clean and dry cloth To avoid damaging the face plate do not push it down or place objects on it while it is open Open Eject Press OPEN When a disc is already loaded the disc will automatically be ejected Close Press OPEN Tilt The display angle changes among 4 levels ...

Page 9: ...ct a CD changer or a DVD changer to CH AUX2 CQ C8401U C8301U CH AUX CQ C7401U C7301U a Installation Instructions SRC CQ C8401U Lights when activated Off default On Note If ON is selected the settings of subwoofer level adjustment and subwoofer low pass filter are activated a page 34 The display changes as follows every time DISP is pressed Note The graphic pattern and still image are selectable a ...

Page 10: ...ality for 2 sec or more The targeted SQ preset appears 2 Adjust each frequency Note If you press DISP the presetting is can celed The presetting is active until another SQ pre set is called up Higher frequency Lower frequency q Level Up w Level Down 3 Hold down or for 2 sec or more to confirm your adjustment Note You can select a SQ preset to be targeted with and and 2 6 on the remote con trol 4 H...

Page 11: ...mode 2 Press BAND to select a band 3 Select a station Frequency adjustment TUNE Lower TUNE Higher Note Hold down for 0 5 sec or more and release for station search Preset station selection P SET Preset Lower preset number P SET Preset Higher preset number Note Direct selection can be executed with 1 to 6 buttons on remote control Band Frequency Preset Number Station Preset APM Auto Preset Memory P...

Page 12: ...e Pause Press BAND h 5 Press again to cancel 4 Press OPEN to eject the disc SRC CQ C8401U Track number Time Lights when the disc is loaded Play Mode indicators Lights when each mode is activated CD TEXT display Notes For scrolling text hold down DISP for 2 sec or more NO TEXT is displayed when there is no information on the disc Random and Repeat play can be set 1 Press MENU to display the menu di...

Page 13: ...is displayed for the album name and title artist name File number File type indicator Folder Random Folder Repeat Folder Scan Random and Repeat play can be set 1 Press MENU to display the menu dis play For using the remote control hold down SEL MENU for 2 sec or more 2 Press or to select a mode to be adjusted 3 Press BAND SET to adjust 4 Press MENU to confirm the adjustment For using the remote co...

Page 14: ...e same disc as MP3 or WMA files the songs may not play in the intended order or some songs may not play at all When storing MP3 data and WMA data on the same disc use different folders for each data Do not record files other than MP3 WMA files and unnecessary folder on a disc The name of an MP3 WMA file should be added by rules as shown in the following descriptions and also comply with the rules ...

Page 15: ... Preset channels can be simply called up by pressing P SET or P SET Note Direct selection can be executed with 1 to 6 buttons on remote control 1 Tune into a channel 2 Hold down or for 2 sec or more 3 Select a preset number by pressing or 4 Preset the channel by holding down or for 2 sec or more Preset number channel number blinks once Notes New channels overwrite existing saved channels In step 2...

Page 16: ...ote control hold down SEL MENU for 2 sec or more 2 Press or to select a mode to be adjusted 3 Press BAND SET to adjust 4 Press MENU to confirm the adjustment For using the remote control hold down SEL MENU for 2 sec or more RANDOM Only for CD DA disc Off default Random playback from whole magazine CD CH From selected disc DVD CH RANDOM Only for MP3 disc Off default Random playback from selected fo...

Page 17: ...ay Mode indicators lights when each mode is activated Chapter number Changer indicator Disc Repeat Chapter Repeat Title Repeat Repeat play can be set 1 Press MENU to display the menu dis play For using the remote control hold down SEL MENU for 2 sec or more 2 Press or to select a mode to be adjusted 3 Press BAND SET to adjust 4 Press MENU to confirm the adjust ment For using the remote control hol...

Page 18: ...ter Setting range Filter OFF 90 Hz 135 Hz 180 Hz 225 Hz Default Filter OFF q Up w Down SQ preset change Adjustable frequency 60 160 400 1 k 3 k 6 k 16 k Hz Setting range 12 dB to 12 dB 2 dB Step a page 18 q Up w Down Higher frequency Lower frequency Subwoofer output range Other speakers output ranges AUDIO Menu Display 1 Press VOLUME SEL Select to display the AUDIO menu display 2 Press VOLUME SEL ...

Page 19: ...d If BACK is selected the screen of step 5 appears 7 For a moving image file or still image file select where to save the file Select BAND SET Confirm Notes New data overwrites existing data If BACK is selected the screen of step 6 appears 8 Confirm the changed item Select BAND SET Confirm Customization is performed Do not turn off the power in mid operation It takes approx 1 minutes to complete t...

Page 20: ...ure that the ground lead is connected to an unpainted part of the chas sis securely Noise is made in step with engine revolutions Alternator noise comes from the car a Change the wiring position of the ground lead a Mount a noise filter on the power supply Customize the Display Customize Function Notes on Customize Function Note on Download Service The download service may be suspended or stopped ...

Page 21: ... lead is not always powered a Make sure that the battery lead is connected securely and preset stations again No playback or disc ejected The disc is inserted upside down a Insert a disc correctly There is a flaw or foreign material on the disc a Remove the foreign material or use a flawless disc Sound skipping or noise There is a flaw or foreign material on the disc a Remove the foreign material ...

Page 22: ... disc has scratches a Check the disc No operation by some cause a Call the store where you purchased the unit or your nearest Panasonic Servicenter A WMA file can be copyrighted a The file protected by copyright is not playable No disc DISC Changer Display Possible cause a Possible solution Display Possible cause a Possible solution XM antenna unconnected a Connect the XM antenna Cannot receive XM...

Page 23: ...use irregularly shaped discs Do not leave discs in the following places In direct sunlight Near car heaters Dirty dusty and damp areas On seats and dashboards Disc cleaning Use a dry soft cloth to wipe from the center outward Do not attach any seals or labels to your discs Do not write on the disc label with a ballpoint pen or other hard point pens Printed side Correct Wrong Do not use irregularly...

Page 24: ...décharge la batterie Ne pas exposer l appareil au soleil ni le soumettre à une chaleur excessive Sinon la température interne de l appareil augmentera ce qui peut déclencher de la fumée un incendie et endommager l appareil Ne pas utiliser l appareil quand il est exposé à l eau à l humidité ou à la poussière L exposition de l appareil à l eau à l humidité ou à la pous sière peut déclencher de la fu...

Page 25: ...reil principal lors de l expédition Écrou hexagonal 5 mmø YEP0FZ5701 Qté 1 ensemble Plaque support arrière YEFG04019 Qté 1 Ce mode d emploi d utilisation traite des 4 modèles CQ C8401U CQ C8301U CQ C7401U et CQ C7301U Les différences entre les modèles respectifs sont indiquées ci dessous Tous les écrans et les illustrations de cette brochure représentent le modèle CQ C8401U sauf indication contrai...

Page 26: ...GATION EN AUCUNE CIRCONSTANCE POUR TOUT DOMMAGE DIRECT INDIRECT OU CONSÉCUTIF Certaines juridictions ne reconnaissent pas les exclusions ou limitations de dommages indirects ou consécutifs ou les exclusions de garanties implicites Dans de tels cas les limitations stipulées ci dessus peuvent ne pas être applicables Expédition de l appareil à un centre de service Emballer soigneusement l appareil de...

Page 27: ...6 72346 Cordon prolongateur P N XMDPAN100 1 800 942 TERK 8375 L appellation XM et les logos connexes sont des marques déposées de la firme XM Satellite Radio Inc Remarque Vous ne pouvez pas connecter un changeur et un récepteur XM en même temps Pour raccorder le récepteur XM XMD1000 il est nécessaire d utiliser le cordon prolongateur optionnel XMDPAN100 exclusivement fabriqué par XM pour les produ...

Page 28: ...C Source PWR Alimentation SQ Qualité du son MENU DIM Gradateur VOLUME PUSH SEL Poussez pour sélectionner DISP Affichage TUNE Syntonisation TRACK FILE Plage fichier Déblocage TILT OPEN Éjection SRC Disposition des commandes Appareil principal Télécommande Fonctions uniquement commandées par la télécommande Fente à disque P SET Préréglage DISC FOLDER Dossier MUTE Sourdine SBC SW Commande d extrêmes ...

Page 29: ...diquée en bas et à droite de votre récepteur XM XMD1000 Vérifier l identification indiquée en accordant votre radio XM sur le canal 0 Se reporter à Sélection de canal à la page 72 2 Activer XM Satellite Radio Choisir l un ou l autre ci dessous pour s inscrire Web site http www xmradio com activation Numéro de téléphone 1 800 XM RADIO 1 800 967 2436 Remarque Reportez vous au manuel d instructions d...

Page 30: ...ite Si des saletés ou de la poussière se sont déposées sur les contacts les retirer soigneusement avec un chiffon sec et propre Ne pas appuyer fortement vers le bas sur le panneau avant quand il est ouvert et ne rien poser dessus car ceci risque de l endommager Ouverture Éjection Appuyer sur OPEN Lorsqu un disque est déjà en place il sera éjecté automatiquement Fermeture Appuyer sur OPEN Inclinais...

Page 31: ... AUX2 CQ C8401U C8301U ou CH AUX CQ C7401U C7301U Instructions d installation SRC CQ C8401U S allume en état activé Désactivé réglage implicite Activé Remarque Si ON est sélectionné les définitions du niveau du haut parleur d extrêmes graves et du filtre passe bas de ce dernier sont activées a page 78 L affichage change comme suit à chaque fois que la touche DISP est pressée Remarque Un motif grap...

Page 32: ...he SQ qualité du son 2 secondes ou plus Le préréglage de SQ désiré apparaît 2 Ajuster chaque fréquence Remarque Si la touche DISP est appuyée le préréglage est annulé Le préréglage est valide jusqu à ce qu un autre préréglage de SQ soit appelé Fréquence plus haute Fréquence plus basse q Elévation du niveau w Abaissement du niveau 3 Appuyer sur ou 2 secondes ou plus pour confirmer votre ajustement ...

Page 33: ...de de réception radio 2 Appuyer sur la touche BAND pour sélectionner une bande de réception 3 Choisir une station Réglage de la fréquence TUNE Inférieure TUNE Supérieure Remarque Maintenir la touche enfoncée plus de 0 5 seconde et la relâcher pour chaque recherche de station Sélection la station préréglée P SET Préréglage Numéro préréglé inférieur P SET Préréglage Numéro préréglé supérieur Remarqu...

Page 34: ...de lecture S allume lorsque chaque mode est activé Affichage de texte CD Remarques Pour faire défiler le texte maintenir la touche DISP enfoncée pendant au moins 2 s NO TEXT est affiché s il n y a pas d informations sur le disque Les modes de lecture par sélection en ordre aléatoire et de relecture peuvent être paramétrés 1 Appuyer sur la touche MENU pour afficher l affichage de menu Pour l utilis...

Page 35: ...la télécommande appuy er sur la touche SEL MENU 2 secondes ou plus 2 Appuyer sur la touche ou pour sélectionner le mode qui doit être ajusté 3 Appuyer sur la touche BAND SET pour ajuster 4 Appuyer sur la touche MENU pour confirmer le réglage Pour l utilisation de la télécommande appuyer sur la touche SEL MENU 2 secondes ou plus RANDOM Aléatoire Désactivé Lecture par sélection en ordre aléatoire di...

Page 36: ...es sur le même disque utiliser des dossiers différents pour chaque type de données Ne pas enregistrer des fichiers autres que des fichiers MP3 WMA ni tout dossier inutile sur un disque Le nom du fichier MP3 WMA doit être ajouté selon les règles habituelles telles qu elles sont décrites ci après et conformément aux règles de chaque système de fichier Des difficultés peuvent apparaître lors de la le...

Page 37: ...élection directe peut être exécutée avec les boutons 1 à 6 de la télécommande 1 Accorder sur un canal 2 Maintenir enfoncée ou pen dant au moins 2 secondes 3 Sélectionner un numéro préréglé en appuyant sur ou 4 Prérégler le canal en appuyant et maintenant enfoncé ou pendant au moins 2 secondes Le nom de canal ou le numéro de présélection clig note une seule fois Remarques Les nouveaux canaux sont r...

Page 38: ...firmer le réglage Pour l utilisation de la télécommande appuyer sur la touche SEL MENU 2 secondes ou plus RANDOM uniquement pour un disque CD DA Désactivé Réglage implicite Lecture par sélection en ordre aléatoire magasin de disques CD CH disque DVD CH RANDOM Uniquement pour un disque MP3 Désactivé Réglage implicite Lecture par sélection en ordre aléatoire dossier DISC RANDOM Uniquement pour un ch...

Page 39: ...itre La relecture peut être paramétrée 1 Appuyer sur la touche MENU pour afficher l affichage de menu Pour l utilisation de la télécommande appuy er sur la touche SEL MENU 2 secondes ou plus 2 Appuyer sur la touche ou pour sélectionner le mode qui doit être ajusté 3 Appuyer sur la touche BAND SET pour ajuster 4 Appuyer sur la touche MENU pour confirmer le réglage Pour l utilisation de la télécomma...

Page 40: ...e Filtre désactivé q Accroissement w Réduction Modification du préréglage de SQ Fréquence réglable 60 Hz 160 Hz 400 Hz 1 kHz 3 kHz 6 kHz 16 kHz Gamme de réglage 12 dB à 12 dB par palier de 2 dB a page 62 q Accroissevnent w Réduction Fréquence plus haute Fréquence plus basse Gamme de sortie du haut parleur d extrêmes graves Gammes de sortie d autres haut parleurs Affichage de menu Audio 1 Appuyer s...

Page 41: ... mouvement ou un fichier d image fixe sélectionner la destina tion du fichier à sauvegarder Sélection BAND SET Confirmation Remarques Les nouvelles données remplacent les données existantes Si BACK retour est sélectionné l écran de l étape 6 apparaît 8 Confirmer la modification Sélection BAND SET Confirmation La personnalisation est terminée Ne pas couper l ali mentation en cours d opération Il fa...

Page 42: ...ne par tie non peinte du châssis Production du bruit et rotation du moteur en synchronisme Le bruit de l alternateur provient du véhicule a Changez la position de connexion du fil de mise à la masse a Montez un filtre antiparasite dans le circuit d alimentation Personnalisation de l affichage fonction de personnalisation Remarques sur la fonction de personnalisation Remarque sur le service de télé...

Page 43: ...terie est sûrement connecté et présyntonisez les stations de nouveau Lecture impossible ou éjection du disque Le disque est introduit sens dessus dessous a Introduire le disque correctement Il y a un défaut ou un objet étranger sur le disque a Enlevez l objet étranger ou utilisez un disque exempt de défaut Saut du son ou bruit Il y a un défaut ou un objet étranger sur le disque a Enlevez l objet é...

Page 44: ...nt CD MP3 WMA Le disque CD est sale ou à l envers a Vérifiez le disque Le disque est rayé a Vérifiez le disque Aucun fonctionnement pour une raison quelconque a Consultez votre concessionnaire ou le centre de service Panasonic le plus proche Un fichier WMA est peut être protégé par les droits d auteur a Tout fichier protégé par les droits d auteur ne peut être lu Absence de disque Changeur Problèm...

Page 45: ...in soleil Près des appareils de chauffage de la voiture Dans des endroits sales poussiéreux et humides Sur les sièges de la voiture ou le tableau de bord Nettoyage des disques Se servir d un morceau d étoffe sèche et souple pour nettoyer en partant du centre du disque et en allant vers l extérieur Ne pas coller d étiquettes ou apposer des sceaux sur vos disques Ne pas écrire sur l étiquette de dis...

Page 46: ...la batería No exponga la unidad a la luz directa del sol ni a un calor excesivo De lo contrario se elevará la temperatura interior de la unidad y podrá ocasionar humos incendios y daños a la unidad No utilice el producto en donde pueda quedar expuesto al agua humedad o polvo La exposición de la unidad al agua humedad o polvo puede ocasionar humos incendios y otros daños a la unidad Asegúrese espec...

Page 47: ...de parte están sujetos a cambios sin previo aviso debido a mejoras del producto El collar de montaje y la placa de guarnición están montados en la unidad principal al salir de fábrica Tuerca hexagonal 5 mmø YEP0FZ5701 Cant 1 juego Regleta de soporte trasera YEFG04019 Cant 1 Diferencia entre los 4 modelos Este manual de instrucciones se aplica a los dos modelos el CQ C8401U CQ C8301U CQ C7401U y el...

Page 48: ...rgo XM Receiver P N XMD1000 1 800 XM RADIO 96 72346 Cable de extensión P N XMDPAN100 1 800 942 TERK 8375 El nombre de XM y los logotipos relacionados con marcas comerciales de XM Satellite Radio Inc Notas No podrán conectarse al mismo tiempo un cambiador y un receptor XM Para conectar el receptor XM XMD1000 es necesario emplear un cable de extensión opcional XMDPAN100 fab ricado por XM exclusivame...

Page 49: ... Presione 5 3 Presione BAND SET SRC Fuente PWR Alimentación SQ Calidad del sonido MENU DIM Regulador de la iluminación VOLUME PUSH SEL presionar para seleccionar DISP visualización TUNE TRACK FILE Liberación TILT OPEN expulsión SRC Disposición de los controles Unidad principal Controlador remoto Funciones sólo con el controlador remoto Ranura del disco P SET Preajuste DISC FOLDER MUTE SBC SW Contr...

Page 50: ...cada en la parte inferi or derecha de su receptor XM XMD1000 Compruebe la identificación ID mostrada sintonizan do la radio XM al canal 0 a página 114 2 Seleccione uno de los accesos siguientes para inscribirse Seleccione uno de los accesos siguientes para inscribirse Web site http www xmradio com activation Número de teléfono 1 800 XM RADIO 1 800 967 2436 Nota Para los detalles consulte el manual...

Page 51: ...ias extrañas en los contactos límpielos con un paño limpio y seco Para evitar daños en el panel frontal no lo empuje hacia abajo ni ponga nada encima mientras esté abierto Abertura expulsión Presione OPEN Cuando haya un disco insertado el disco se expulsará automáticamente Cerrar Presione OPEN Inclinación El ángulo de la pantalla cambia entre 4 niveles de la forma siguiente cada vez que se mantien...

Page 52: ...o Ajuste predeterminado Activado Nota Si se selecciona ON se activan los ajustes del nivel del altavoz de subgraves y del filtro de paso bajo del altavoz de subgraves a página 120 La visualización cambia de la forma siguiente cada vez que se presiona DISP Nota Pueden seleccionarse el patrón gráfico y la imagen fija a página 122 Cuando la alimentación está desconectada Visualización de la hora Ajus...

Page 53: ... sonido durante 2 o más segundos Aparece el preajuste de SQ propuesto 2 Ajuste cada frecuencia Nota Si presiona la tecla DISP se cancela el preajuste El preajuste queda activo hasta que se activa otro preajuste de SQ Frecuencia más alta Frecuencia más baja q Aumento del nivel w Reducción del nivel 3 Mantenga presionado o durante 2 o más segundos para confirmar su ajuste Nota Podrá seleccionar un p...

Page 54: ...modo de la radio 2 Presione BAND para seleccionar la banda 3 Seleccione una emisora Ajuste de la frecuencia TUNE Más baja TUNE Más alta Nota Manténgalo presionado durante más de 0 5 segundos y suéltelo para la búsqueda de emisoras Selección de emisoras preajustadas P SET Preajuste Número de preajuste más bajo P SET Preajuste Número de preajuste más alto Nota La selección directa puede ejecutarse c...

Page 55: ...úmero de pista Tiempo Se enciende cuando se inserta el disco Indicadores del modo de reproducción Se enciende cuando se activa cada modo Visualización de texto del CD Notas Para desplazar el texto mantenga presionado BAND durante 2 o más segundos Se visualizará NO TEXT cuando no haya información en el disco Podrá ajustar la reproducción aleatoria y repetida 1 Presione MENU para que aparezca la vis...

Page 56: ...oria de carpeta Reproducción repetida de carpeta Exploración de carpeta Podrá ajustar la reproducción aleatoria y repetida 1 Presione MENU para que aparezca la visualización del menú Para emplear el con trolador remoto man tenga presionado SEL MENU durante 2 o más segundos 2 Presione o para seleccionar el modo que desee ajustar 3 Presione BAND SET para realizar el ajuste 4 Presione MENU para confi...

Page 57: ...o es posible que las canciones no se reproduzcan en el orden deseado o que algunas canciones no se reproduzcan en absoluto Cuando almacene datos MP3 y datos WMA en el mismo disco hágalo en carpetas distintas para cada tipo de datos No grabe archivos que no sean archivos MP3 WMA ni carpetas innecesarias en el disco El nombre de archivo MP3 WMA debe añadirse según las normas como se indica en las de...

Page 58: ...ecta puede ejecutarse con los botones 1 a 6 en el controlador remoto 1 Sintonice un canal 2 Mantenga presionado o durante 2 o más segundos 3 Seleccione un número de preajuste pre sionando o 4 Preajuste el canal manteniendo pre sionado o durante 2 o más segundos El nombre de canal número de preajuste parpadea una vez Notas Los nuevos canales se sobrescriben sobre las emisoras que hay actualmente al...

Page 59: ...para confirmar el ajuste Para emplear el controlador remoto mantenga pre sionado SEL MENU durante 2 o más segundos RANDOM sólo para discos CD DA Desactivado Ajuste predeterminado Reproducción aleatoria desde todo el cartucho CD CH desde el disco seleccionado DVD CH RANDOM sólo para discos MP3 Desactivado Ajuste predeterminado Reproducción aleatoria desde la carpeta seleccionada DISC RANDOM sólo pa...

Page 60: ...producción repetida del capítulo Podrá ajustar la reproducción repetida 1 Presione MENU para que aparezca la visualización del menú Para emplear el con trolador remoto man tenga presionado SEL MENU durante 2 o más segundos 2 Presione o para seleccionar el modo que desee ajustar 3 Presione BAND SET para realizar el ajuste 4 Presione MENU para confirmar el ajuste Para emplear el controlador remoto m...

Page 61: ...e Filtro desactivado OFF 90 Hz 135 Hz 180 Hz 225 Hz Ajuste predeterminado Filtro desactivado OFF q Incremento w Reducción Cambio del preajuste de SQ Frecuencia ajustable 60 Hz 160 Hz 400 Hz 1 kHz 3 kHz 6 kHz 16 kHz Margen de ajuste 12 dB a 12 dB pasos de 2 dB a página 104 q Incremento w Reducción Frecuencia más alta Frecuencia más baja Margen de salida del altavoz de subgraves Márgenes de salida d...

Page 62: ...ona BACK aparece la pantalla del paso 5 7 Para un archivo de imagen en movimiento o archivo de imagen fija seleccione el lugar en el que deba guardarse el archivo Seleccione BAND SET Confirme Notas Los nuevos datos se sobrescriben sobre los datos existentes Si se selecciona BACK aparece la pantalla del paso 6 8 Confirme el elemento cambiado Seleccione BAND SET Confirme Se efectúa la personalizació...

Page 63: ...ierra está conectado segura mente a una parte sin pintar del chasis El ruido se produce en pasos con las revoluciones del motor El ruido del alternador viene desde el automóvil a Cambie la posición del cableado del conductor de puesta a tierra a Monte un filtro de ruido sobre la fuente de alimentación Personalice la visualización función personalizada Notas sobre la función personalizada Nota sobr...

Page 64: ...ectado segura mente y preajuste de nuevo las emisoras No hay reproducción o el disco es expulsado El disco está colocado al revés a Inserte el disco correctamente Hay una falla o materias extrañas en el disco a Retire la materia extraña o utilice un disco sin fallas El sonido salta o tiene ruidos Hay una falla o materias extrañas en el disco a Retire la materia extraña o utilice un disco sin falla...

Page 65: ...funciona por alguna causa a Llame al establecimiento donde compró la unidad o al centro de servicio Panasonic que tenga más cerca El archivo WMA está protegido a Los discos protegidos con derechos de autor no pueden reproducirse No hay ningún disco Cambiador de Discos Visualización Causa posible a Solución posible Visualización Causa posible a Solución posible Antena XM desconectada a Conecte la a...

Page 66: ...uando no lo utilice guarde el disco en su caja No emplee discos con formas irregulares No deje los discos en los lugares siguientes Bajo la luz directa del sol Cerca la calefacción del automóvil Lugares polvorientos sucios o húmedos Sobre los asientos o sobre el tablero de instrumentos Limpieza de los discos Emplee un paño seco y suave para frotar desde el centro del disco hacia fuera No adhiera n...

Reviews: