


Getting Started
15
English
1.4
When Not Using a Router
Before connecting your cameras to the BL-WV10, make sure that each camera’s
firmware version meets the requirements noted on page 6. If necessary, refer to
the operating instructions included with the camera and update the firmware.
1.4.1
Initial Connections (When Not Using a Router)
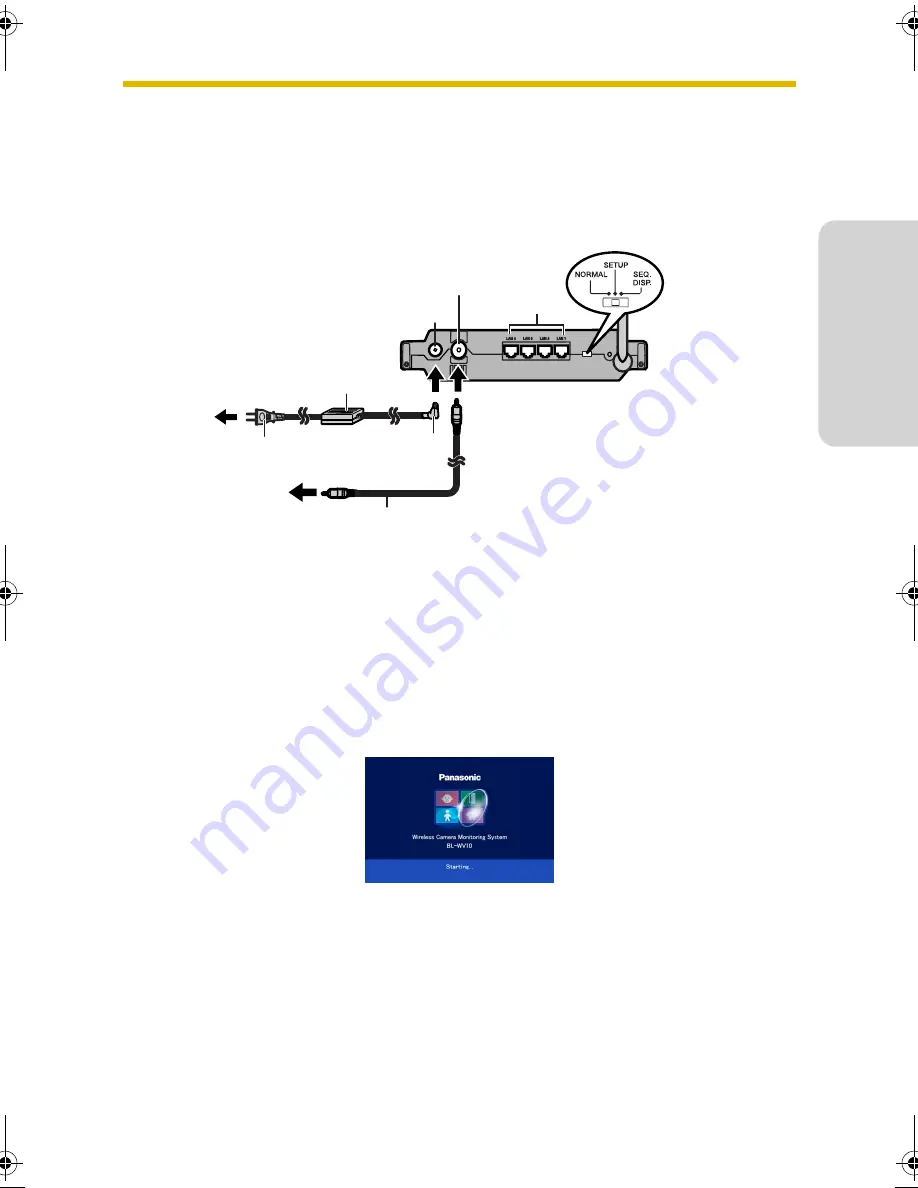
1.
Connect the BL-WV10 to your TV using the included video cable.
2.
Turn on the TV and set the TV’s input switch to the external video input
(“VIDEO”, “EXT”, “INPUT 1”, etc.)
3.
Set the mode switch on the rear of the BL-WV10 to
SETUP
.
4.
Connect the AC cord to the AC adaptor and to the power outlet.
5.
Turn on the BL-WV10 by connecting the DC cord to the unit.
•
The startup screen appears on the TV screen.
You are now ready to use the BL-WV10’s Easy Network Setup utility to configure
the BL-WV10 (see page 16).
Rear panel of
BL-WV10
To TV
Video cable
(included)
AC adaptor
(included)
AC cord
(included)
DC cord
LAN jacks
DC IN jack
Video output
terminal
To
power
outlet
BL-WV10_GS-en.book Page 15 Wednesday, January 25, 2006 5:18 PM
Summary of Contents for BL-WV10
Page 90: ...90 1 2 3 4 5 6 AC AC 7 AC AC 8 AC AC Panasonic 9 AC 10 11 AC AC 12 13 AC AC 14 15...
Page 92: ...92 1 2 3 4 5 6 7 AA Panasonic 1 2 4 GHz POS 2 3 2...
Page 96: ...96 1 1 1 1 1 1 BL WV10 1 1 2 BL WV10 RETURN ENTER BL WV10 0 7 8 2 0 RETURN 8 7 ENTER 5 5 6 6...
Page 102: ...102 5 LAN BL WV10 6 BL WV10 NORMAL DC DC 107...
Page 109: ...109 1 6 8 BL WV10 Quick Setup utility SETUP Quick Setup utility 98 103 1 7 ENTER 1 STOP...
Page 129: ...129 LAN BL WV10 92 BL WV10 PC BL WV10...
Page 130: ...130 3 11 built in BL C10 BL C30 privacy privacy 30 85 5 BL WV10...
Page 131: ...131 BL C10 BL C30...


