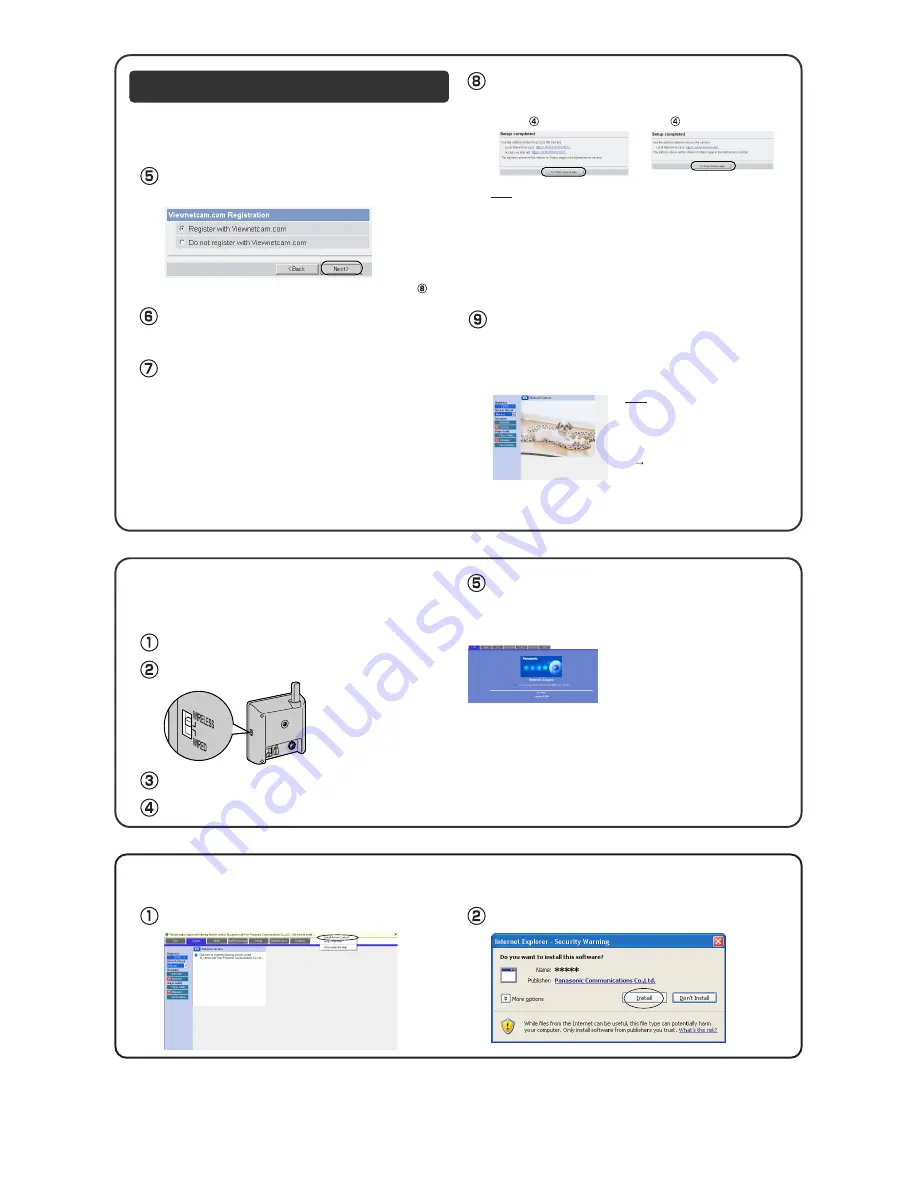
Registration with the "Viewnetcam.com
FREE DynamicDNS service"
To ensure that the most current image is
displayed, Internet Explorer should be
configured as follows. This will not have a
negative effect on normal use.
1. While viewing any website, click [Tools]
[Internet Options].
2. In the section "Temporary Internet
Files", click [Settings] and check [Every
visit to the page].
•
If a Security Warning window is displayed when installing ActiveX
Controls, click [Yes].
•
To install ActiveX Controls on Microsoft Windows XP Service Pack
2, see "Security Warning window on Microsoft Windows XP Service
Pack 2" below.
•
If you set wireless configuration, confirm the wireless LAN setup below.
Note
•
When [Enable] was selected
at step .
• The port number must be specified at the end of the camera URL.
For example
Using port 80: http://(Cameraname).viewnetcam.com
or http://IP Address
Using any other port: http://(Cameraname).viewnetcam.com:Port Number
or http://IP Address:Port Number
• The URL for the local network access may be different from the one set up on
the previous page.
• If you selected [Do not register with Viewnetcam.com], skip to step .
•
When [Disable] was selected at
step .
Set the switch on the side of the camera to WIRELESS.
Start up the web browser on the PC.
After setting each item for the wireless LAN, confirm that the camera works
correctly.
Unplug the Ethernet cable and turn off the power (disconnect
the AC adaptor).
Turn on the power by connecting the AC adaptor to the
outlet.
Enter "http://IP address (or URL):Port No." in the address field
and press [Enter].
(When port number is 80 (default), you do not need to enter port number.)
• When the following Top Page is displayed, the wireless LAN setup is
successful.
• If the Top Page was not displayed, the settings
for the camera are not identical with those for the
router. Check the settings by using wired connec-
tion.
If the settings are correct and you use a proxy
server, set the web browser not to access the
proxy server.
If the Top Page is not displayed even after trying
these methods, contact the retailer.
• It takes about 1 minute for the new settings to be
effective.
• It is not possible to access the camera simultane-
ously by both wired and wireless connection.
• Some routers need to be restarted after setting
the camera's switch to WIRELESS.
Confirming the Wireless LAN Setup
By registering with the Viewnetcam.com FREE DynamicDNS service, you
can create a personalized web address at which your camera's live video
can always be found on the Internet. For detailed information, access
"
http://www.viewnetcam.com
".
Security Warning window on Microsoft Windows XP Service Pack 2
To view a video (Motion JPEG), ActiveX Controls must be installed. Follow the steps shown below to install ActiveX Controls.
Click the warning displayed above the tabs, and click [Install
ActiveX Control...].
Click [Install].
When "Setup completed" is displayed, click [To Single
Camera page].
When the Single Camera page is displayed, setup is complete.
Note
To register with the "Viewnetcam.com FREE DynamicDNS
service", check [Register with Viewnetcam.com] and click
[Next>].
The Enter Network Password window is displayed.
Enter the user name and password that were set, and click
[OK].
The "Viewnetcam.com FREE DynamicDNS service" website is
displayed. Follow the displayed instructions for registration.
• If the message "Failed to configure the router's Port Forwarding by UPnP" is
displayed, your router may not support UPnP
TM
or UPnP
TM
is not enabled.
Enable your router's UPnP
TM
or set Port Forwarding manually following the
router's manual, and try Automatic Setup again. For more information about
setting up a router, refer to the Panasonic Network Camera support web-site
at
http://panasonic.co.jp/pcc/products/en/netwkcam/
• If the message "Failed to register with Viewnetcam.com." is displayed,
confirm that the router is connected to the Internet.


