


NetCam
When the Single Camera page is displayed, setup
is complete.
Click [Next] to set up the Internet access to the cam-
era and go to step in "To Set Up Internet Access
to the Camera".
Enter the user name and password, and click [Save].
The Enter Network Password window is displayed.
Enter the user name and password that were set, and
click [OK].
Make a note of the user name and password.
To ensure that the most current image
is displayed, Internet Explorer should
be configured as follows. This will not
have a negative effect on normal use.
1. While viewing any website, click
[Tools] [Internet Options].
2. In the section "Temporary Internet
Files", click [Settings] and check
[Every visit to the page].
•
If the Security Warning window is displayed when installing ActiveX
®
Controls, click [Yes].
•
To install ActiveX Controls on Microsoft
®
Windows
®
XP Service Pack
2, see "Security Warning window on Microsoft Windows XP Service
Pack 2" on the next page.
•
Click [Cancel] and go to the last
page if you will mount the camera.
•
If you set wireless configuration,
confirm the wireless LAN setup
seeing the next page.
•
This program searches for the cameras that are connected to the router
and displays their MAC Addresses, IP addresses and Port Numbers.
•
The MAC Address on the rear side (see page 6 of the Operating
Instructions on the CD-ROM.) of the camera shows which camera you
select on the camera list window.
If more than 20 minutes have passed since the camera was turned on, the
camera cannot be set up from the Setup Program. In this situation, restart the
camera.
Note
Note
1
2
3
4
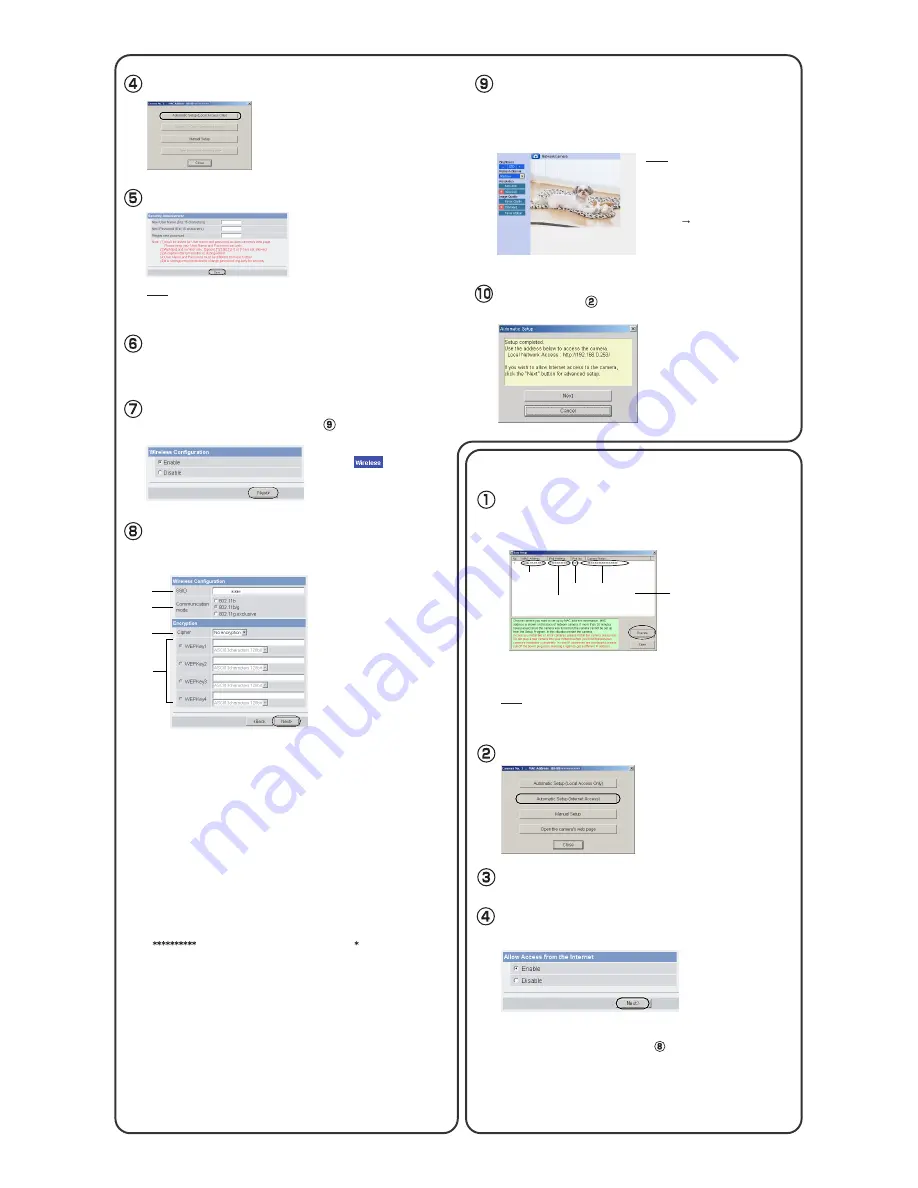
Set the Wireless Configuration according to the wireless
settings of the router and click [Next>].
•
For more information about wireless setting, see
http://panasonic.co.jp/pcc/products/en/netwkcam/
1. Set the SSID.
Set the name of the wireless network.
2. Select the Communication mode.
These are IEEE Communication modes. Select the same Communication mode as
that of the router to which the camera is connected.
802.11b (IEEE802.11b) :
Only the 802.11b wireless router can be connected.
802.11b/g (IEEE802.11g) :
Either the 802.11b or 802.11g router can be
connected.
802.11g exclusive (IEEE802.11g) :
Only the 802.11g router can be connected.
3. Select encrypting or not encrypting.
Selecting WEP can encrypt data within the wireless LAN.
WEP:
Encrypting (setting WEP) makes it difficult for unauthorized users to read
data within the wireless LAN, even if they can receive it. To encrypt data, set
the same encryption key to every terminal within the wireless LAN. There are
3 kinds of encryption key: 64 bit, 128 bit and 152 bit. Security level of
encryption increases in order of length as follows: 64 bit, 128 bit and 152 bit.
No encryption:
select when not using encryption.
4. Set the WEPKey1–4.
Selecting [WEP] at Cipher enables you to set WEPKey1–4. One or all of the four
keys can be set. Check the key number set to the router, and set the same key as at
the router.
:
The entered WEPKey will be displayed as " "s regardless of the key
type selected.
<Example>
HEX, 10 characters 64 bit
:
012345abcd
HEX, 26 characters 128 bit
:
0123456789abcdef012345abcd
HEX, 32 characters 152 bit
:
0123456789abcdef0123456789abcdef
ASCII 5 characters 64 bit
:
012yz
ASCII 13 characters 128 bit :
0123456uvwxyz
ASCII 16 characters 152 bit :
0123456789uvwxyz
•
Wireless Configuration can also
be set at on the Setup
Page. (See page 36 of the
Operating Instructions on the
CD-ROM.)
Click [Automatic Setup (Local Access Only)].
Click [Automatic Setup (Internet Access)].
The Enter Network Password window is displayed. Enter the
user name and password that were set, and click [OK].
Select the camera on the camera list to set up the
Internet access and click [Execute].
When using a router that supports UPnP
TM
, check [Enable].
When using a router that does not support UPnP
TM
, check
[Disable]. Then click [Next>].
•
Check if your router supports UPnP
TM
referring to the router's
manual.
•
If you select [Disable], skip to step on the next page.
Note
Camera
List window
Camera
Status
Port
No.
MAC
Address
IP
Address
To set Wireless Configuration, check [Enable] and click [Next>].
•
When [Disable] is selected, skip to step .
3.
Set up Internet access to the camera.


