


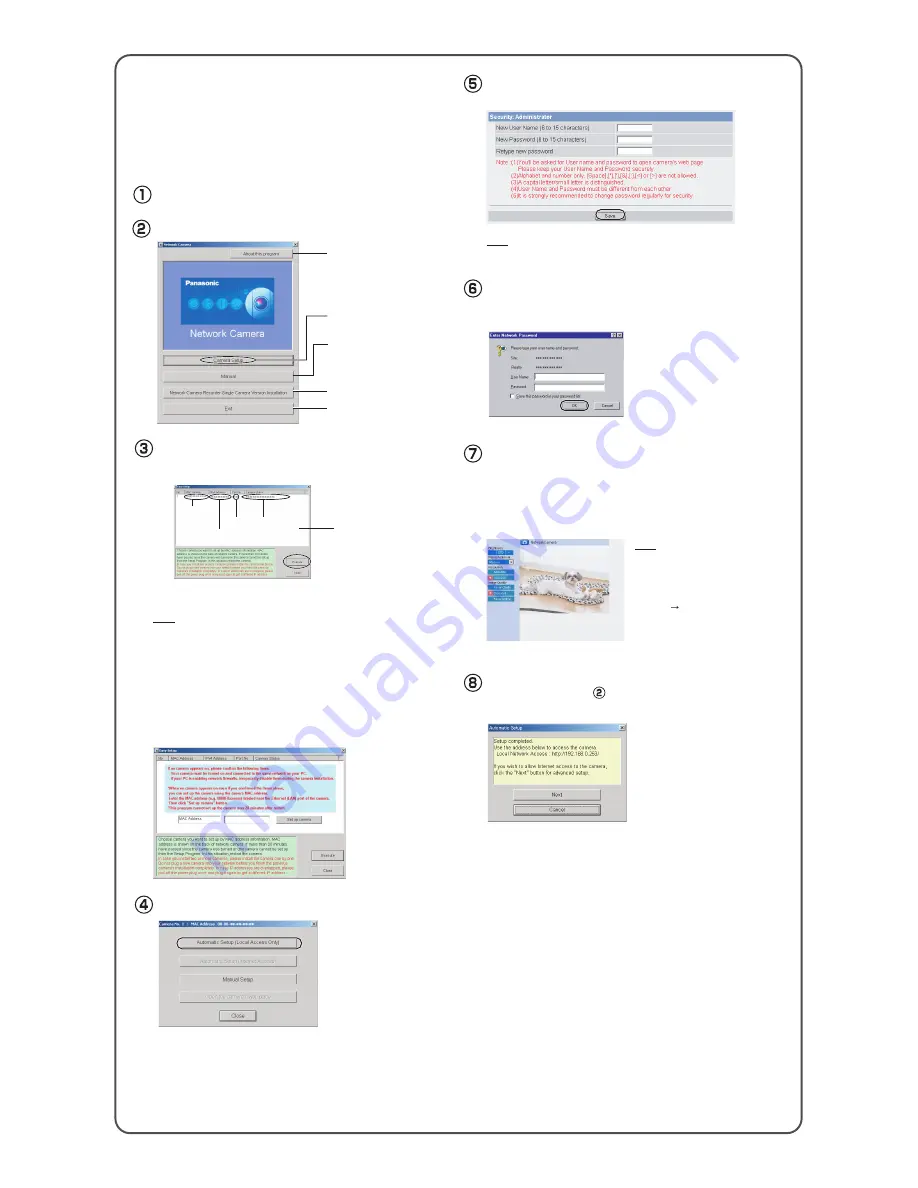
When the Single Camera page is displayed, setup
is complete.
•
Click [Cancel] and go to the last page if you will mount the camera.
Click [Next] to set up the Internet access to the cam-
era and go to step in "Set Up Internet access to the
camera" on the next page.
Enter the user name and password, and click [Save].
The Enter Network Password window is displayed.
Enter the user name and password that were set, and
click [OK].
Make a note of the user name and password.
To ensure that the most current image
is displayed, Internet Explorer should
be configured as follows. This will not
have a negative effect on normal use.
1. While viewing any website, click
[Tools] [Internet Options].
2. In the section "Temporary Internet
Files", click [Settings] and check
[Every visit to the page].
•
If the Security Warning window is displayed when installing ActiveX
®
Controls, click [Yes].
•
To install ActiveX Controls on Microsoft
®
Windows
®
XP Service Pack
2, see "Security Warning window on Microsoft Windows XP Service
Pack 2" on the last page.
Note
Note
Insert the CD-ROM into the CD-ROM drive of the PC.
(If the Network Camera Setup window is not displayed automatically,
double-click the "Setup.exe" file on the CD-ROM.)
Select the camera to set up and click [Execute].
•
This program searches for the cameras that are connected to the router
and displays their MAC Addresses, IP addresses and Port Numbers.
Displays the camera manuals.
If your PC does not have Adobe®
Acrobat® Reader®, install it from
the Adobe Reader website.
Closes the Setup Program.
• The MAC Address on the rear side (see page 5 of the Operating Instructions
on the CD-ROM.) of the camera shows which camera you select on the
Camera List window.
Displays version information
about this program.
2.
Set up the camera.
Sets up the camera.
Click [Camera Setup].
Important
•
To avoid any possible problems, temporarily disable any firewall
or antivirus software.
•
This procedure explains installation of the camera on the same
network as your PC.
•
Before proceeding, close your web browser.
Installs Network Camera Recorder
Single Camera Version.
•
If a Windows Security Alert is displayed, click [Unblock].
• If the indicator does not light green, check the connection (see page 4 of the
Operating Instructions, and page 3 and 4 of the Troubleshooting on the CD-
ROM).
• If more than 20 minutes have passed since the camera was turned on, the
camera cannot be set up from the Setup Program. In this situation,
disconnect the AC adaptor from the outlet, and reconnect it again.
• The Setup Program may not list any cameras due to your firewall or
antivirus software settings on your PC. If you cannot disable your firewall or
antivirus software, you can set up the camera by entering the camera MAC
address on the following window. The camera's MAC address can be found
on the label affixed to the rear of each camera. See page 5 of the Operating
Instructions on the CD-ROM for details.
Note
Camera
List window
Camera
Status
Port
No.
MAC
Address
IP
Address
Click [Automatic Setup (Local Access Only)].


