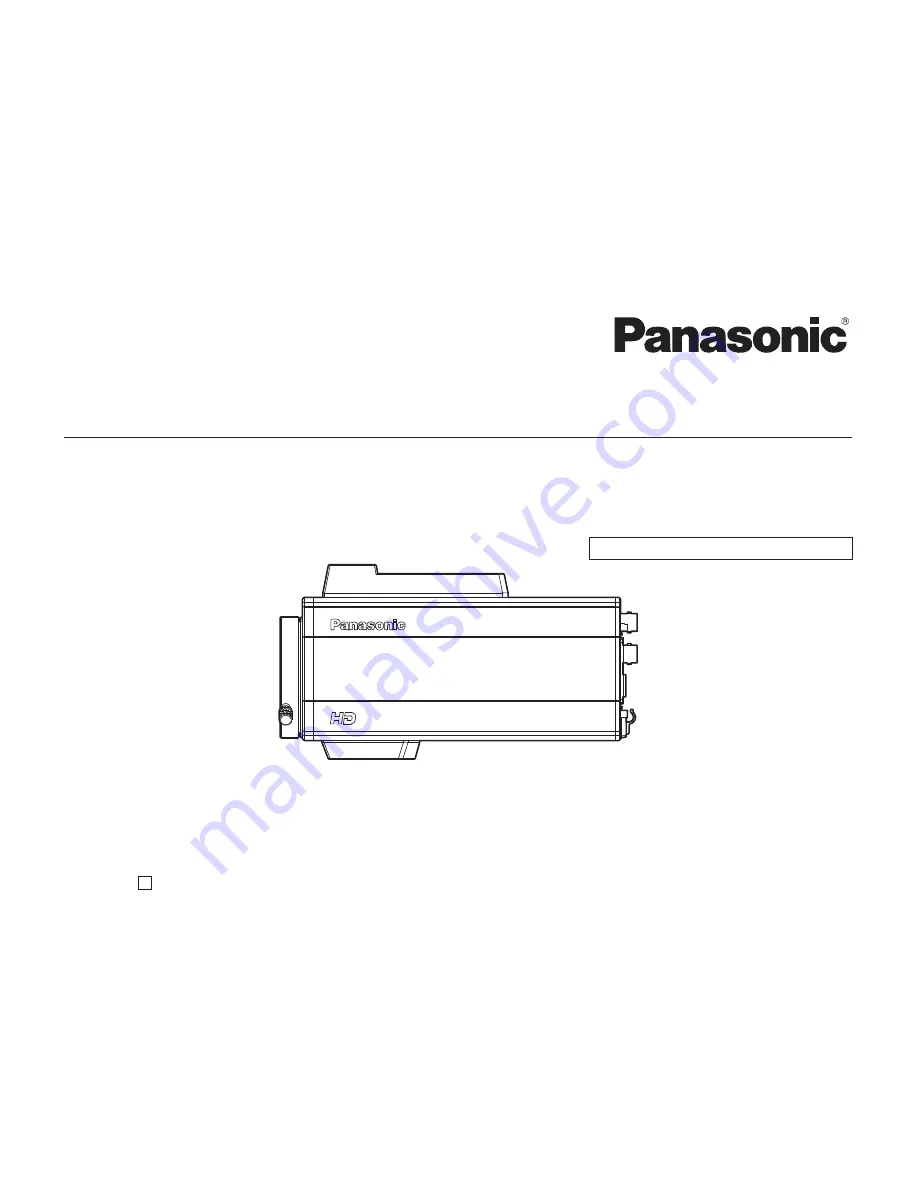
background image

AW-HE870

HD Co

nver

tible Ca

mera

DEFINITION

HIGH

取扱説明書

HDコンバーチブルカメラ

品番  

AW

-HE870N

このたびは、パナソニック製品をお買い上げいただき、まことにありがとうございます。


取扱説明書をよくお読みのうえ、正しく安全にお使いください。

 ご使用前に「安全上のご注意」 (4

〜7

ページ) を必ずお読みください。


保証書は「お買い上げ日・販売店名」 な

どの記入を確かめ、取扱説明書とともに大切に保管してください。

保証書別添付

VQTB0350-1

F0109S1029 

D

Operating Instructions

A

W

-HE870N

工事説明付き

AW-HE870

HD Convertible Camera

DEFINITION

HIGH

Operating Instructions

HD Convertible Camera

Model No.  

AW-HE870N

Before operating this product, please read the instructions carefully and save this manual for future use.

VQTB0350-1

F0109S1029 

D

 Installation instructions provided

Summary of Contents for AW-HE870N

Page 1: ...ITION HIGH Operating Instructions HD Convertible Camera Model No AW HE870N Before operating this product please read the instructions carefully and save this manual for future use VQTB0350 1 F0109S1029 D Installation instructions provided ...

Page 2: ......

Page 3: ... FIRE OR ELECTRIC SHOCK DO NOT EXPOSE THIS APPARATUS TO RAIN OR MOISTURE THE APPARATUS SHALL NOT BE EXPOSED TO DRIPPING OR SPLASHING AND THAT NO OBJECTS FILLED WITH LIQUIDS SUCH AS VASES SHALL BE PLACED ON THE APPARATUS CAUTION TO REDUCE THE RISK OF FIRE OR SHOCK HAZARD AND ANNOYING INTERFERENCE USE THE RECOMMENDED ACCESSORIES ONLY ...

Page 4: ...r pinched particularly at plugs convenience receptacles and the point where they exit from the apparatus 11 Only use attachments accessories specified by the manufacturer 12 Use only with the cart stand tripod bracket or table specified by the manufacturer or sold with the apparatus When a cart is used use caution when moving the cart apparatus combination to avoid injury from tip over 13 Unplug t...

Page 5: ...pplying the external synchronizing signals 26 Connection of the Indoor Pan tilt Head AW PH360 27 Connection of the Indoor Pan tilt Head AW PH400 30 Connection of the Indoor Pan tilt Head AW PH405 33 Connection of the Outdoor Pan tilt Head AW PH650 36 How to operate the system 39 Control exercised from the Remote Operation Panel AW CB400 39 Control exercised from the Multi Function Controller AW RP...

Page 6: ...u item setting changing User Mode 70 Sub menu User Mode 70 Description of the setting screen 73 Changing the settings 86 Changing the format settings 86 Changing the component setting 87 Setting the EBU matrix 88 Setting to initial set Factory presets 89 Setting to initial set 89 Initial settings of the setting items Factory preset values 90 Troubleshooting 93 Appearance 98 Specifications 99 Conte...

Page 7: ...te control panel or a pan tilt head allowing for system development according to the intended use The camera can be used for even more applications by inserting an option card In order to protect the environment when the HD convertible camera is to be discarded at the end of its service life ask a specialized contractor to dispose of it properly Note Standard accessories Operating Instructions 1 D...

Page 8: ...tions Noise during imaging on computer screens is reduced by the Synchro Scan function An optimum condition can be selected to suit the intended use from among four use modes Halogen Fluorescent Outdoor and User Supports the SDI card option 2 AW HHD870 Adopts operating procedures that are the same as those of our convertible cameras 3 Our pan tilt heads 4 and control panels can be used 5 1 When us...

Page 9: ...red picture unique to the CCD The ATW function under fluorescent illumination can adversely change the white balance There is a cooling fan inside The cooling fan is a consumable part Replace it 3 to 5 years after installation as a general rule When the cooling fan malfunctions the Fan Error message is displayed when the power is turned ON When the Fan Error message is displayed request replacemen...

Page 10: ...le uncovered Do not touch the surface of the lens or prism Do not use strong of abrasive detergents when cleaning the camera body Do not aim the camera toward the sun no matter whether it is turned on or not Do not expose the camera or other units to rain or moisture and do not try to operate the equipment in wet conditions Do not operate the camera if it becomes wet Do not operate the camera or o...

Page 11: ...dirty In case the dirt is hard to remove use mild detergent and wipe gently Use caution when operating the camera in the vicinity of spot lights or bright lights as well as light reflecting objects and surfaces Take immediate action if ever the camera should become wet Turn the power off and have the unit checked by an authorized service facility Follow normal safety precautions to avoid personal ...

Page 12: ... s operating ambient temperature 14 F to 113 F 10 C to 45 C range Locations near the air outlet of an air conditioner or near a door where the camera will be exposed to incoming outside air or other locations where the temperature is subject to sudden change since these locations may cause the lens area to cloud over and or condensation to form Locations that are subject to significant vibration s...

Page 13: ...ounting spacer in the camera mounting screw hole The mounting spacer must be fitted securely using a flathead screwdriver Note Mounting screw M4 Drop prevention wire Mounting spacer supplied Mounting screws Inch screws 1 4 20UNC Pan tilt head or camera mounting bracket Flat washers Spring washers Tightening the mounting screws and mounting spacer Tighten using the torque levels shown in the table ...

Page 14: ...nchor bolt that is best suited for the installation location and mounting method used Mounting screws M4 1 For attaching the drop prevention wire Determine the length of this screw by factoring in the thickness of the drop prevention wire s terminal Mounting screws Inch screws 1 4 20UNC 2 For mounting the camera Determine the length of these screws by factoring in the thickness of the camera mount...

Page 15: ...op view Rear view Bottom view Front view Top view Bottom view 1 1 4 32 mm 13 16 20 mm 3 8 10 mm 11 16 18 mm Rear view 13 16 20 mm 1 1 4 32 mm Mounting screws Inch screws 1 4 20UNC Depth 3 8 10 mm Mounting screws Inch screws 1 4 20UNC Depth 3 8 10 mm 11 16 17 5 mm ...

Page 16: ...sed for at least 3 seconds while the menu is displayed When this switch is pressed while an item is being changed on a sub menu screen the set values will revert back to those prior to making changes ENTER AWB switch ENTER AWB If this switch is pressed on the main menu screen a sub menu screen with selection items appears and if it is pressed on the sub menu screen the selection items start flashi...

Page 17: ...ted lower When the menu is not displayed the color bar and the shooting conditions are indicated by pressing the switch for about 2 seconds Video output connector VIDEO OUT A composite video signal is provided at this connector 1 V p p 75 BNC connector Iris connector IRIS Connect the IRIS cable of the motor drive lens such as the AW LZ17MD9AG and AK LZ20M85G to this connector I F Remote connector ...

Page 18: ...ovided with the main unit Note Cable clamp Clamp the DC cable with ø5 5 plug connected to the DC 12 V input connector to prevent it from slipping out Be absolutely sure to secure the DC cable using the cable clamp G L input connector G L IN External synchronizing signals BB are to be supplied to this connector when the camera is to be synchronized with the external synchronizing signals Three valu...

Page 19: ...rder to fix the lens securely 3 Connect the IRIS cable to the IRIS connector on the back panel of the camera When the pan tilt head has been used Connect the remote cable of the lens to the LENS IF 1 terminal on the pan tilt head When the SDI card AW HHD870 is installed without using the pan tilt head Connect the remote cable of the lens to the ZOOM FOCUS terminal of the SDI card IRIS cable Remote...

Page 20: ...and attach the drop prevention wire using the mounting screw M4 When the unit is to be mounted onto a Panasonic pan tilt head use the mounting screws and drop prevention wire that are supplied with the pan tilt head When the unit is to be mounted onto a tripod camera mounting bracket or other part refer to page 14 and provide your own drop prevention wire mounting screws and washers Camera mountin...

Page 21: ...t or other part Tighten the mounting screws and mounting spacers using the torque levels shown in the table to the right and then check for play and unsteadiness Screws Spacer Clamping torque Mounting screws M4 1 5N m 15 kgf cm Mounting screws Inch screws 2 0N m 20 kgf cm Mounting spacer 2 0N m 20 kgf cm Camera mounting bracket Mounting screws Inch screws 1 4 20UNC Wall Mounting screw M4 Mounting ...

Page 22: ...unting spacers using the torque levels shown in the table to the right and then check for play and unsteadiness Screws Spacer Clamping torque Mounting screws M4 1 5N m 15 kgf cm Mounting screws Inch screws 2 0N m 20 kgf cm Mounting spacer 2 0N m 20 kgf cm Example of mounting on a surface above the camera Mounting spacer supplied Mounting screw M4 Drop prevention wire Mounting screws Inch screws 1 ...

Page 23: ...hen mounting the camera by suspending it take care not to block the ventilation holes of the cooling fan When using the camera mounting screw holes on the camera s top surface when mounting the camera by suspending it attach the drop prevention wire to the camera mounting screw holes on the camera s bottom surface Do not mount the camera upside down because this will cause the temperature inside t...

Page 24: ...e unit with the device equipped with HD SD component signal input connectors Composite signals from the VIDEO OUT connector and component signals from the I F REMOTE connector can be output at the same time Use the DC cable with ø5 5 plug supplied with the AW HE870 for connection to the 12 V input connector AC Adapter AW PS510A VIDEO OUT connector 75 coaxial cable Composite video input connector V...

Page 25: ...rough the connecting cables optional accessory AW CA50T8 or AW CA50T9 RS 422 RS 232C converter The distance between the ROP and the AW CA50T8 or AW CA50T9 RS 422 RS 232C converter can be extended up to a maximum of about 3280 ft 1000 m using a 10BASE T equivalent to UTP category 5 straight cable Zoom lens Iris control DC cable provided with AW HE870 AC Adapter AW PS510A AC Adapter AW PS510A Monito...

Page 26: ...deo output To special effect generator or monitoring system Three value synchronizing signals of the HD format are not supported When using external synchronization only the output signal for the selected video output format Format will be synchronized 1080i 720p or 480i When selecting an HD format 1080i or 720p neither the VIDEO OUT signal composite signal nor the Y C signal output from the AW CA...

Page 27: ...s or their equivalent Connect the CONTROL OUT TO PAN TILT HEAD terminals P1 to P5 of the AW RP400 and the RP terminal of the AW PH360 with a 10BASE T straight cable when using the AW RP400 pan tilt control panel The maximum extension distance is 1640 ft 500 m when using UTP category 5 cables or their equivalent Use the camera cable provided with the pan tilt head to connect the AW PH360 to the uni...

Page 28: ...log component signals cannot be output from the AW PH360 Refer to the operating instructions of the AW PH360 for details relating to internal switch settings etc of the pan tilt head Use the AW LZ17MD9AG lens when using the camera mounted on the pan tilt head AW PH360 Lenses other than the AW LZ17MD9AG cannot be used Do not mount the camera on the AW PH360 when the AK LZ20M85G is installed Weight ...

Page 29: ... or UL Type NISPT 2 2 16 AWG to be locally purchased Pan Tilt Control Panel AW RP400 Remote Operation Panel AW CB400 Multi Function Controller AW RP655 Multi Hybrid Control Panel AW RP555 Pan tilt head camera control signals 10BASE T straight cable Monitor AC Adapter AW PS510A AC Adapter AW PS510A AC Adapter AW PS510A When an SDI card AW HHD870 has been installed Monitor Y Pr Pb SD component signa...

Page 30: ...onnect the PAN TILT HEAD terminal of the protocol converter AW IF400 and the RP terminal of the AW PH400 with a 10BASE T straight cable The maximum extension distance is 1640 ft 500 m when using UTP category 5 cables or their equivalent Connect the CONTROL OUT TO PAN TILT HEAD terminals P1 to P5 of the AW RP400 and the RP terminal of the pan tilt head using a 10BASE T straight cable when using the...

Page 31: ...N connector on the AW PH400 Use a coaxial cable to connect the SDI connector on the AW PH400 to the SDI input connector on the color monitor HD 1080i or 720p analog component signals cannot be output from the AW PH400 Note AW IF400 Switch settings when the AW RP555 AW RP655 is used SW1 SW2 SET UP 1 2 3 Tilt range 4 OFF OFF ON OFF ON 300 deg OFF 190 deg OFF System configuration Connections ...

Page 32: ...tor Protocol Converter AW IF400 Pan Tilt Control Panel AW RP400 Remote Operation Panel AW CB400 Multi Function Controller AW RP655 Multi Hybrid Control Panel AW RP555 Pan tilt head camera control signals 10BASE T straight cable AC Adapter AW PS510A Monitor AC Adapter AW PS510A AC Adapter AW PS510A AC Adapter AW PS510A AC power cable supplied with AW PH400 To the LENS I F 1 connector Iris control c...

Page 33: ... TO PAN TILT HEAD terminals P1 to P5 of the AW RP400 and the CONTROLLER terminal of the protocol converter AW IF400 using a 10BASE T straight cable when using the AW RP400 pan tilt control panel The maximum extension distance is 1640 ft 500 m when using UTP category 5 cables or their equivalent Connect the PAN TILT HEAD terminal of the protocol converter AW IF400 and the RP terminal of the AW PH40...

Page 34: ...o connect the SDI connector on the AW PH405 to the SDI input connector on the color monitor When transmitting HD 1080i or 720p analog component signals the switch inside the AW PH405 main unit must be set to the HD position the operation of the cable compensation circuit is not involved Consult your dealer Note AW IF400 Switch settings when the AW RP400 is used SW1 SW2 SET UP 1 2 3 4 OFF ON OFF ON...

Page 35: ...onverter AW IF400 Pan Tilt Control Panel AW RP400 Remote Operation Panel AW CB400 Multi Function Controller AW RP655 Multi Hybrid Control Panel AW RP555 Pan tilt head camera control signals 10BASE T straight cable AC Adapter AW PS510A Monitor AC Adapter AW PS510A AC Adapter AW PS510A AC Adapter AW PS510A Iris control cable When an SDI card AW HHD870 has been installed Zoom focus control cable To t...

Page 36: ...TO PAN TILT HEAD terminals P1 to P5 of the AW RP400 and the CONTROLLER terminal of the protocol converter AW IF400 using a 10BASE T straight cable when using the AW RP400 pan tilt control panel The maximum extension distance is 1640 ft 500 m when using UTP category 5 cables or their equivalent Connect the PAN TILT HEAD terminal of the protocol converter AW IF400 and the RP terminal of the AW PH650...

Page 37: ...connector on the color monitor When transmitting HD 1080i or 720p analog component signals set SW2 and SW3 on the COMP circuit board to the HD position The cable compensation circuit will not be activated even if SW1 is set to ON at this time so use this switch at the OFF setting For the connections inside the housing and other details refer to the operating instructions of the AW PH650 Notes AW I...

Page 38: ... adapter Protocol Converter AW IF400 Pan Tilt Control Panel AW RP400 Remote Operation Panel AW CB400 Multi Function Controller AW RP655 Multi Hybrid Control Panel AW RP555 Pan tilt head camera control signals 10BASE T straight cable AC Adapter AW PS510A Monitor AC Adapter AW PS510A AC Adapter AW PS510A AC Adapter AW PS510A Pb Y MULTI SDI OUT POWER When an SDI card AW HHD870 has been installed Moni...

Page 39: ...r when FAST has been selected as the status of the IRIS dial reaction speed For switching DTL ON and OFF The LOW HIGH selection can be made on the LCD menu when turned ON For selecting GAIN 0dB L M H or AGC The selected button lights 2 The L M H buttons can be set in increments of 1 dB between 0 dB and 18 dB on the LCD of the CB400 3 11 Furthermore the MAX GAIN setting of the AGC can be performed ...

Page 40: ...connected because the OPERATE switch has been turned OFF CAMERA SELECT has been switched the communication cable has been disconnected etc 6 The lamp of the ABB or AWB switch flashes while automatic white balance or automatic black balance is being executed respectively When ABB or AWB is completed successfully the corresponding lamp goes off when it is not completed successfully it lights up 7 Th...

Page 41: ... scroll up the item list Press the D button of the OPTION SW to scroll down the selected item Press the B button of the OPTION SW to confirm the item selection Once an item is selected change the set value of the AW HE870 Press the C button of the OPTION SW to change the set value in the positive direction and press the D button of the OPTION SW to change the set value in the negative direction Pr...

Page 42: ... between AUTO and MANU for the gain The GAIN button lights when the AUTO setting is selected Jog dial R When the LCD panel is in the gain adjustment mode Adjust the B GAIN setting 150 to 150 When the LCD panel is in the pedestal adjustment mode Adjust the B PEDESTAL setting 150 to 150 7 When the camera menu is used The jog dial performs the same operations as the MENU switch on the camera main uni...

Page 43: ... Bar is being displayed 4 Flashing stops when communication is disconnected because the OPERATE switch has been turned OFF CAMERA SELECT has been switched the communication cable has been disconnected etc 5 The switch lights without ABB being executed when the Color Bar is being displayed 6 SCENE FILE CAM BAR and GAINUP of each SCENE as well as the W B MODE R B GAIN and T R B PED statuses are sync...

Page 44: ...alled without using the pan tilt head Procedure for camera menu operation AW RP655 Press the MENU button to set the LCD panel display to the menu mode Turn the jog dial main to select the CAMERA SETTING Press the OK button The SCENE Selection menu display appears on the LCD panel SCENE HALOGEN OK Key Select the preferred scene and press the OK button The right display appears on the LCD panel OPEN...

Page 45: ...ting in increments of 10 it is not possible to change the data setting beyond setting range of data Push the jog dial main down to enter the settings To exit the camera menu press the MENU button or R B GAIN PED button When controlling the AW HE870 the G L SETTING is not displayed The G L must be set using the camera menu of the AW HE870 It may be necessary to upgrade the software version in order...

Page 46: ...e MODE button is pressed the setting is switched between CAM and BAR The MODE button lights up at the BAR setting Each time the GAIN button is pressed the setting is switched in the sequence of GAIN AUTO 0dB L 9dB H 18dB and the mode is displayed by the LEDs as shown below ON LED lighted OFF LED off GAIN button MANU L LED MANU H LED AUTO ON OFF OFF 0dB OFF OFF OFF LOW OFF ON OFF HIGH OFF OFF ON Ot...

Page 47: ...switch lights without AWB being executed when the white balance mode of the main unit is ATW PRESET 3200K or PRESET 5600K or when the Color Bar is being displayed 3 Flashing stops when communication is disconnected because the OPERATE switch has been turned OFF CAMERA SELECT has been switched the communication cable has been disconnected etc 4 The switch lights without ABB being executed when the ...

Page 48: ...nds The camera menu of the AW HE870 is displayed on the monitor Select a menu item Press the YES button to scroll up the selected item Press the NO button to scroll down the selected item Press the ITEM button to confirm the item selection Once an item is selected change the set value of the AW HE870 Press the YES button to change the set value in the positive direction and press the NO button to ...

Page 49: ...en mode Suited to indoor shooting such as at weddings parties lecture meetings events etc Settings can be changed using a simple menu Fluorescent mode Suited to indoor shooting under fluorescent lighting Settings can be changed using a simple menu Outdoor mode Suited to outdoor shooting Settings can be changed using a simple menu User mode Settings can be changed using a detail menu ...

Page 50: ...he DOWN BAR switch is pressed Move the cursor to the desired use mode 3 Press the ENTER AWB switch The selecting use mode comes into effect After the use mode setting menu is shown for about 5 seconds the camera returns to be ready for operation Then the camera operates in the selected use mode MENU switch ENTER AWB switch UP ABB switch DOWN BAR switch Use Mode Set Halogen Fluorescent Outdoor User...

Page 51: ...htness has been changed Once the white balance has been adjusted it need not be adjusted again when the camera is going to be used under the same conditions 6 Adjust the black balance The black balance must be adjusted when the camera is used for the first time and when it is going to be used again after it has not been used for a prolonged period It must be adjusted when the ambient temperature h...

Page 52: ... focus ring and the flange back adjust ring alternately for the best focus within the zooming range Tighten the flange back lock knob upon completion of focusing Iris gain control in a lens An iris gain control hole G S is usually provided in the front of the lens Adjustment of the iris gain with a screwdriver through the hole may be done as follows Shape and location of the hole may vary dependin...

Page 53: ... to the ambient conditions The preset conditions will be renewed whenever you input new conditions 1 Select the white balance mode either AWB A or AWB B 2 Aim the camera at a white object a white wall or a white handkerchief and zoom in to enlarge the image as much as possible For white balance setting aim the camera at a white object and try to position it in the center of the monitor screen The ...

Page 54: ...not function properly when high brightness light ex fluorescent lamp beams into a screen White balance may not be accurately set if there is no white object in the scene being shot Notes Manual white balance setting Manual setting is possible in User Mode only 1 Select the white balance mode either AWB A or AWB B by menu 2 Aim the camera at a large white object to set the automatic white balance 3...

Page 55: ... setting will be automatically reset to 0 after setting the black balance Painting setting in only User Mode Press the UP ABB switch for over 2 seconds and the black balance will be set in 30 seconds In user mode black balance fine adjustment can be performed by changing the R pedestal B pedestal setting with the Painting item of Color Set sub menu after setting the black balance UP ABB switch Adj...

Page 56: ...me Please contact your dealer for the adjustment 1 Close the lens 2 Select Pedestal item in the Brightness Set sub menu 3 Set the pedestal level to 5 IRE 0 035 V with the UP ABB switch or the DOWN BAR switch UP ABB switch DOWN BAR switch Brightness Set Picture Level 0 Light PEAK AVG 0 Light Area Top Cut Shutter Mode Step Step Synchro Off Gain 0dB AGC Max Gain Pedestal 0 Return Adjustment ...

Page 57: ... of the camera menu Notes When horizontal phase adjustment is moved color phase is also moved Adjust color phase whenever horizontal phase adjustment is moved Phases of the composite and Y C signals are interlocked for adjustments Three value synchronizing signals of the HD format are not supported When using external synchronization only the output signal for the selected video output format Form...

Page 58: ... Press the DOWN BAR switch for over 2 seconds to display the color bar Press the MENU switch for 3 seconds or more to display the main menu Press the UP ABB switch or the DOWN BAR switch to move the cursor to G L Set then press the ENTER AWB switch to display the G L Set sub menu Select H Phase on the G L Set sub menu Adjust the horizontal phase with the UP ABB and DOWN BAR switch The level of H P...

Page 59: ...nu Press the DOWN BAR switch for over 2 seconds to display the color bar Press the MENU switch for 3 seconds or more to display the main menu Press the UP ABB switch or the DOWN BAR switch to move the cursor to G L Set then press the ENTER AWB switch to display the G L Set sub menu Select SC Coarse on the G L Set sub menu Make coarse adjustment with the UP ABB switch and the DOWN BAR switch Select...

Page 60: ...idual scenes Characters displayed on the menu may be cut off depending on the monitor used Notes Setting when using the camera by itself 1 Keep the MENU switch depressed for 3 seconds or more to display the main menu of each use mode For selecting the use mode refer to page 49 2 Each time the UP ABB switch or DOWN BAR switch is pressed the selected item moves up or down 3 When the ENTER AWB switch...

Page 61: ...BAR switch Main menu screen Main menu of Halogen Fluorescent Outdoor Mode Halogen Mode Set Brightness Set Color Set Sharpness DTL Set G L Set Other Set 1 Other Set 2 Initialize Data Displays the use mode Main menu of User Mode User Mode Set Brightness Set Color Set HD Detail Set SD Detail Set Color Matrix Set Color Correction Set G L Set Other Set 1 Other Set 2 Initialize Data Displays the use mod...

Page 62: ...peed Return Color Set Display Sharpness DTL Set DTL Select Sharpness Level High Noise Suppress Off Clean DNR Off Flesh Noise Sup Off Return Sharpness DTL Set Display G L Set H Phase 0 SC Coarse 90deg SC Fine 0 H Phase SC Fine Step 1 Return G L Set Display Other Set 1 Contrast Gamma Mid SD 2D LPF Off Return Other Set Display Other Set 2 Format 1080i Downconv Mode Squeeze Component Y Pb Pr Status Of...

Page 63: ... about one third of both the top and bottom and one third of both the right and left portions of the screen are excluded from measurement Top Cut About one third of the top portion of the screen is excluded from measurement BTM Cut About one third of the bottom portion of the screen is excluded from measurement R L Cut About one third of both the right and left portions of the screen are excluded ...

Page 64: ...ing may increase at ELC under fluorescent lights Notes Gain setting Gain Auto 6 dB to 18 dB Auto The light quantity is adjusted automatically 6 dB to 1 dB This setting makes it possible to shoot at the optimal gain setting under conditions where the light quantity is high When it is used images with minimal noise can be shot but the dynamic range is reduced 0 dB 0 dB should be selected in normal c...

Page 65: ...sted to the optimum position The white balance is tracked across an approximate color temperature range from 2000K to 10000K AWB A AWB B Once the white balance is adjusted it is no longer necessary to set the white balance again if you simply select AWB A or AWB B provided that the camera is used under the same conditions 3200K The white balance is adjusted to 3200K illumination 5600K The white ba...

Page 66: ... level can be adjusted when it is at Super DTL Noise suppress level setting Noise Suppress Off Low High Screen noise can be reduced when detail level setting is at High or Low Clean DNR setting Clean DNR Off Low High The noise reduction effect to be provided by the clean DNR can be selected Flesh noise suppress level setting Flesh Noise Sup Off Low High Flesh noise is suppressed in two steps when ...

Page 67: ...nal is supplied Valid for the composite and Y C signals of the SD format Horizontal phase and color phase fine adjustment H Phase SC Fine Step 1 to 10 The level of horizontal phase adjustment and color phase fine adjustment can be selected simultaneously Other Set Contrast adjustment Contrast Gamma Low Mid High Contrast can be adjusted to any of three levels SD 480i 2D LPF SD 2D LPF Off Low High T...

Page 68: ...item set to On the following is displayed AWB ACTIVE This is displayed while AWB is being executed AWB OK This is displayed for 3 seconds after AWB was completed successfully AWB NG This is displayed for 3 seconds after AWB was not completed successfully AWB executed while ATW 3200K or 5600K is selected OUT RANGE RB This is displayed for 3 seconds after AWB was not completed successfully A color t...

Page 69: ... selected Option How the characters to the optional card are output is selected When the menu is started within 1 minute or so after the camera has been turned on the characters are displayed in all the outputs The selection of Option as the Character Mix setting takes effect when an optional card has been installed Notes Composite Y C setup selection Composite Y C Setup Off On The composite signa...

Page 70: ...Detail 0 Return HD Detail Set Display HD Detail Set 2 2 Chroma Detail 0 Clean DNR Off Flesh Noise Sup Off Precision Detail Off Return Brightness Set Picture Level 0 Light PEAK AVG 0 Light Area Top Cut Shutter Mode Step Step Synchro Off Gain 0dB AGC Max Gain Pedestal 0 Return Brightness Set Display Color Set Chroma Level 2 White Bal AWB A ATW Speed Painting R Gain 0 B Gain 0 R Pedestal 0 B Pedestal...

Page 71: ...e 0 Cy Gain 44 Cy Phase 15 Cy_B Gain 0 Cy_B Phase 0 B Gain 20 B Phase 36 Return SD Detail Set 1 2 Detail High H Detail Level H 16 V Detail Level H 3 H Detail Level L 13 V Detail Level L 2 Detail Band 4 Noise Suppress 3 Level Dependent 10 Dark Detail 0 Return SD Detail Set Display SD Detail Set 2 2 Chroma Detail 0 Clean DNR Off Flesh Noise Sup Off Return Color Matrix Set Matrix R G 0 Matrix R B 0 M...

Page 72: ...er Set Display Other Set 2 Format 1080i Downconv Mode Squeeze Component Y Pb Pr Status Off Character Mix Component On Composite On Option On Composite Y C Setup On Return G L Set H Phase 0 SC Coarse 90deg SC Fine 0 H Phase SC Fine Step 1 Return G L Set Display To return to the initial settings refer to page 89 Menu item setting changing User Mode ...

Page 73: ...about one third of both the top and bottom and one third of both the right and left portions of the screen are excluded from measurement Top Cut About one third of the top portion of the screen is excluded from measurement BTM Cut About one third of the bottom portion of the screen is excluded from measurement R L Cut About one third of both the right and left portions of the screen are excluded f...

Page 74: ...uto Flickering may increase at ELC under fluorescent lights Notes Gain setting Gain Auto 6 dB to 18 dB Auto The light quantity is adjusted automatically 6 dB to 1 dB This setting makes it possible to shoot at the optimal gain setting under conditions where the light quantity is high When it is used images with minimal noise can be shot but the dynamic range is reduced 0 dB 0 dB should be selected ...

Page 75: ...ra is used under the same conditions Fine color adjustment can be made after AWB setting by R gain and B gain for the painting setting 3200K The white balance is adjusted to 3200K illumination 5600K The white balance is adjusted to 5600K illumination ATW speed setting ATW Speed Slow2 Slow1 Mid Fast1 Fast2 ATW Speed can be set Painting setting Painting R Gain B Gain R Pedestal B Pedestal 150 to 150...

Page 76: ...w Whichever the direction H or V the set level at High must be at least one position higher than that at Low Detail band setting Detail Band 1 to 5 A contour correction band can be set with the detail level setting at High or Low The higher setting the finer will be the detail Noise suppress level setting Noise Suppress 1 to 10 Screen noise can be reduced with the detail level setting at High or L...

Page 77: ...NR Off Low High The noise reduction effect to be provided by the clean DNR can be selected Flesh noise suppress level setting Flesh Noise Sup Off Low High Flesh noise is suppressed in two steps when the detail level setting is at High or Low Precision detail level setting Precision Detail Off Low High This setting is to narrow detail width and suppress detail glare HD 1080i 720p detail settings ar...

Page 78: ...hichever the direction H or V the set level at High must be at least one position higher than that at Low Detail band setting Detail Band 1 to 5 A contour correction band can be set with the detail level setting at High or Low The higher setting the finer will be the detail Noise suppress level setting Noise Suppress 1 to 10 Screen noise can be reduced with the detail level setting at High or Low ...

Page 79: ...evel setting Chroma Detail 0 to 15 The contours of high hue portions of an object can be emphasized Clean DNR setting Clean DNR Off Low High The noise reduction effect to be provided by the clean DNR can be selected Flesh noise suppress level setting Flesh Noise Sup Off Low High Flesh noise is suppressed in two steps when the detail level setting is at High or Low The setting for the SD 480i Detai...

Page 80: ... color in the R B axis direction Linear Matrix G R Matrix G R 31 to 31 This is used to adjust the color in the G R axis direction Linear Matrix G B Matrix G B 31 to 31 This is used to adjust the color in the G B axis direction Linear Matrix B G Matrix B G 31 to 31 This is used to adjust the color in the B G axis direction Linear Matrix B R Matrix B R 31 to 31 This is used to adjust the color in th...

Page 81: ...l Gain 127 to 127 Increases or decreases the yellow Yl Phase 127 to 127 Varies the hue of the yellow Yl_G Gain 127 to 127 Increases or decreases the intermediate color between yellow and green Yl_G Phase 127 to 127 Varies the hue of the intermediate color between yellow and green G Gain 127 to 127 Increases or decreases the green G Phase 127 to 127 Varies the hue of the green G_Cy Gain 127 to 127 ...

Page 82: ...e SD format Horizontal phase and color phase fine adjustment H Phase SC Fine Step 1 to 10 The level of horizontal phase adjustment and color phase fine adjustment can be selected simultaneously Other Set Gamma level setting Gamma 0 35 to 0 55 Gamma correction level can be set Knee level setting Knee Point 88 to 98 Dynamic 88 to 98 The level of video signals subject to knee knee point can be set Dy...

Page 83: ...etting EBU Matrix Set Off On Off This reverts settings of the color matrix color correction and chroma level adjustment back to respective levels prior to the EBU matrix setting On This enables the EBU matrix setting to be selected for the color matrix chroma level adjustment and color correction items Refer to Setting the EBU matrix on page 88 Video output format setting Format 480i 720p 1080i Th...

Page 84: ...isplayed while AWB is being executed AWB OK This is displayed for 3 seconds after AWB was completed successfully AWB NG This is displayed for 3 seconds after AWB was not completed successfully AWB executed while ATW 3200K or 5600K is selected OUT RANGE RB This is displayed for 3 seconds after AWB was not completed successfully A color that could not be adjusted is displayed with RB HIGH LIGHT NG T...

Page 85: ...t method for composite signals and Y C signals is selected Option How the characters to the optional card are output is selected When the menu is started within 1 minute or so after the camera has been turned on the characters are displayed in all the outputs The selection of Option as the Character Mix setting takes effect when an optional card has been installed Notes Composite Y C setup selecti...

Page 86: ...selected and the ENTER AWB switch is pressed within about 10 seconds after the Format sub menu screen appeared the setting is changed a screen such as the one shown below is displayed and operation returns to the main menu Format 1080i Set 3 If CANCEL is selected and the ENTER AWB switch is pressed after the Format sub menu screen appeared or if O K is selected and the ENTER AWB switch is not pres...

Page 87: ...R AWB switch is pressed within about 10 seconds after the Component sub menu screen appeared the setting is changed a screen such as the one shown below is displayed and operation returns to the main menu Component Y Pb Pr Set 3 If CANCEL is selected and the ENTER AWB switch is pressed after the Component sub menu screen appeared or if O K is selected and the ENTER AWB switch is not pressed within...

Page 88: ...h is pressed within about 10 seconds after the EBU Matrix sub menu screen appeared the EBU matrix is set a screen such as the one shown below is displayed and operation returns to the main menu EBU Matrix On Set 3 If CANCEL is selected and the ENTER AWB switch is pressed after the EBU Matrix sub menu screen appeared or if O K is selected and the ENTER AWB switch is not pressed within about 10 seco...

Page 89: ... Do you want to initialize Halogen Mode settings O K CANCEL When initialization is performed all values set prior to initialization will be cleared and they cannot be restored Note 2 Select O K and press the ENTER AWB switch within about 10 seconds to return to the initial settings the existing settings are initialized the screen below is displayed and the camera returns to main menu Halogen Mode ...

Page 90: ...AWB A AWB A ATW ATW Speed Mid Sharpness DTL Set DTL Select Sharpness Sharpness Sharpness Level High High High Noise Suppress Off Off Off Clean DNR Off Off Off Flesh Noise Sup Off Off Off G L Set Items common to all scenes H Phase 0 0 0 SC Coarse 90deg 90deg 90deg SC Fine 0 0 0 H Phase SC Fine Step 1 1 1 Other Set 1 Contrast Gamma Mid Mid Mid SD 2D LPF Off Off Off Other Set 2 Items common to all sc...

Page 91: ...5 Detail Band 4 Noise Suppress 5 Level Dependent 10 Dark Detail 0 HD Detail Set 2 2 Chroma Detail 0 Clean DNR Off Flesh Noise Sup Off Precision Detail Off Item User SD Detail Set 1 2 Detail High H Detail Level H 16 V Detail Level H 3 H Detail Level L 13 V Detail Level L 2 Detail Band 4 Noise Suppress 3 Level Dependent 10 Dark Detail 0 SD Detail Set 2 2 Chroma Detail 0 Clean DNR Off Flesh Noise Sup...

Page 92: ...0 Cy_B Phase 0 B Gain 20 B Phase 36 G L Set Items common to all scenes H Phase 0 SC Coarse 90deg SC Fine 0 H Phase SC Fine Step 1 Other Set 1 Gamma 0 45 Knee Point 88 White Clip 110 Flare R 0 Flare G 0 Flare B 0 Black Stretch Off SD 2D LPF Off EBU Matrix Set Off Item User Other Set 2 Items common to all scenes Format 1080i Downconv Mode Squeeze Component Y Pb Pr Status Off Character Mix Component ...

Page 93: ...efer to the Operating Instructions of the pan tilt head or the controller P 27 to 38 Cannot operate using the controller Has the unit s power been turned on If the unit s power indicator LED is off it means that no power is being supplied to the unit P 18 Is the unit connected to the pan tilt head and controller properly Has the power of the pan tilt head and controller been turned on Refer to the...

Page 94: ... lens Check that the unit and lens have been connected properly Check that the iris selector switch on the lens is set to AUTO P 19 P 52 Is the designated lens being used P 19 Cannot display the menus Has OFF been set for the character output selection of the output connected to the monitor Check the character output selection Even if OFF is selected characters are displayed in all outputs for up ...

Page 95: ...ion using a switcher or other unit with which the images are also switched when the camera to be operated is selected has the unit rather than another camera been selected Has the video output been selected properly Check the video output format component output selection and other settings P 67 to 68 P 83 to 84 Is the camera being used in conditions under which its use is prohibited Check the pre...

Page 96: ...ing used by the composite video signal output Check that the horizontal phase and color phase have been set correctly P 26 P 57 to 59 The pictures are too light or too dark When the controller is being used Either set the iris to auto or set it to manual and adjust the iris manually P 39 to 48 Check the connections and terminations of the video cables Signal attenuation may cause the images to bec...

Page 97: ...started The cooling fan inside the unit has reached the end of its service life or it has failed If the camera would be kept using with displaying Fan Error it may cause malfunctioning Ask your dealer to replace it Fan Error is displayed in all video outputs regardless of the AWB ABB operation status display setting or character output selection To clear the Fan Error display display the menu scre...

Page 98: ... 98 Appearance Unit inch mm AW HE870 HD Convertible Camera DEFINITION HIGH 3 1 4 83 6 3 4 171 4 1 8 104 5 1 4 12 3 8 9 3 1 16 77 1 5 16 34 10 11 16 17 5 ...

Page 99: ...Dsub 50P 1 Switched by menu RGB 1 0 Vp p 75 Dsub 50P 1 SD format VIDEO OUT 1 0 Vp p 75 BNC 1 Dsub 50P 1 Continuous output Y C Y 1 0 Vp p 75 C 0 286 Vp p 75 burst Dsub 50P 1 Y Pb Pr Y 1 0 Vp p 75 Pb Pr 0 7 Vp p 75 Dsub 50P 1 Switched by menu RGB 1 0 Vp p 75 Dsub 50P 1 Y C Y 1 0 Vp p 75 C 0 286 Vp p 75 burst Dsub 50P 1 Standard illumination color temperature 2 000 lx F10 3200K Registration 0 05 Enti...

Page 100: ...olor bars SMPTE Video output format setting 480i 720p 1080i Lens mount 2 3 bayonet mount Lens diaphragm Auto Manual manual available only when using the remote control Selectors MENU ENTER AWB AWB when menu screen is not displayed UP ABB ABB when menu screen is not displayed DOWN BAR BAR when menu screen is not displayed Input Output connectors VIDEO OUT BNC connector G L IN BNC connector IRIS 12P...

Page 101: ...it must be warmed up for at least 30 minutes if the temperature is 32 F 0 C or below Ambient operating humidity For storage 20 to 90 For guaranteeing operation 20 to 90 Dimensions W H D 3 1 4 4 1 8 7 9 16 83 104 5 192 mm excluding protrusions Weight Approx 2 65 lbs 1 2 kg Weight and dimensions indicated are approximate Specifications are subject to change without notice Specifications ...

Page 102: ...Memo ...

Page 103: ...Memo ...

Page 104: ...201 348 7587 Broadcast PARTS INFORMATION ORDERING 9 00 a m 5 00 p m PST 800 334 4881 24 Hr Fax 800 334 4880 Emergency after hour parts orders 800 334 4881 TECHNICAL SUPPORT Emergency 24 Hour Service 800 222 0741 Panasonic Canada Inc Panasonic Puerto Rico Inc 5770 Ambler Drive Mississauga Ontario L4W 2T3 905 624 5010 Corporativo Panasonic de México Moras No 313 Col Tlacoquemecatl del Valle Del Beni...

Reviews: