background image

46

5. Image transmission functions

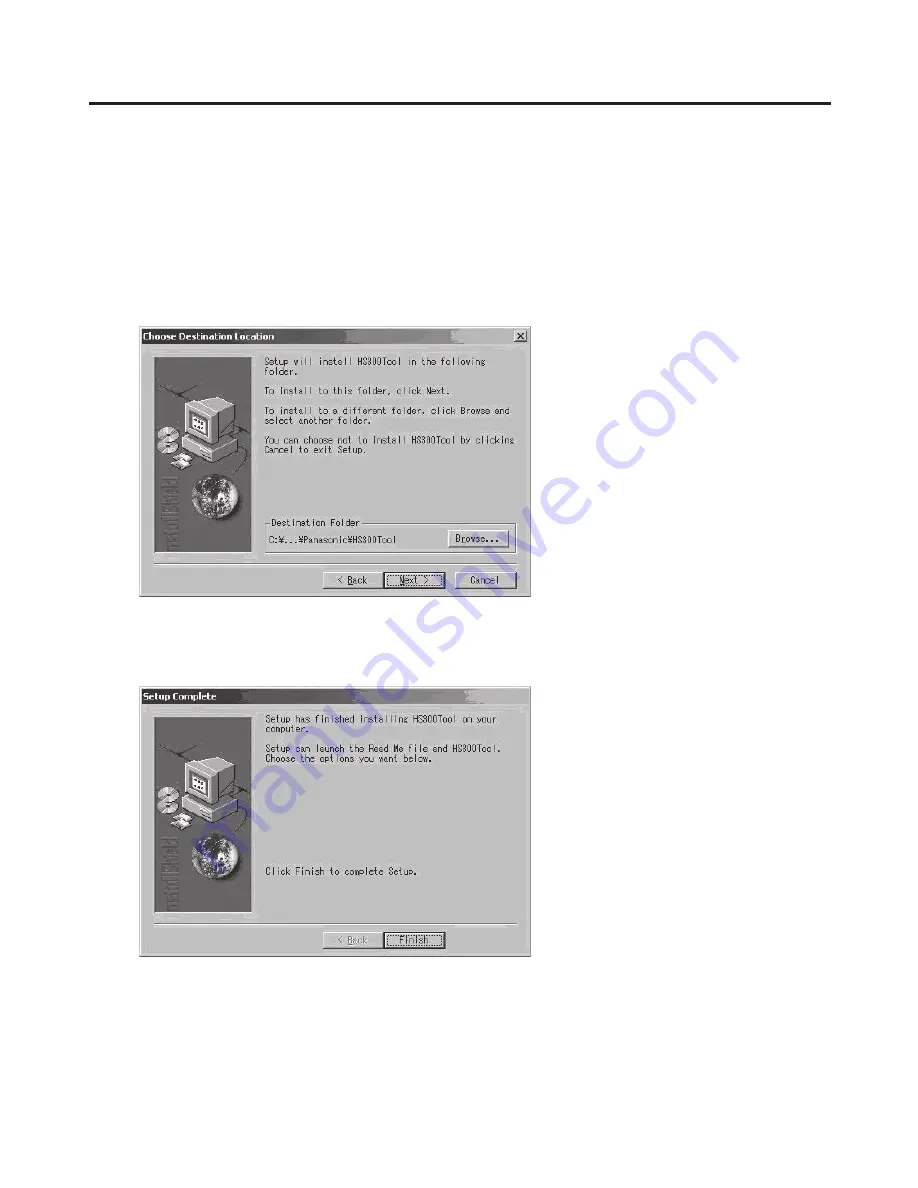
How to install the program

This section describes how to install the image transmission program (HS300 Tool).  
Windows XP is used as the host computer’s operating system in the example given here.

1.   Insert the CD-ROM supplied with the unit into the CD-ROM drive of the host computer in which the program 

will be installed. (Here, E: will serve as the name of this drive for example.)

2.  Execute the setup program (E:\HS300TOOL\JPN\SETUP.EXE).

3.  The installer now starts up so follow its instructions to proceed.

4.   The Setup Complete screen appears to indicate that installation is complete. 

Click [Finish] to close the window.

Summary of Contents for AV-HS300

Page 1: ...Before operating this product please read the instructions carefully and save this manual for future use Operating Instructions Multi Format Compact Live Switcher Model No AV HS300 ...

Page 2: ...f the FCC Rules These limits are designed to provide reasonable protection against harmful interference when the equipment is operated in a commercial environment This equipment generates uses and can radiate radio frequency energy and if not installed and used in accordance with the instruction manual may cause harmful interference to radio communications Operation of this equipment in a resident...

Page 3: ...particularly at plugs convenience receptacles and the point where they exit from the apparatus 11 Only use attachments accessories specified by the manufacturer 12 Use only with the cart stand tripod bracket or table specified by the manufacturer or sold with the apparatus When a cart is used use caution when moving the cart apparatus combination to avoid injury from tip over 13 Unplug this appara...

Page 4: ...ory 23 2 7 Preset memory 24 3 Setup 26 3 1 Setting the input signals 26 3 1 1 Setting the input signals IN 1 to 5 26 3 1 2 Setting the input signal frame synchronizer 26 3 1 3 Setting the DVI input signals 27 3 2 Setting the output signals 29 3 2 1 Types of output signals 29 3 2 2 Selecting the AUX signals 29 3 3 Selecting the video format 30 3 4 Setting the crosspoints 31 3 4 1 Assigning signals ...

Page 5: ... unit contains a high performance 10 bit frame synchronizer to enable non synchronized images to be input By using the BB signal output a system can be configured using the switcher s sync signals as a reference Gen lock is also possible with external sync signals BB or TRI signals Built in effects and key combination functions The unit provides nine different waveform patterns as wipe patterns to...

Page 6: ...hile power is supplied to the DC power socket the unit s power is turned on and the power indicator lights When it is set to O the unit s power is turned off and the power indicator goes off Alarm indicator ALARM This lights when the fan has stopped running or when something is wrong with the DC power such as a drop in voltage Which type of trouble has occurred can be checked on the LCD s status m...

Page 7: ...als or AUX signals are selected Source selector switches SOURCE SELECT AUX KEY S KEY F When a B bus crosspoint switch is pressed while the AUX source selector switch is held down the AUX signals are selected and when a B bus crosspoint switch is pressed while the KEY S or KEY F source selector switch is held down the key signals are selected While a switch is held down its indicator lights in ambe...

Page 8: ...ch lights up green and the setting menu of the function indicated underneath the switch appears on the LCD display TIME For setting the auto transition time See 2 1 5 WIPE For setting the wipe border and soft effect See 2 2 3 CBGD For setting the color background See 2 4 KEY For setting the key See 2 3 EDGE For setting the key edge See 2 3 5 FRZ For displaying the freeze status display and setting...

Page 9: ...anged while a transition is being executed or suspended KEYON status indicator LED This lights in red when the key ON status is established MIX switch This is used to switch the A and B bus images while making them overlap During the transition the A and B bus output total is kept at 100 When the MIX switch is pressed and it is selected its indicator lights in amber If the WIPE switch is now press...

Page 10: ...gram signals PGM are being output lights 1 5 LCD menu area LCD The setting menus are displayed on the LCD When the FUNC switch is pressed and its indicator is lighted and then one of the wipe pattern selector switches is pressed the setting menu for the function concerned is displayed Rotary encoders F1 to F4 These are used to set the parameters displayed on the menu Menu items are selected and pa...

Page 11: ...S PVW 1 SDI AUX output connectors DIGITAL OUTPUTS AUX 1 2 SDI PGM output connector ANALOG OUTPUTS PGM 1 analog HD component PVW output connector ANALOG OUTPUTS PVW 1 analog HD component AUX output connector ANALOG OUTPUTS AUX 1 analog HD component Ethernet port ETHERNET 10BASE T 100BASE TX GPI input connector GPI auto take DC power socket Reference input connector BB output connector REF Loop thro...

Page 12: ...er to 3 2 2 2 1 2 Selecting the bus mode Select the A B bus system or flip flop system PGM PST system from the setting menu Press the FUNC switch to light its indicator and then press the SETUP switch to display the SETUP menu Turn F1 to display the BUS menu Turn F2 and select the A B or P P flip flop system using the MODE item BUS 11 14 MODE A B P P With the flip flop P P system the PGM A bus sel...

Page 13: ... lights PGM A bus output Top and bottom LEDs light Transition underway Bottom LED only lights B bus output 2 1 5 Auto transition When the AUTO switch is pressed the transition is executed automatically using the transition time which has been set If the AUTO switch is pressed while the fader lever is at a midway position the remaining transition will be executed automatically using the transition ...

Page 14: ... to the normal direction N R To switch the wipe direction between normal and reverse when the execution of the transition has been completed R For setting the wipe direction to the reverse direction 2 2 3 Wipe decorations border soft effect Adding borders Borders can be added to the wipe edges Press the FUNC switch to light its indicator and then press the WIPE switch to display the WIPE menu The ...

Page 15: ...R1 to 4 menu Adjusting the border color When USR1 2 3 or 4 has been selected the border color can be adjusted Use of USR1 to 4 is shared by the background color fill color and edge color Press the FUNC switch to light its indicator and then press the WIPE switch to display the WIPE menu Turn F1 to display the USR1 to 4 user color menu Turn F2 F3 or F4 to adjust the color HUE SAT or LUM USR1 2 5 HU...

Page 16: ...he key source signal The indicators of the KEY S switch and selected crosspoint switch light in amber Provide materials with white key combined characters or patterns on a black background as the key source signals The keys may not be combined satisfactorily if the material has colors other than black and white Material with black characters on a white background for example can be reversed for us...

Page 17: ... SELF INV ON PVW ON OFF AUTO OFF LIN Setting key inversion On the KEY menu turn F3 and set the INV item Key inversion can now be set to ON or OFF Selecting key preview Select whether to display the key preview for the PVW output On the KEY menu turn F4 and set the PVW item ON Images with key effects added are output to PVW OFF Images with no key effects added are output to PVW AUTO Preview images ...

Page 18: ...mber Bus images are not used when the fill color has been selected on the menu When the KEY F switch in the source selection area is pressed the menu display is switched to the FILL menu and the fill color can now be selected Selecting the fill color The fill color is selected on the menu Press the FUNC switch to light its indicator and then press the KEY switch to display the KEY menu Turn F1 to ...

Page 19: ...ow or other edge can be added to the key Press the FUNC switch to light its indicator and then press the EDGE switch to display the EDGE menu The EDGE setting screen appears first EDGE 1 5 TYPE BODR WIDT 4 COLR WHT YLW CYN GRN MGT RED BLE BLK USR1 USR2 USR3 USR4 DROP SHDW OUTL OFF 0 8 Turn F2 to select the edge type OFF An edge is not added BODR BORDER A border is added around the entire edge DROP...

Page 20: ...SR1 to 4 is shared by the border color background color and fill color Press the FUNC switch to light its indicator and then press the EDGE switch to display the EDGE menu Turn F1 to display the USR1 to 4 user color menu Turn F2 F3 and F4 to adjust the color HUE SAT and LUM USR1 2 5 HUE 100 SAT 100 LUM 100 0 108 0 100 0 359 ...

Page 21: ...cator and then press the CBGD switch to display the CBGD menu Turn F2 and select the color using the COLR item CBGD 1 5 COLR WHT YLW CYN GRN MGT RED BLE BLK USR1 USR2 USR3 USR4 Adjusting the color background The background color can be adjusted when USR1 2 3 or 4 has been selected Use of USR1 to 4 is shared by the border color background color and fill color On the CBGD menu turn F1 to display the...

Page 22: ... FRZ switch to display the FRZ menu Turn F1 to display the FRZ 2 2 menu Turn F2 and select the input video signals using the SIG item Press the F4 switch to freeze or de freeze the input image If it is pressed when the display shows ON the input image is frozen and it is de frozen when the display shows OFF FRZ 2 2 SIG IN1 FRZ ON IN2 IN3 IN4 IN5 DVI When the unit is used with the frame synchronize...

Page 23: ...used even after the power is turned off Stored images have an 8 bit format so their image quality may appear downgraded Press the FUNC switch to light its indicator and then press the MEM switch to display the MEM menu Turn F1 to display the MEM menu Press the F4 switch EXEC to store the still images in the frame memory FMEM 3 3 SIG AUX MEM FMEM STOR EXEC Images can also be imported into the frame...

Page 24: ...IN 100 TBD CLIP 50 TBD DENS 100 TBD Inversion ON OFF OFF Fill color GRN TBD Edge color YLW TBD Edge ON OFF TYPE OFF Edge width 4 TBD User color User color 1 HUE SAT LUM 0 0 100 TBD User color 2 HUE SAT LUM 355 100 7 TBD User color 3 HUE SAT LUM 50 100 29 TBD User color 4 HUE SAT LUM 0 0 0 TBD STORE This is used to store the panel settings in the preset memory Press the FUNC switch to light its ind...

Page 25: ...ry is used DSBL The data stored in the preset memory is not used and the settings prior to recall are retained Press the FUNC switch to light its indicator and then press the MEM switch to display the PSMEM 1 3 menu Turn F1 to display the PSMEM 2 3 menu Turn F2 and select crosspoint disable DSBL or enable ENBL using the XPT item PSMEM 2 3 XPT DSBL ENBL CLEAR This is used to clear the preset memory...

Page 26: ...item IN1 5 1 14 SIG IN1 MODE SDI IN2 IN3 IN4 IN5 ANLG 3 1 2 Setting the input signal frame synchronizer The frame synchronizer can be set to ON or OFF for each input Press the FUNC switch to light its indicator and then press the SETUP switch to display the SETUP menu Turn F1 to display the FS menu Turn F2 select the input signals using the SIG item turn F3 and select ON or OFF for the frame synch...

Page 27: ...Selecting the scaling method NORM normal The size of the input images is increased or reduced while keeping their aspect ratio the same FULL full The size of the input images is increased or reduced in accordance with the system resolution The aspect ratio of the input images is not kept the same The rate at which the image size is increased or reduced in the vertical direction and in the horizont...

Page 28: ...nals of the DVI connector take effect ANLG analog Analog input signals of the DVI connector take effect On the DVIIN menu turn F4 and select the signal system using the MODE item DVI input scaling size table DVI format Mode HD 1080i HD 720P SD NTSC SD PAL 1920 1080 1280 720 720 480 720 576 XGA 1024 768 NORM FULL SXGA 1280 1024 NORM FULL ...

Page 29: ...ing the AUX signals One of the crosspoints 1 to 7 PGM PVW or CLN signals can be selected for the AUX bus To select a crosspoint signal press one of the B crosspoint switches 1 to 7 while holding down the AUX switch The indictor of the selected switch lights in amber and the images are switched To select PGM PVW or CLN signals press one of the wipe pattern selector switches while holding down the A...

Page 30: ... F1 to display the FORMT menu Turn F2 select the format using the MODE item and press the F4 switch EXEC to enter the selection An asterisk appears at the left of the format currently selected FORMT 4 14 MODE 1080 59i EXEC 1080 50i 720 59p 720 50p 480 59i 576 50i Display HD SD Signal format Input signals 1080 59i HD 1080 59 94i SDI analog HD component 1080 50i HD 1080 50i SDI analog HD component 7...

Page 31: ...en crosspoint switch 1 is pressed when the black signal has been assigned to this switch XPTAS SIG BLK XPT 1 Assigning signals to the crosspoints Press the FUNC switch to light its indicator and then press the XPT switch to display the XPT menu Turn F1 to display the XPTAS 2 3 menu Turn F2 select the crosspoint switch using the XPT item turn F2 and select the input signal using the SIG item XPTAS ...

Page 32: ...nent XP7 DVIIN External video input 6 DVI I input 3 4 2 Setting the crosspoint switching The timing at which the crosspoints are to be switched can be set ANY The crosspoints are switched in the nearest field This is suited to live applications F1 The crosspoints are switched in field 1 This is suited to editing applications F2 The crosspoints are switched in field 2 This is suited to editing appl...

Page 33: ...vel sync signal vertical phase of 0H This can be selected when HD format signals are supplied Internal sync For synchronization with an internal reference signal INT The REFOUT signal black burst signal is output from the two reference connectors Its phase can be adjusted using a menu Press the FUNC switch to light its indicator and then press the SETUP switch to display the SETUP menu Turn F1 to ...

Page 34: ...on is ON for all input signals 1H The output video signals are output to the system REF signal with 1H delay Turn F3 to adjust HPHASE using the H item and turn F4 to adjust VPHASE using the V item HPHASE can be adjusted within a range of 0 5H to 0 5H and VPHASE within a range of 100H to 100H OUPHS 6 14 SYS 1H H ー1000 H ー100 0H Output video signal phase adjustment The numbers given are provisional ...

Page 35: ...35 3 Setup Phase adjustment setup AVDL Range Range for automatic phase adjustment ...

Page 36: ...play the IP menu Turn F2 to select the setting location An asterisk appears at the setting location Turn F3 to set the number and press the F3 switch to enter the setting If the setting is not entered even though it has been changed appears above the setting location and when the setting location is moved by turning F2 the value prior to the change is restored IP 7 14 192 168 0 10 Setting the subn...

Page 37: ...the number and press the F3 switch to enter the setting If the setting is not entered even though it has been changed appears above the setting location and when the setting location is moved by turning F2 the value prior to the change is restored GW 9 14 0 0 0 0 Setting the MAC address On the SETUP menu turn F1 to display the MAC menu The MAC address now appears MAC 10 14 008045123456 ...

Page 38: ...ch to light its indicator and then press the SETUP switch to display the SETUP menu Turn F1 to display the SYS menu Turn F3 and select ON or OFF for the ancillary data using the VANS item ON The ancillary data is passed through OFF The ancillary data is not passed through SYS 12 14 BL ON VANC OFF BB 7 5 0 ON OFF 3 8 3 BB signal setup level The setup level of the BB signal in the internal sync mode...

Page 39: ...component option has not been inserted VER version Indicates the software version STATS 14 14 ALM FAN OPT ANLG VER 1 00 NO POWR F P NO 3 10 Initialization All the settings can be returned to the factory defaults When they are returned the images in the frame memory will also be initialized Press the FUNC switch to light its indicator and then press the SETUP switch to display the SETUP menu Turn F...

Page 40: ...efault value 50 0 YLW USR1 Parameter HUE SAT LUM 2 5 Setting range 0 to 359 0 to 100 0 to 108 Default value 0 0 100 USR2 Parameter HUE SAT LUM 3 5 Setting range 0 to 359 0 to 100 0 to 108 Default value 355 100 7 USR3 Parameter HUE SAT LUM 4 5 Setting range 0 to 359 0 to 100 0 to 108 Default value 50 100 29 USR4 Parameter HUE SAT LUM 5 5 Setting range 0 to 359 0 to 100 0 to 108 Default value 0 0 0 ...

Page 41: ...value BUS BLE USR1 Parameter HUE SAT LUM 4 7 Setting range 0 to 359 0 to 100 0 to 108 Default value 0 0 100 USR2 Parameter HUE SAT LUM 5 7 Setting range 0 to 359 0 to 100 0 to 108 Default value 355 100 7 USR3 Parameter HUE SAT LUM 6 7 Setting range 0 to 359 0 to 100 0 to 108 Default value 50 100 29 USR4 Parameter HUE SAT LUM 7 7 Setting range 0 to 359 0 to 100 0 to 108 Default value 0 0 0 EDGE EDG...

Page 42: ...R 1 PSMEM Parameter XPT 2 3 Setting range DSBL ENBL Default value DSBL FMEM Parameter SIG MEM STOR 3 3 Setting range AUX FMEM EXEC Default value XPT XPTAS Display only SIG B 1 2 3 4 5 D XPT 1 2 3 4 5 6 7 1 3 XPTAS Parameter XPT SIG 2 3 Setting range 1 to 7 IN1 to 5 DVI BLK CBGD CBAR FMEM Default value 1 BLK 2 IN1 3 IN2 4 IN3 5 IN4 6 IN5 7 DVI XPTSW Parameter TIMG 3 3 Setting range ANY F1 F2 Defaul...

Page 43: ...ting range 1080 59i 1080 50i 720 59p 720 50p 480 59i 576 50i EXEC Default value 1080 59i REF Parameter SYNC 5 14 Setting range BBST BBAD TRI INT EXEC Default value BBST OUPHS Parameter SYS H V 6 14 Setting range 0H 1H 1369 to 1369 100 to 100 Default value 0H 0 0 IP Setting range Cursor movement 0 to 255 7 14 Default value 192 168 0 1 MASK Setting range Cursor movement 0 to 255 8 14 Default value 2...

Page 44: ...ct Turn F3 to select Turn F4 to select SETUP SYS Parameter BL VANC BB 12 14 Setting range ON OFF ON OFF 0 7 5 Default value ON OFF 7 5 INIT Parameter INIT 13 14 Setting range EXEC STATS Parameter ALM OPT VER 14 14 Display only FAN POWR F P NO ANLG NO Version number 4 Setting menu table ...

Page 45: ...t least 50 MB of free memory Ethernet 10BASE T or 100BASE TX Display TrueColor 24 bit 32 bit color 800 600 dots or more The image formats supported include bitmap bmp JPEG jpg or jpeg TIFF tif and GIF gif The image transmission program is equipped with a function for automatically converting images into the specified video format size Connections Connect this unit to Ethernet using a twisted pair ...

Page 46: ...n here 1 Insert the CD ROM supplied with the unit into the CD ROM drive of the host computer in which the program will be installed Here E will serve as the name of this drive for example 2 Execute the setup program E HS300TOOL JPN SETUP EXE 3 The installer now starts up so follow its instructions to proceed 4 The Setup Complete screen appears to indicate that installation is complete Click Finish...

Page 47: ...s how to operate the image transmission program HS300 Tool Startup On the Start menu of Windows select Programs Panasonic HS300Tool The main screen now appears Exit Click the CLOSE button Setting the IP address Set the unit s IP address in the IP Address setting box ...

Page 48: ... image to be transmitted and the selected image differ the image will be automatically scaled according to one of the following methods Full The size of the image is increased or reduced so that it fits the size selected in the Size field If the aspect ratio of the image to be transmitted differs from that of the selected image the ratio between the horizontal and vertical dimensions will be chang...

Page 49: ...he GPI signals 6 3 Tally connector The tally connector comes with tally output output enable power supply or fan alarm output pins The output signals from the tally output pins are for lighting the tally lamps and these outputs are open collector outputs Pin assignment Pin No Signal name Input output Description of signal 1 IN1 Open collector output Tally output of input video 1 2 IN2 Open collect...

Page 50: ...OFF Signal Generator HD camera HD camera HD camera VTR PC AC adapter AW PS505A DVI or VGA Analog HD SDI converter Component SDI SDI HD SDI HD SDI HD SDI HD SDI HD SDI HD HD Component HD component monitor HD SDI monitor HD SDI monitor Multi format compact live switcher AV HS300 ...

Page 51: ...ut option is used HD camera HD camera HD camera VTR PC AC adapter AW PS505A DVI or VGA SDI SDI HD SDI HD SDI HD HD Component HD component monitor HD SDI monitor Multi format compact live switcher AV HS300 DVD player HD Component HD Component HD Component HD component monitor Optional HD analog inputs HD Component ...

Page 52: ...52 8 Appearance Unit mm ...

Page 53: ... complied with 0 8 Vp p 10 75 Input return loss More than 15 dB 5 MHz to 750 MHz More than 10 dB 750 MHz to 1 5 GHz Automatic equalizer More than 100 m 5C FB SD SMPTE 259M standard complied with 0 8 Vp p 10 75 Input return loss More than 15 dB 5 MHz to 270 MHz Automatic equalizer 200 m 5C 2V SDI outputs HD Serial digital SMPTE 292M SD Component digital SMPTE 259M PGM PVW AUX HD SMPTE 292M BTA S 00...

Page 54: ... lock mode loop through output 1 In internal sync mode black burst 2 Video delay time Frame synchronizer OFF 1H Frame synchronizer ON 1F Control I O Ethernet 100 Mbps 10 Mbps 1 Image transmission function available provided with transmission program Serial communication interface RS 422A D SUB 9 pin 1 Tally output Open collector outputs negative logic 1 to 6 GPI Auto take 1 Ambient operating tempe...

Page 55: ...s added to the edge of a wipe or key Its width and color can be adjusted The defocusing of the area around a border is referred to as the soft effect Clip The threshold level of the luminance when key signals are created from a key source Color Background The signals which are output from the internal color generator and used as the background image Density A parameter which is used to adjust the ...

Page 56: ... creates key signals based on the luminance brightness information of the video signals to combine keys ME Mix Effect A video effect device which combines a number of video signals to create mix wipe key and other video signals Mix The picture changing effect produced by overlapping one image with the next It is also referred to as dissolve Preview The function for checking ahead of time the image...

Page 57: ...nput signals to an external device The LED that indicates the program output status on the control panel is also referred to as tally Transition A function that switches from one image to another Wipe mix and other effects are available for the images during switching Tri Sync The sync signal used for HD formats It is also referred to as tri level sync Wipe A video effect in which one image is gra...

Page 58: ...58 ...

Page 59: ...59 ...

Page 60: ... Marketing Department 52 West Gude Drive Rockville MD 20850 301 738 3840 Broadcast PARTS INFORMATION ORDERING 9 00 a m 5 00 p m PST 800 334 4881 24 Hr Fax 800 334 4880 Emergency after hour parts orders 800 334 4881 TECHNICAL SUPPORT Emergency 24 Hour Service 800 222 0741 Panasonic Canada Inc 5770 Ambler Drive Mississauga Ontario L4W 2T3 905 624 5010 Panasonic de Mexico S A de C V Av angel Urraza N...

Reviews: