18
Preparations
Use the dedicated battery pack (AU-BP402: optional
accessory). It is recommended that a spare battery
pack be kept on hand.
2. When using a battery pack
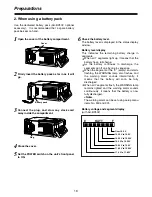
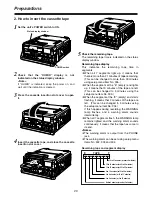
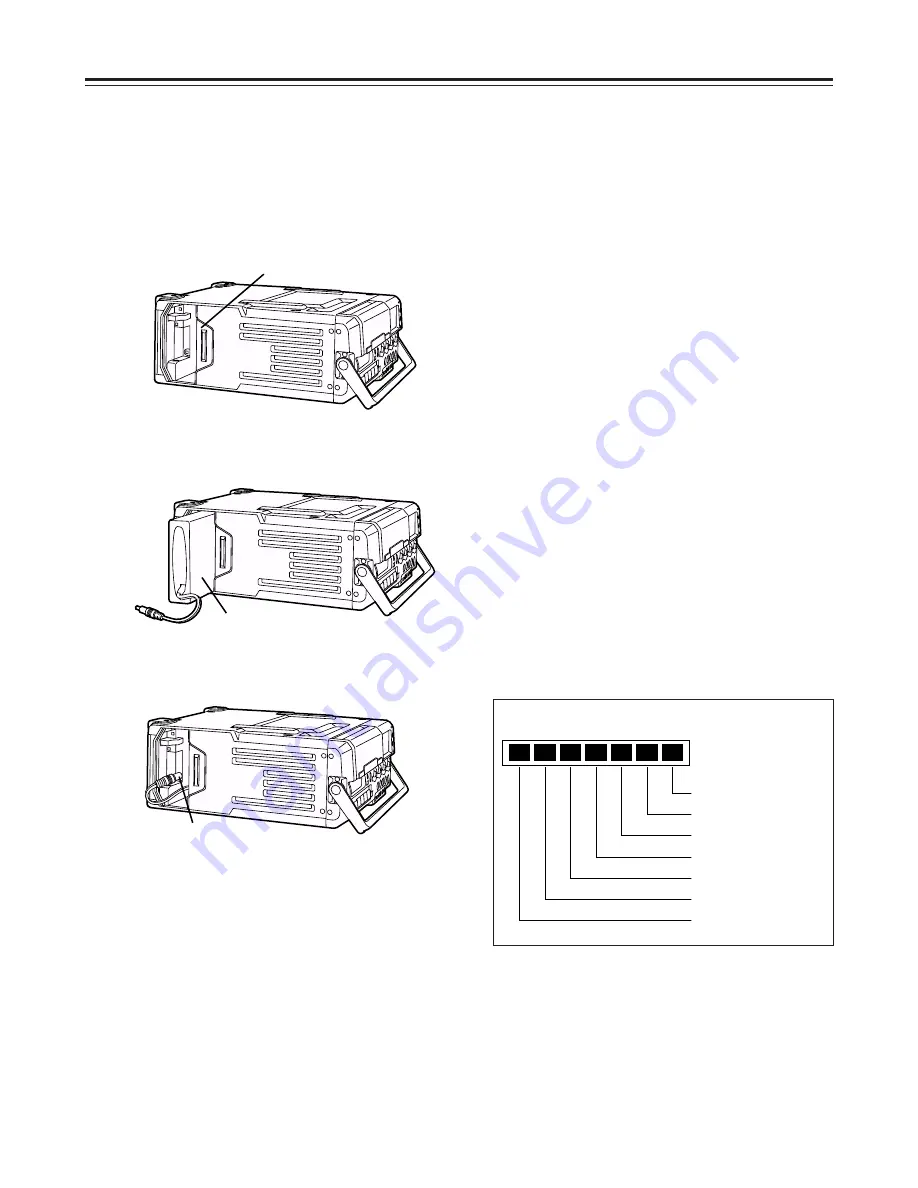
Open the cover of the battery compartment.
1
Cover
Battery pack
Set the POWER switch on the unit’s front panel
to ON.
5
Check the battery level.
The battery level is displayed in the status display
window.
6
Firmly insert the battery pack as far in as it will
go.
2
Connect the plug, and stow any slack cord
away inside the compartment.
3
Close the cover.
4
Battery level display
This indicates the remaining battery charge in
segments.
O
When all 7 segments light up, it means that the
battery has a full charge.
O
As the battery continues to discharge, the
segments go off one by one in sequence.
O
When the segment at the “E” (empty) end starts
flashing, the WARNING lamp also flashes, and
the warning alarm sounds intermittently, it
means that the battery will soon be fully
discharged.
O
When all 7 segments flash, the WARNING lamp
remains lighted and the warning alarm sounds
continuously, it means that the battery is now
fully discharged.
<Note>
The warning alarm can be set using setup menu
items No. 900 and 901.
Battery voltage and segment display
(with AU-BP402)
E
BATT
F
Over 12.5 V
12.35 V to 12.5 V
12.25 V to 12.35 V
12.2 V to 12.25 V
12.05 V to 12.2 V
11.85 V to 12.05 V
11.4 V to 11.85 V
Plug

