


43
REC
SP
R0:45
INDEX
D.ZOOM
P-IN-P
r
2)
NEGA
1)
3)
4)
5)
6)
8)
0:00.00
7)
VOLUME
11)
10)
5:30:45PM
OCT 1 2001
5
t
T
W
9)
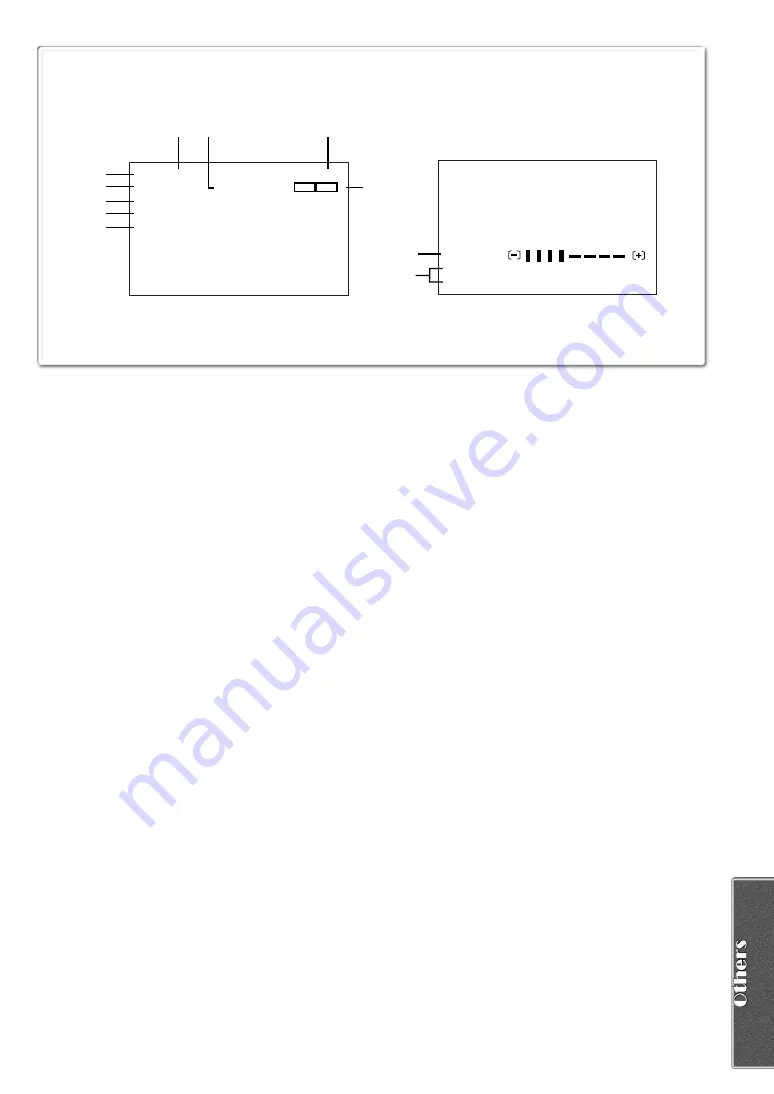
Indications
Various functions and Camera/Recorder conditions are
displayed on the screen.
1) Remaining Battery Power [
r
]
≥
When the battery power becomes low, the indication
changes. When the battery is discharged completely,
the
u
(
v
) Indication flashes.
≥
When you are using the AC Adaptor, the [
s
]
Indication may appear, however, this has no meaning
in this case.
2) Remaining Tape Time [R0:00]
≥
Remaining tape time is indicated in minutes. When it
reaches less than 3 minutes, the indication starts
flashing.
3) Digital Zoom [D.ZOOM] (
l
Playback Zoom [ZOOM 5
t
4) Digital Effects 1
≥
MULTI: Multi-Picture
Mode
(
l
≥
P-IN-P: Picture-in-Picture
≥
WIPE: Wipe
(
l
≥
MIX: Mix
Mode
(
l
≥
STROBE: Strobe Mode
≥
GAIN-UP: Gain-up Mode
(
≥
TRAIL:
Trailing Effect Mode
l
≥
MOSAIC: Mosaic Mode
(
l
≥
MIRROR: Mirror Mode
(
l
5) Digital Effects 2
≥
NEGA:
Negative Mode
(
l
≥
SEPIA:
Sepia Mode
(
l
≥
MONO:
Black & White Mode
≥
SOLARI: Solarization Mode
(
l
6) Recording Speed Mode
≥
SP:
Standard Play Mode
(
l
≥
LP:
Long Play Mode
(
l
7) Index
≥
For several seconds while index signals are being
recorded, the [INDEX] Indication flashes.
(
l
Search Number [S 1] (
l
≥
The figure indicates which number of scene ahead
from the present scene is to be played back.
8) Tape Run Indications
≥
REC:
Recording
(
l
≥
PAUSE:
(
l
≥!
:
Playback/Camera Search in forward
direction
(
l
≥"
:
Camera Search in reverse direction
(
l
≥;
:
Still Playback
(
l
≥%
:
Fast-forward/Cue Playback
(
l
≥&
:
Rewind/Review Playback
(
l
≥
}
:
Slow Playback in forward direction
(
l
≥
~
:
Slow Playback in reverse direction
(
l
≥;!
:
Still Advance Playback in forward direction
(
l
≥";
:
Still Advance Playback in reverse direction
(
l
≥)
:
Index Search in forward direction
(
l
≥*
:
Index Search in reverse direction
(
l
≥
CHK:
Recording Check
(
l
≥
A.DUB
!
:Audio Dubbing
(
l
≥
A.DUB
;
:Audio Dubbing Pause
(
l
≥
PHOTO: Photoshot Mode Recording
l
≥
BLANK:
Blank Search
(
l
≥
R
!
:
Repeat Playback
≥
2
k%
:
Variable Speed Search
(
l
9) Zoom Magnification
≥
When the [W/T] Zoom Lever is pushed up or down, the
Zoom Magnification Indication and Zoom Gauge
appear.
(
l
10) Sound Volume
≥
Use this indication to adjust the volume of playback
sound from the built-in speaker or headphones.
(
l
11) Date/Time Indication [5:30:45PM /OCT 1 2001]
(
l


