SAFETY ADVICE
DURING ASSEMBLY
•
•
It is of utmost importance to assemble all of the parts according to the directions. Do not skip any steps.
• •
We strongly recommend using work gloves during panel sliding.
• •
Some parts may have sharp edges. Please be careful when handling components.
• •
Always wear shoes and safety goggles when working with extruded aluminium.
• •
If using a step ladder or power tools make sure that you follow the manufacturer’s safety advice.
• •
Keep children away from the assembly area.
• •
Do not touch overhead power cables with the aluminium profiles.
• •
Do not attempt to assemble the product in windy or wet conditions.
• •
Dispose of all plastic bags. Keep them out of reach of small children.
• •
Do not climb or stand the roof.
• •
Do not hang or lay the profiles.
• •
Do not position your product in an area exposed to excessive winds.
• •
Do not attempt to assemble this product if you are tired, have taken drugs or alcohol or if you are prone to dizzy spells.
• •
Make sure there are no hidden pipes or cables in the wall before inserting the pegs.
• •
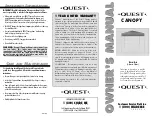
This product is designed to be used mainly as a Door Awning.
• •
Heavy snow load on the roof can make it unsafe to stand below or nearby.
• •
The wall anchoring kit supplied with this product is suitable for concrete or solidbrick walls. Other wall types need an accordant wall fixation kit.
During assembly, you will encounter different icons for different products.
Please see below for more information:
SILICONE
LUBRICANT SPRAY
You may use silicone lubricant spray on the frame in order to help
you slide the panels into the profiles. Do not spray the panels.
Use a rubber mallet if necessary.
Make sure you remove covering plastic film from both sides
of the panel.
All panels with the stamped words “THIS SIDE OUT” must be
facing out to create full UV protection. Remove plastic sticker
as panels are locked in place.
Extension Kit
Steps marked with dashed outlines refer to Extensions only.
Some of the steps are irrelevant for an assembly of a single product.
When assembling a single or an extended product,
some parts may be surplus.
These 2 icons below indicate if screw's tightening is required or not.
Temporary tightening of a few screws may be needed to
prevent a profile from sliding out.
Tighten all screws once assembly is completed.
CARE & MAINTENANCE
•
•
When your product needs to be cleaned, use a mild detergent solution and rinse with cold
clean water.
• •
DO NOT use acetone, abrasive cleaners or other special detergents to clean the panels.
• •
Clean the product once assembly is complete.
BEFORE ASSEMBLY
•
•
Selecting a site:
- Choose your site carefully before beginning assembly.
- Consider the door's opening - inside or outside.
- The product must be positioned and fixed on a flat level surface.
• •
This is a multi-part assembly best achieved by two people. Allow at least half a day for the assembly process.
• •
Take all components & parts out of the packages. Sort the parts and check against the content parts list.
• •
Parts should be laid out close at hand. Keep all small parts (screws etc.) in a bowl so they do not get lost.
• •
Please note multi-sided profiles are used in this Door Awning. As a result some holes in the profiles are not used during assembly.
• •
Please review entire instructions before starting. Carry out the assembly steps in exact order.
• •
Please consult your local authorities if any permits are required prior to constructing the product.
IMPORTANT!
•
•
During assembly use a soft surface below the parts to avoid scratches and damages.
• •
You are solely responsible for determining whether the handling, storage, assembly, installation or use of this product is safe and appropriate in any location
or for any given application.
• •
The manufacturer is not responsible for any damages or injury to you, any other person or any property resulting from the improper handling, storage, installation,
assembly or use of this product, or the failure to follow the manufacturer's written instructions regarding the handling, storage, installation, assembly and use of
this product.
• •
This product is intended for normal residential use only. Do not use this product for any application that is not recommended in these instructions or building
codes in effect in location where this product will be used. Always take care and use appropriate safety equipment (including eye protection)
when assembling or installing this product.
• •
We recommend checking for restrictions or covenants for building this product in your area.
In addition we advise to check if you need to submit any forms or if any permit is required prior to building the product.
EN
INFORMATION