background image

9

BENTO 42 CONCRETE FIRE PIT Match-lit | Installation & Owner's Manual

LIGHTING YOUR FIRE PIT

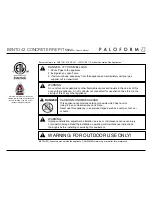
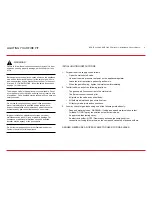
 WARNINGS:

Failure to follow these instructions exactly may result in fire or 

explosion causing property damage, personal injury or loss 

of life.

Before operating the appliance, check all around the appliance 

area and on the surrounding floor for the smell of gas - some 

gas is heavier than air and may settle on the floor in the event 

of a leak.  IF YOU SMELL GAS, follow the safety instructions 

on page 1 of this manual.

The main gas valve in this appliance is not serviceable. Do not 

try to repair or modify the valve, as doing so may result in a fire 

or explosion.  Call a qualified service technician if you have any 

safety concerns.

Do not use this appliance if any part of it has been under 

water.  Immediately call a qualified service technician to 

inspect the appliance and to replace any part of the control 

system and any gas control that has been under water.

Improper installation, adjustment, alteration, service or 

maintenance can result in injury or property damage. For 

assistance or additional information, consult a qualified 

installer, service agency or the gas supplier.

Do not store or use gasoline or other flammable vapors or 

liquids in the vicinity of this appliance.

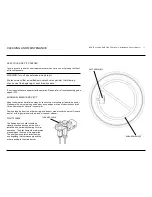
INITIAL LIGHTING INSTRUCTIONS

1.  Purge air from the supply line as follows:  

•  Open the main shutoff valve.
•  Unscrew the main pressure test point on the appliance regulator
•  Leave the inlet test screw open until gas flows in.
•  When the gas is flowing, tighten the inlet screw immediately.

2.  Test for leaks in each of the following locations:

•  The gas supply line connection to the main valve;
•  The Burner connections and pilot;
•  All joints on the valve and control body;
•  All field made joints and gas shutoff valves;
•  All factory made joints and connections.

3.  You may check for gas leaks using one of the following methods only:

•  Soap and water solution.  WARNING:  If using a soap and water solution to test 

for leaks, DO NOT spray the solution onto electronic parts;

•  An approved leak testing spray;
•  An electronic sniffer.  NOTE: Remove any excess pipe compound from 

connections if using this method, as the compound can set off electronic sniffers.

DANGER: NEVER USE AN OPEN FLAME TO CHECK FOR GAS LEAKS.

Summary of Contents for Bento 42 Corten

Page 1: ...se gasoline or other flammable vapors and liquids in the vicinity of this or any other appliance An LP cyllinder not connected for use shall not be stored in the vicinity of this or any other applianc...

Page 2: ...Z223 1 NFPA 54 or the International Fuel Gas Code 3 Keep the appliance area clear and free from combustible materials gasoline and other flammable vapors and liquids 4 Do not burn solid fuel in this...

Page 3: ...CONNECTOR VALVE BODY 1 UNPACK Account for all parts see p 20 2 FRAGILE Handle with care 3 LEVEL Place on a solid level surface 4 AIR VENTS Do not block ventilation holes in base if applicable see p 4...

Page 4: ...IFICATIONS NATURAL GAS PROPANE Burner Model CIR M 18 CIR M 18P Max Heat Input 69 000 BTU h 60 000 BTU h Inlet Pressure Min 4 5 W C 11 0 W C Inlet Pressure Max 10 5 W C 13 0 W C Orifice Size 18 37 Burn...

Page 5: ...5 BENTO 42 CONCRETE FIRE PIT Match lit Installation Owner s Manual FIG 1 MINIMUM CLEARANCES TO COMBUSTIBLES REQUIRED CLEARANCES 72 72 12 17 BENTO 42 BENTO 32...

Page 6: ...aintain safe distance during this time ASSEMBLY TO ASSEMBLE THE FIRE PIT 1 Connect the Burner Assembly to the gas propane supply using the supplied flex connector and following the instructions on pag...

Page 7: ...A DECORATIVE TOPPING METAL TABLE TOP OPTIONAL DECORATIVE TOPPING MEDIA VARIOUS FILL TOPPING TRAY COVER BURNER MEDIA KEEP BELOW LID LINE BURNER MEDIA CRUSHED GLASS NG or LAVA ROCK LP FILL BURNER MEDIA...

Page 8: ...an open flame to check for a leak Apply a mixture of liquid soap and water to all joints Bubbles forming on joints while the gas is running indicate a leak Correct all leaks at immediately Test Pressu...

Page 9: ...result in injury or property damage For assistance or additional information consult a qualified installer service agency or the gas supplier Do not store or use gasoline or other flammable vapors or...

Page 10: ...ey and light the pilot immediately by applying a flame to the lighting port Hold the key down for one full minute after lighting the pilot 4 When the gas control key is released the pilot flame should...

Page 11: ...g guide pages 12 13 BURNER ELEMENT AND PILOT Keep the burner and pilot area clean by vacuuming or brushing at least twice a year Make sure the burner porting and burner air openings are free of obstru...

Page 12: ...2 Check reset gas regulator pressure Gas odor even when manual valve is in the OFF position 1 Gas leak See Warning statement below 2 Main gas valve defective 1 Locate and correct all leaks see Checki...

Page 13: ...R109 same 6 3 8 Flare Adapter 7 Regulator M REG RV20 NG M REG RV20 LP 8 3 8 Close Nipple 9 3 8 135 Street Elbow 10 Valve Bracket set of 2 BEN32 BRA WR109 same 11 Main Gas Valve M VAL WR 764 109 same 1...

Page 14: ...ill also be void if the appliance is not operated and maintained according to the operating instructions supplied with the appliance and does not extend to 1 fire pit burner assembly damaged by accide...

Reviews: