


User manual
Remote Controller
1. POWER( )
Turns the power ON or OFF. There will be a few seconds
delay before the display appears.
2. ID RESET
Reset the system id of remote controller.(Default system id is ‘1’)
3. P.MODE
Select Picture mode in Video. (Dynamic / Standard / Movie /
Custom)
4. AUTO
Auto geometry adjustment in VGA Source.
5. RETURN
Return to the previous menu.
6. MENU
Activates and exits the On Screen Display.
7. VOLUME, LEFT / RIGHT (
◀/▶
)
Adjust the volume , Increases or decreases the level of active
function, and right button is to select OSD menu, left button is
previous OSD menu.
8. UP / DOWN (
▲
/
▼
), MUTE
Move to OSD menu, and Mute the sound.
9. NUMBER Button
Change the SYSTEM ID for remote controller.
With the SYSTEM ID button pressed, entered the desired
NUMBER by pressing the corresponding button(0~9) to set up
the Remote Controller ID
10. SYSTEM ID
Set the system id of remote controller.
11. BRIGHT, CONTRAST, COLOR, SHARPNESS
Simply control brightness, contrast, color, sharpness via the
remote controller.
12. INFO
Display information of the picture.
.
13. SOURCE
Select VGA or Video (Video A / Video B / S-Video) sources.
14. ENTER
Select OSD main menu or sub menu.
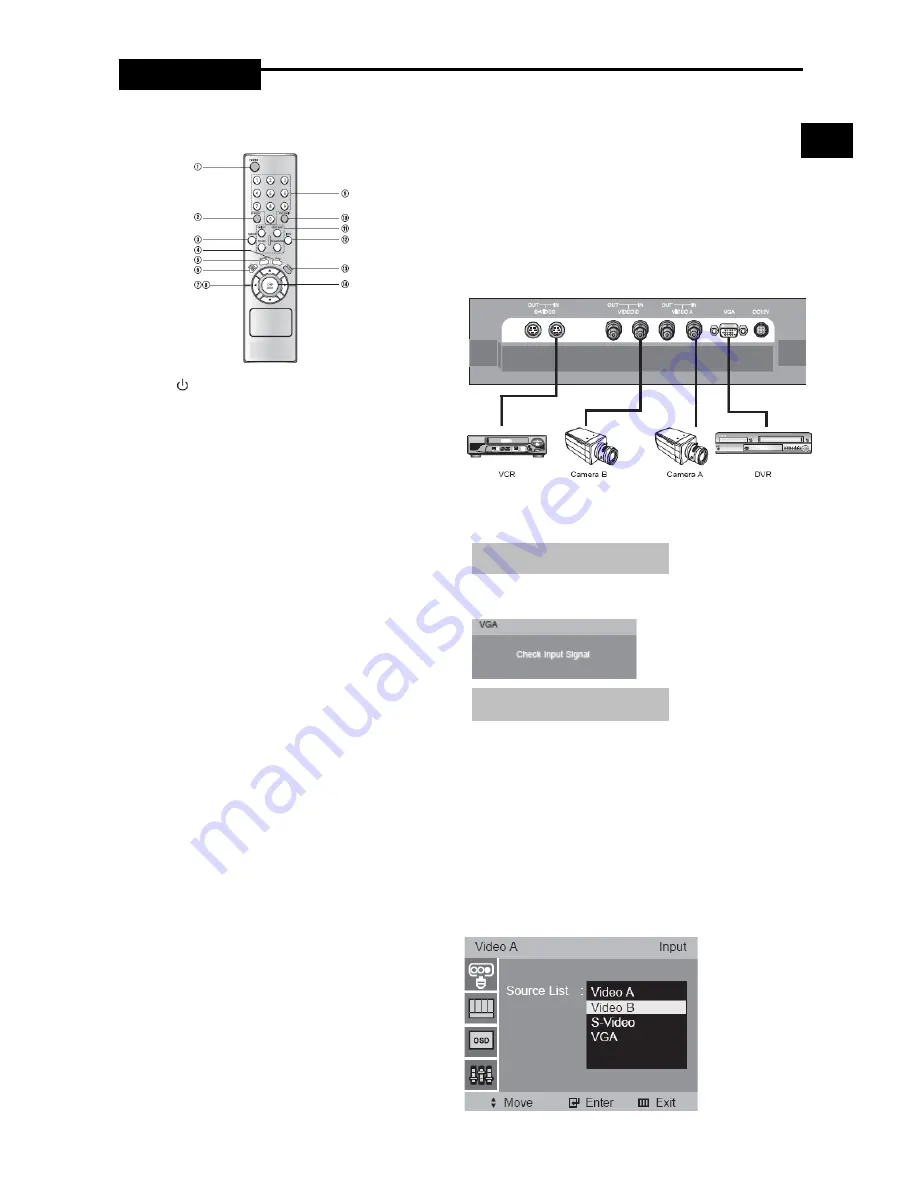
Connecting to External Devices
The product can be connected to an external device such as
Camera, DVR,VCR, etc.
Setup Menu Configurations
When there is no connection at the VGA and Video input, the On
Screen Display will show this message.
MENU SELECTION
1. Press the MENU button and then
▲
/
▼
button to display each
menu.
2. Press the ENTER or
▶
button and then
▲
/
▼
button to select
the menu item.
3. Press the MENU button to return to normal picture.
NOTE : If you don’t connect to VGA port, menu is not displayed
in VGA mode.
A. INPUT MENU
OSD MENU DESCRIPTION
NO SIGNAL DISPLAY
E
- 7 -
Summary of Contents for PAC-171AV
Page 12: ...User manual E 12 ...
Page 13: ... 13 ...


