background image

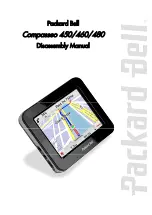
Packard Bell Compasseo 450/460/480 Disassembly Manual

2

About this Guide

This guide contains systematic disassembly instructions for the Packard Bell Compasseo 450/460/480. The

instructions are illustrated where necessary with images of the part that is being removed or disassembled.

Packard Bell B.V. reserves the right to make changes to the Compasseo 450/460/480 without notice.

For More Information

For more information about the Packard Bell Compasseo 450/460/480, visit Packard Bell‘s support web site

at

www.packardbell.com

. The support web site also has links to additional Packard Bell documentation and

detailed specifications.

Technician Notes

Only technicians authorized by Packard Bell B.V. should attempt to repair this equipment. All troubleshooting

and repair procedures are detailed to allow only subassembly/module level repair. Because of the complexity

of the individual boards and subassemblies, no one should attempt to make repairs at the component level or

to make modifications to any printed wiring board. Improper repairs can create a safety hazard. Any

indication of component replacement or printed wiring board modifications may void any warranty or

exchange allowances.

Disassembly

When disassembling the system unit, follow these general rules:

Turn OFF the device.

Disconnect the AC adapter or USB cable.

Remove any SD/MMC card, ExpressCard or dummy card from the device.

Do not disassemble the system into parts that are smaller than those specified in the instructions.

Label all removed connectors; note where the connector goes and in what position it was installed.

Use something to hold the small screws (trays, jars, or cups). Label each cup with the disassembly

step number. This can reduce questions about where each screw came from during re-assembly.

Reassembly

Reassembly is the reverse of the disassembly process. Use care to ensure that all cables and screws are

returned to their proper positions. Check that no tools or any loose parts have been left inside the casing.

Check that everything is properly installed and tightened.

Required Tools

All disassembly procedures can be performed using the following tools:

Small Phillips screwdriver (2.0 mm or less).

Hex screwdriver (1.3 mm).

Summary of Contents for Compasseo 450

Page 1: ...Packard Bell Compasseo 450 460 480 Disassembly Manual ...

Page 2: ...50 460 480 Disassembly Manual 1 Table of Contents About this Guide 2 For More Information 2 Technician Notes 2 Disassembly 2 Reassembly 2 Required Tools 2 Casing 3 Battery 4 Main Board 5 GPS Board 6 Speaker 7 Touch Screen 7 Notice 8 ...

Page 3: ...any printed wiring board Improper repairs can create a safety hazard Any indication of component replacement or printed wiring board modifications may void any warranty or exchange allowances Disassembly When disassembling the system unit follow these general rules Turn OFF the device Disconnect the AC adapter or USB cable Remove any SD MMC card ExpressCard or dummy card from the device Do not dis...

Page 4: ...e device to prevent damage to the exterior of the device 3 Remove the four hex screws securing the casing Fig 1 Location of screws 4 Carefully separate the back cover from the device Do not separate both parts completely because they are still connected through a thin speaker cable Fig 2 Removing the back cover Note When separating the back cover from the device keep in mind not to tear the label ...

Page 5: ...able from the main board Fig 3 Disconnecting the speaker cable Battery To remove the battery perform the following steps 1 Disconnect the battery cable from the main board Fig 4 Removing the battery 2 Pull the battery until it comes loose and take it out of the device as shown in Fig 4 Note The battery is glued to the main board ...

Page 6: ... the cable from connector on the GPS board Fig 5 Location of main board screws 2 Remove the two screws securing the main board see Fig 5 3 Gently lift one side of the main board out of the device Fig 6 Removing the GPS board Note You cannot completely separate the main board from the device because it is still attached to the touch screen ...

Page 7: ...clip securing the LCD flat cable see Fig 7 6 Disconnect the LCD cable from the main board Note If necessary disconnect the GPS board cable from the main board The GPS board cable is a service item GPS Board To remove the GPS board perform the following steps 1 Remove the tape securing the GPS board to the back of the touch screen Fig 8 Removing the GPS board 2 Slide the GPS board upwards and take ...

Page 8: ... securing the speaker to the back cover Fig 9 Removing the speaker 2 Remove the speaker Touch Screen To remove the touch screen perform the following steps 1 Gently push the touch screen from the inside out bottom side first to separate it from the front cover Note You may have to bend the front cover a bit in order to release the touch screen ...

Page 9: ...HNICAL OR EDITORIAL ERRORS OR OMISSIONS CONTAINED HEREIN NOR FOR INCIDENTAL OR CONSEQUENTIAL DAMAGES RESULTING FROM THE FURNISHING PERFORMANCE OR USE OF THIS MATERIAL Copyright 2008 Packard Bell B V All rights reserved Packard Bell is a trademark of Packard Bell B V The names of actual companies and products mentioned herein may be trademarks and or registered trademarks of their respective owners...

Reviews: