TROUBLESHOOTING GUIDE
ISSUE
POTENTIAL CAUSE
PROPOSED SOLUTION
Insufficient water to the brushes
Solution flow setting is too low
Make sure the solution control valve is open by
adjusting the solution flow knob
Solution tank is empty
Check the sight gage for solution level. If low or
empty, add water and detergent
Inline solution filter may be clogged
Remove inline filter cap & screen to check for clog.
Rinse and put back in place
Solution dispensing tubes may be
clogged, kinked or damaged
Visually inspect tubes
Squeegee isn’t drying the floor well
Squeegee blades may be dirty or worn
Remove the squeegee assembly, rinse it off and wipe
the blades down. Inspect edges for damage or wear.
Flip or replace blades as needed
Recovery hose may not be secure at
connections
Make sure upper recovery hose elbow is secure at the
recovery tank orifice. Make sure that lower recovery
hose elbow is secure on squeegee assembly neck
Recovery hose or squeegee assembly
may be obstructed
Remove recovery hose and run water through it to
check for any clogs. Remove squeegee assembly and
check for a clog in the neck of the assembly
Recovery hose may be damaged
Check for damage. Replace if damage found
Squeegee assembly height may be out
of adjustment
Check the squeegee height. See Machine
Preparation segment of manual for squeegee height
adjustment instructions
Ball float may be damaged or clogged
and it is obstructing air flow
Check to see that the ball float is moving freely
and is clean
Recovery tank is full
Empty recovery tank
Recovery tank lid is not sealing
Make sure that the lid is in the proper position and
that there isn’t damage to the gasket. Replace gasket
if damage found
Drain hose cap may be loose
Make sure cap is clean and has been pressed in
tightly
Batteries may be discharged
Check battery indicator and if necessary, recharge
batteries
Machine will not turn on
Key switch may be faulty
Contact a service center to have tested
A fuse may be blown (pad assist unit
only)
Replace fuses
Batteries may be discharged
Charge your batteries until charger indicates cycle is
complete
Batteries may be faulty
Replace batteries
Battery cable(s) may be loose
Check connections and tighten if necessary
Handle trigger isn’t activated
Follow instructions in Machine Operation segment of
manual or “1, 2, 3-Step” on-board instructions
Summary of Contents for S-20
Page 37: ...37 S 20 AUTO SCRUBBER FRAME ASSEMBLY TRACTION...
Page 38: ...38 S 20 AUTO SCRUBBER FRAME ASSEMBLY PAD BRUSH ASSIST...
Page 39: ...39 S 20 AUTO SCRUBBER SOLUTION TANK ASSEMBLY...
Page 40: ...34 S 20 AUTO SCRUBBER BATTERY ASSEMBLY...
Page 41: ...41 S 20 AUTO SCRUBBER RECOVERY TANK ASSEMBLY...
Page 42: ...42 S 20 AUTO SCRUBBER SQUEEGEE ASSEMBLY...
Page 43: ...43 S 20 AUTO SCRUBBER SQUEEGEE LINK ASSEMBLY...
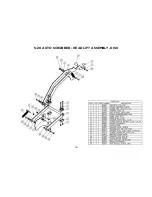
Page 44: ...44 S 20 AUTO SCRUBBER HEAD LIFT ASSEMBLY DISK...
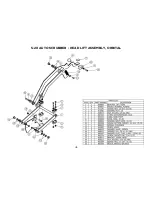
Page 45: ...45 S 20 AUTO SCRUBBER HEAD LIFT ASSEMBLY ORBITAL...
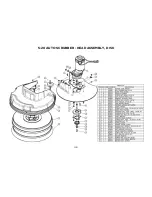
Page 46: ...46 S 20 AUTO SCRUBBER HEAD ASSEMBLY DISK...
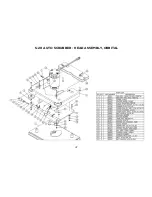
Page 47: ...47 S 20 AUTO SCRUBBER HEAD ASSEMBLY ORBITAL...
Page 48: ...48 S 20 AUTO SCRUBBER DRIVE PLATE ASSEMBLY ORBITAL...
Page 49: ...49 S 20 AUTO SCRUBBER CONTROLS ASSEMBLY TRACTION...
Page 50: ...50 S 20 AUTO SCRUBBER CONTROLS ASSEMBLY PAD BRUSH ASSIST...
Page 51: ...51 S 20 AUTO SCRUBBER ELECTRONICS ASSEMBLY TRACTION...
Page 52: ...52 S 20 AUTO SCRUBBER ELECTRONICS ASSEMBLY PAD BRUSH ASSIST...
Page 53: ...53 S 20 AUTO SCRUBBER CHARGER ASSEMBLY ON BOARD...
Page 54: ...S 20 AUTO SCRUBBER WIRING DIAGRAM TRACTION DRIVE DISK...
Page 55: ...S 20 AUTO SCRUBBER WIRING DIAGRAM PAD BRUSH ASSIST DISK...


