2.
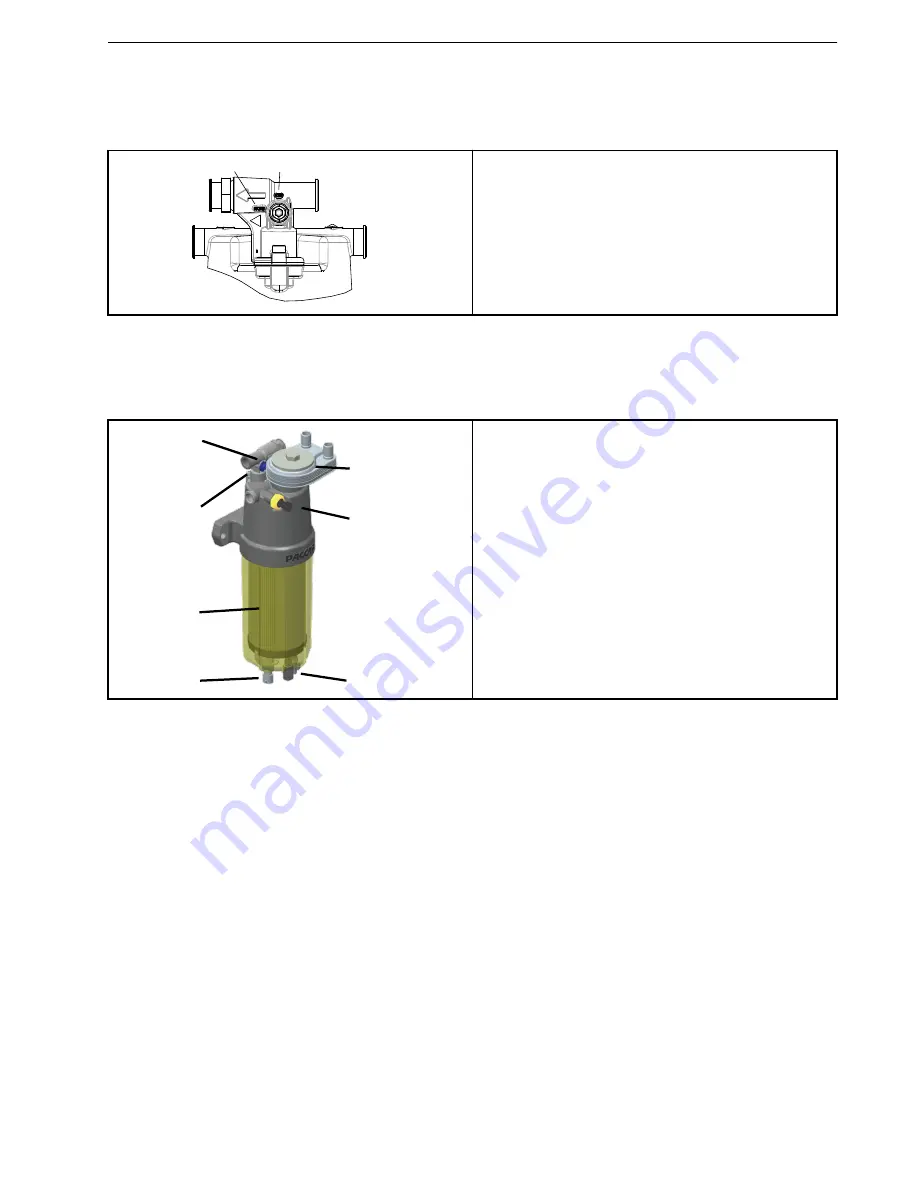
If equipped with a fuel blender, turn the blender 90° counterclockwise to the prime position (2). The valve only
rotates 90° left or right.
Figure 1: PACCAR Fuel Blending Valve Position
1
2
1.
Run (open)
2.
Prime (closed)
3.
If equipped, disconnect the water-in-fuel sensor and heater connectors (2 and 4).
4.
Clean the area around the filter to prevent debris from falling into the filter bowl during the filter change.
5.
Drain the fuel from the fuel filter into a suitable container by opening the manual drain valve located at the bottom
of the filter housing (3).
Figure 2: PACCAR Branded Chassis Fuel Filter
1
2
3
4
5
6
7
1.
Coolant heat exchanger
2.
Water in fuel / Restriction sensor
3.
Manual drain valve
4.
12V heater
5.
Bowl and element (extended version shown)
6.
Quick-connects
7.
Fuel blending valve
6.
Remove the filter bowl (5). A filter bowl wrench may be required. Dispose of the filter appropriately.
7.
Clean the filter bowl.
8.
Lubricate the new filter seals with clean diesel fuel and install the seals with the new filter.
9.
To aid in priming, pre-fill the filter bowl with clean diesel fuel.
10. Slowly, so as not to spill fuel from the filter bowl, raise the filter bowl up to the filter housing.
11. Tighten the filter bowl snugly by hand or using the filter bowl wrench.
12. If equipped, connect the water-in-fuel sensor and heater connectors.
13. Prime the fuel system. See
on page 15.
14. Check for leaks. Correct leaks as needed with the engine off.
15. Allow the engine to idle for 5 minutes.
16. Turn the engine off.
17. Proceed to
Engine Mounted Fuel Filter Removal
on page 11.
Engine Mounted Fuel Filter Removal
Follow the steps below to remove the fuel filter:
PACCAR has published a video on YouTube to help you understand how to replace the engine mounted fuel filter. Please
scan the QR code below or go to
.
Engine Mounted Fuel Filter Removal - CHAPTER 2: FUEL FILTER
SM044-004 (01/2021)
11


