background image

8

OPERATION

Warning!

Always turn off the tool and disconnect from the power

supply prior to change any accessories or making any 
handle adjustments.

Side Handle

The side handle will provide additional control, support and guidance when
using the tool. The side handle can be assembled to the left, top or right
side of the metal gear casing. Align the thread on the end of the side handle
with the corresponding hole in the metal gear casing, screw the side handle
clockwise till secured.

Spade Handle

The rear spade handle provides additional control and support when using
the tool. It can be attached either horizontally, vertically or should you
require it, diagonally. To assemble, place the spade handle into the locating
boss at the angle you desire, secure in place by screwing the spade handle
securing knob (clockwise) into the recess. To change the angle simply loosen
the securing knob (anti-clockwise), pull the handle off the locating boss,
replace the handle back into the locating boss at the angle desired. Secure
as previously described.

Keyed Chuck Use

Warning!

Prior to inserting or removing accessories always

disconnect the tool from the power supply. Drill bit accessories can
be sharp, always wear gloves to prevent cuts or lacerations.

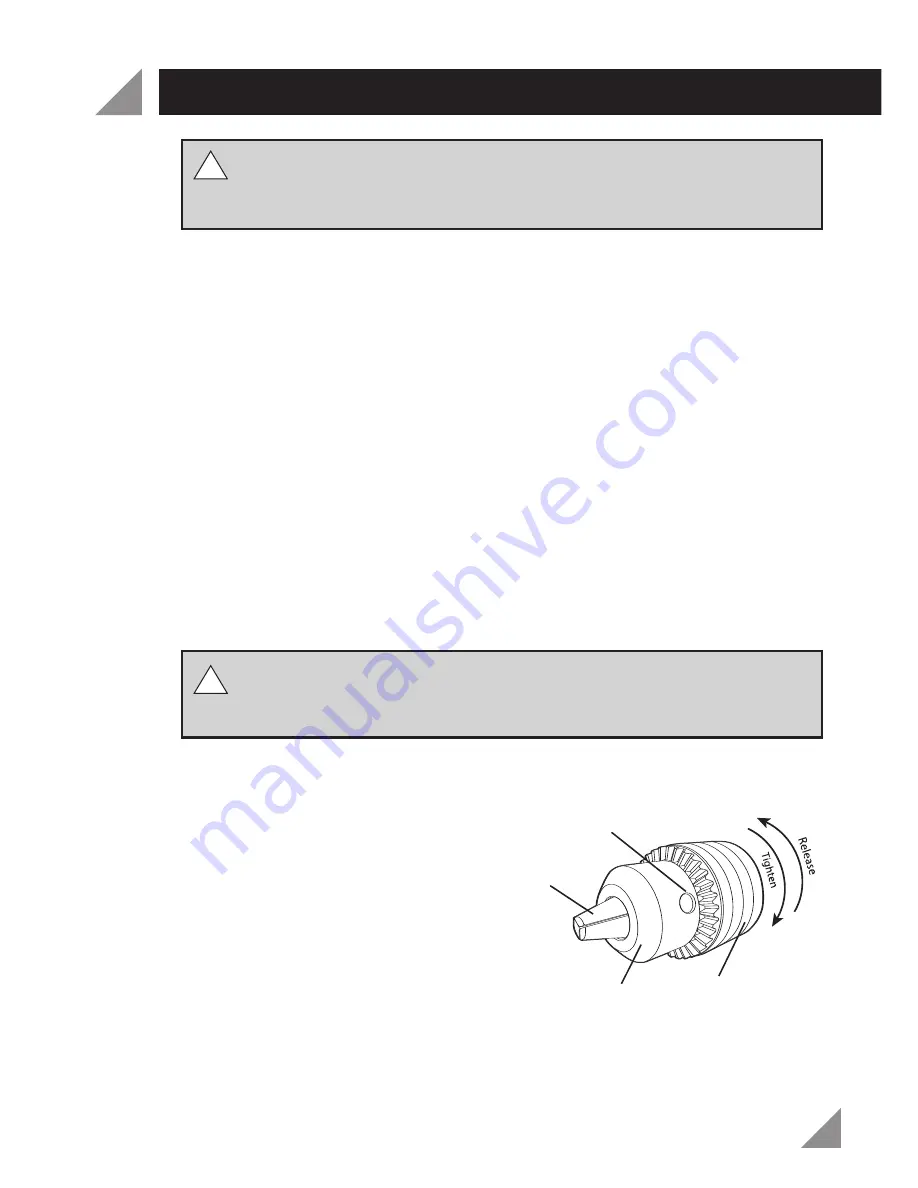
To insert a bit or accessory, follow the below steps: 

Open the chuck jaws by turning the
collar your with fingers. 

Insert the drill bit into the chuck
ensuring the end of the drill bit
does not touch the screw inside the
chuck.

Once the jaws hold the bit or
accessory firmly, use the chuck key to
further tighten the jaws by placing it
into each of the 3 holes on the chuck
body and rotating the key clockwise in each position. 

Note: 

Always use the chuck key on all three holes on the chuck body to

ensure each jaw is equally tightened.

Jaws

Chuck key hole

Body

Collar

!!

!!


Summary of Contents for OZSHD1050WA

Page 1: ...Spade Handlle Drill 1050 Watt Operation Manual 3 Year Replacement Warranty OZSHD1050WA To view the full range visit www ozito com au 0509...

Page 2: ...imber 50mm Features Metal gear casing Soft grip 1 13mm keyed chuck 2 Metal gear case 3 Three position side handle 4 Multi position spade handle 5 Switch lock on button 6 Rear handle with soft grip 7 O...

Page 3: ...3 TABLE OF CONTENTS SPECIFICATIONS TABLE OF CONTENTS INTRODUCTION SAFETY INSTRUCTIONS OPERATION MAINTENANCE CONTENTS WARRANTY Page 2 Page 3 Page 4 Page 4 Page 8 Page 11 Page 12 Page 13...

Page 4: ...power supply corresponds to the voltage on the rating plate Note The supply of 230V and 240V on Ozito tools are interchangeable for Australia and New Zealand This tool is double insulated in accordan...

Page 5: ...n or wet conditions Water entering a power tool will increase the risk of electric shock d Do not abuse the cord Never use the cord for carrying pulling or unplugging the power tool Keep cord away fro...

Page 6: ...ngerous in the hands of untrained users e Maintain power tools Check for misalignment or binding of moving parts breakage of parts and any other condition that may affect the power tools operation If...

Page 7: ...r sanding sawing grinding drilling and other construction activities contain chemicals known to cause cancer birth defects or other reproductive harm Some examples of these chemicals are Lead from lea...

Page 8: ...knob clockwise into the recess To change the angle simply loosen the securing knob anti clockwise pull the handle off the locating boss replace the handle back into the locating boss at the angle des...

Page 9: ...e side of the main handle As the name suggests it enables the trigger switch to be locked ON without the need to continuously hold in the trigger This feature is intended for use when the drill has be...

Page 10: ...der warranty Drilling Warning When changing bits or accessories always turn off the tool and disconnect from the power supply When drilling in timber use twist spade bits drill bits power auger bits o...

Page 11: ...the tool and should be replaced prior to the carbon wearing out fully Brushes will wear out after many uses but before they do take the tool to an Authorised Ozito Service Agent for quick and low cos...

Page 12: ...al CARING FOR THE ENVIRONMENT 12 Power tools that are no longer usable should not be disposed of with household waste but in an environmentally friendly way Please recycle where facilities exist Check...

Page 13: ...f the tool has been operated on a supply voltage other than that specified on the tool If the tool shows signs of damage or defects caused by or resulting from abuse accidents or alterations If the to...

Reviews: