Warning!
If the lock on button is engaged when the tool is connected to a live
mains power supply, the tool will start immediately. This could result in serious
bodily harm or material damage. Always squeeze and release the switch to
ensure the lock on button has been disengaged prior to connecting the tool to
the power supply.
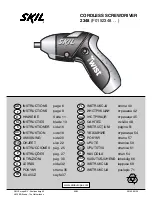
Variable Speed Dial
A variable speed dial is incorporated into the switch. The speed of the tool can be
regulated by adjusting this dial. After a speed has been selected the switch will be
regulated to that speed until you adjust readjust the dial. Check variable speed dial
prior to each use, this will ensure you do not damage the drill or accessories by using
the incorrect speed. Refer to accessory packaging for correct operating speeds.
Forward/Reverse Lever
The direction of the chuck is controlled by the forward/reverse lever located above
the switch.
FOR FORWARD ROTATION: Move the lever to the left.
FOR REVERSE ROTATION: Move the lever to the right.
Note:
Do not change the direction of rotation while the chuck is still in motion.
Torque Settings (Tightening Power of Your Drill Driver)
When using your drill driver for various driving applications, it becomes necessary
to increase and decrease the power and torque in order to prevent the possibility
of damaging screw heads, threads, work piece, etc. In general, power and torque
should correspond to the difficulty of the screw to be driven. If torque is too high
the screws may be damaged or broken.
To Adjust Torque
•
Locate the arrow on the top front end of the grey housing.
•
Identify the torque settings and 1 drill setting on the torque adjustment ring.
•
Rotate the adjustment ring to the desired setting aligning the number on the
adjustment ring with the arrow on the housing.
•
To increase or decrease torque, rotate torque adjustment ring. The lower the
number, the lower the torque setting. The higher the number, the higher the
torque setting.
OPERATION (cont.)
8