8
The Business of Science
®
•
•
•
Setpoint Configuration
Setpoint Configuration
Setpoint Configuration
Setpoint Configuration
The user can individually configure each setpoint relay to a unique temperature. Each channel has 3
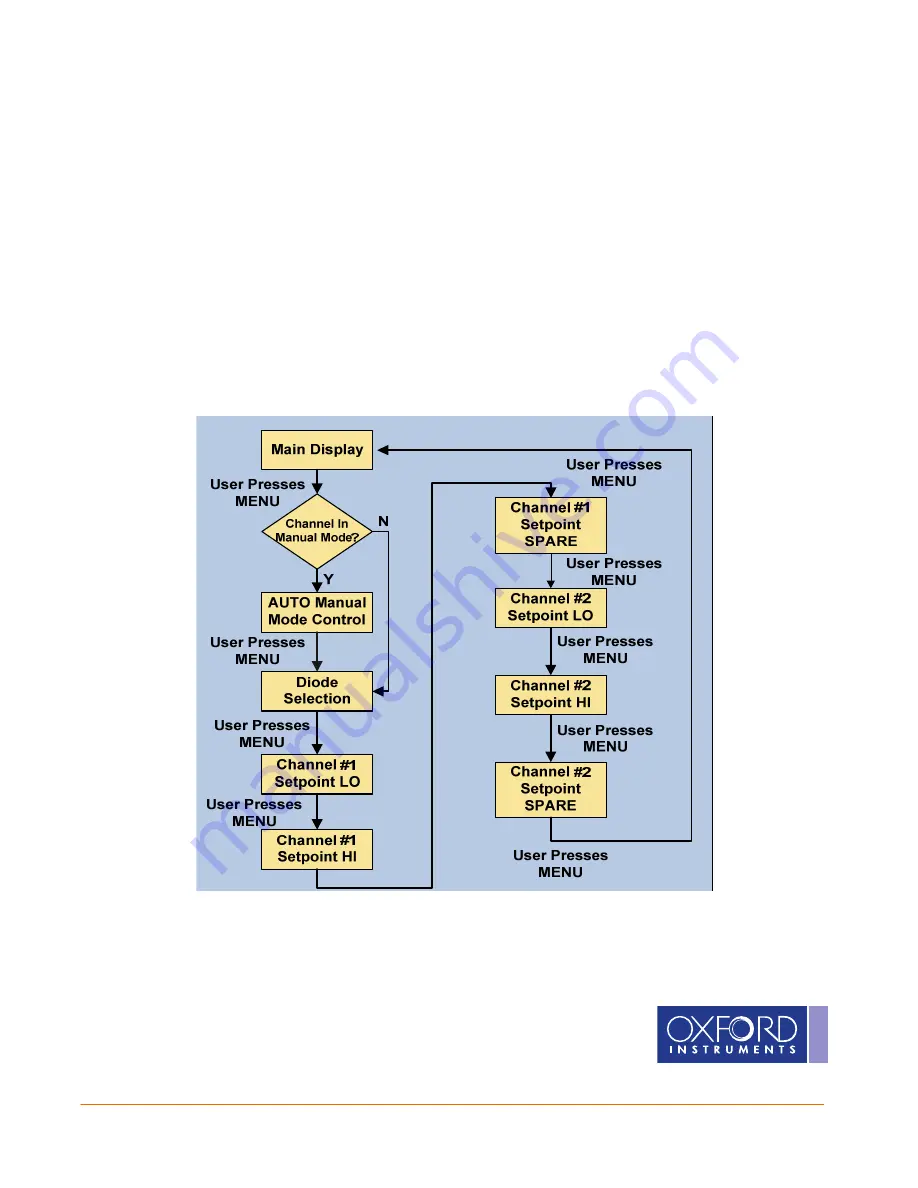
setpoints associated with its temperature measurement – LOW, HIGH, and SPARE. A flow chart is shown to
aid in navigating the menus. In addition, an example is shown at the end of the section. If no buttons are
pressed for roughly 10 seconds, the display times out and returns to the main menu. NOTE: the changes
are stored
and take effect if the menu times out. To configure a setpoint:
1.
Press the MENU
MENU
MENU
MENU button twice. The first relay is “Channel #1 LO
Channel #1 LO
Channel #1 LO
Channel #1 LO”. When the temperature is
below
this value, the relay is in the “Active” position. The temperature value is modified by pressing U
U
U
UP
P
P
P
or DOWN
DOWN
DOWN
DOWN for each digit. Once the digit has been set, press ENTER
ENTER
ENTER
ENTER to move to the next digit.
2.
Press the MENU
MENU
MENU
MENU button to configure “Channel #1 HI
Channel #1 HI
Channel #1 HI
Channel #1 HI”. When the temperature is
above
this value,
the relay is in the “Active” position.
3.
Press the MENU
MENU
MENU
MENU button to configure “Channel #1 SPARE
Channel #1 SPARE
Channel #1 SPARE
Channel #1 SPARE”. When the temperature is
above
this
value, the relay is in the “Active” position.
4.
Continue to press the MENU
MENU
MENU
MENU button to cycle through the Channel #2 setpoints.


